 Amlan Chakladar
Nowadays managing applications as containers has become commonplace. With rising complexities of applications and solutions, containerization is a great way to keep the applications scalable and easily manageable.
This is where Kubernetes comes into the picture, it's an open source container orchestration platform which can automate the deployments, scaling, and management of containerized apps.
Kubernetes provides an abstraction layer on top of the infrastructure and maintains the application as a collection of units, which can scale up and down. Some of the key features of Kubernetes are:
- Service discovery and load balancing
- Automated rollouts and rollbacks
- Self Healing
- Secrets and Config management
- Storage orchestration
- Batch execution
- Horizontal scaling
Being such a powerful platform, it's very useful to learn the ins and outs of Kubernetes. In this guide I will provide an overview of Kubernetes and provide a step by step walkthrough of how to setup a simple cluster.
Understanding Kubernetes
Before we dive into the hands on part of creating our own cluster, let's first understand a bit about the components of Kubernetes. Setting up Kubernetes means, you are deploying various components which are like the building blocks of the Kubernetes cluster. This image shows high level components which builds the cluster.

Some of the high level components shown here are:
- control plane: This is the central part of the cluster which controls everything for the cluster
- nodes: These are the cluster components which are connected to the control plane and run the actual application pods
- kube-apiserver: This is the API component of Kubernetes which exposes the Control plane functions through an API. All functionalities in Kubernetes are handled using this API
- etcd: This is a key value store which is like a database for Kubernetes and stores all the cluster related data
- kube-scheduler: This component is responsible for managing the pods within the nodes. This controls creating and running the pods in available nodes
- controller-manager: This is a main control plane component which runs all the controller processes for the cluster
- kubelet: This is a node component which runs in each node and manages the pods in each node
- kube-proxy: This is the network proxy which runs on each node and implements the networking within the cluster
- **cloud providers:**Cloud providers like AWS provide their own managed clusters which are easy to launch as the management of the cluster is mostly managed by the provider. This is one of the ways to spin up a Kubernetes cluster
Apart from these cluster components, each of the nodes run the pods which are the actual application related components which run on those nodes. Each node can have multiple pods running on them.
Kubernetes Objects
Now let's see some of the common Kubernetes objects which can be created on the cluster and can be part of a whole application stack.
- Pods: A pod is the smallest deployable unit which can be managed in Kubernetes. This runs 1 or more containers which is part of an application
- Deployment: A deployment can be thought as a collection of pods. It provides easy and declarative way to manage pods and specify the specs for the pods
- Services: The applications running as pods in the cluster, need to be exposed so they can be accessed. Thats where services come in. A service is how you expose your application which is running as pod or pods in the cluster. There are few types of services available based on how the application needs to be exposed- ClusterIP, NodePort,LoadBalancer and ExternalName.
- Persistent Volumes: Applications need persistent storage. Through Persistent volumes, the storage can be provided to the pods
- Configmap: It is used to store non-confidential config data which may be needed by an application. App configuration parameters like Log Level or some config file, can be stored in a Configmap and accessed from the pod
- Secret: Similar to Configmap, but it can be used to store sensitive data like passwords. One thing to note here is that the Secrets are by default stored unencrypted. So separate steps are needed to safeguard the secrets
- Namespaces: Namespaces are a way to logically separate the cluster resources. This comes in handy to segregate the applications in their own namespaces
- Daemonsets: Daemonsets are used to run a pod on each node in the cluster. This is useful when you want to run a pod on each node. For example, a monitoring agent can be run as a Daemonset so it runs on each node and monitors the node.
- Statefulsets: Statefulsets are used to manage stateful applications. This is useful when you have an application which needs to maintain state. For example, a database application which needs to maintain state.
- Jobs: Jobs are used to run a task which needs to be run once and then exit. This is useful when you have a task which needs to be run once and then exit. For example, a task which needs to be run once a day to do some cleanup.
- Cronjobs: Cronjobs are used to run a task periodically. This is useful when you have a task which needs to be run periodically. For example, a task which needs to be run once a day to do some cleanup.
Kubernetes Setup
We went through some of the basics about Kubernetes above, now let's see how you setup your own cluster. Keep in mind, I will demonstrate setting up a a basic cluster. Getting a full blown cluster is a more involved process as described in the official docs.
Before we start there are few pre-requisites to follow along the steps:
- A system or VM with Ubuntu 20.04 and shell access to the VM (this is for the control plane)
- 1-2 Ubuntu 20.04 VMS or systems for the nodes
- Some basic knowledge about shell commands
Let's start the setup. The setup will be divided into sections:
- Setting up the control plane
- Setting up one or more nodes and join the cluster
Setup the Control plane
All of these steps need to be executed on the VM which will be used as control plane. SSH to the VM and follow these steps. We need to install some packages before we can run the command to setup the control plane. Run this command to first update apt repository to be able to install Kubernetes packages:
wget -qO - https://packages.cloud.google.com/apt/doc/apt-key.gpg | sudo apt-key add -
sudo add-apt-repository "deb http://apt.kubernetes.io/ kubernetes-xenial main"

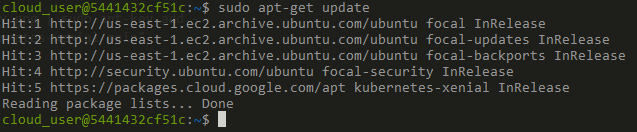
Once its added, run apt update to update repo list:
apt-get update
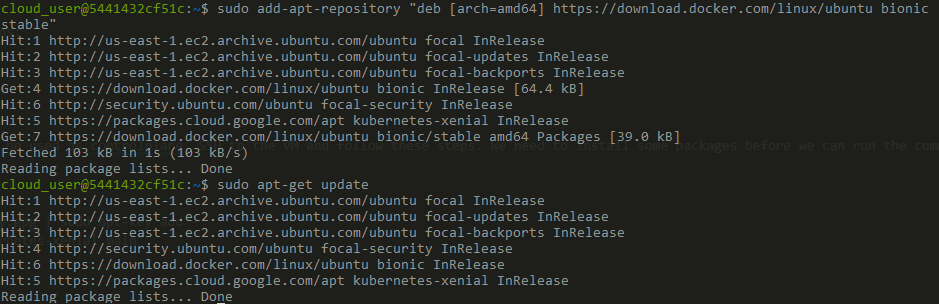
Kubernetes needs a container runtime to function. Here we will use Docker as our container runtime. There are other runtimes too like containerd, CRI-O etc. But we will use Docker here. So let's install docker. First add the Docker repo to the apt repo:
wget -qO - https://download.docker.com/linux/ubuntu/gpg | sudo apt-key add -
sudo add-apt-repository "deb [arch=amd64] https://download.docker.com/linux/ubuntu bionic stable"
apt-get update
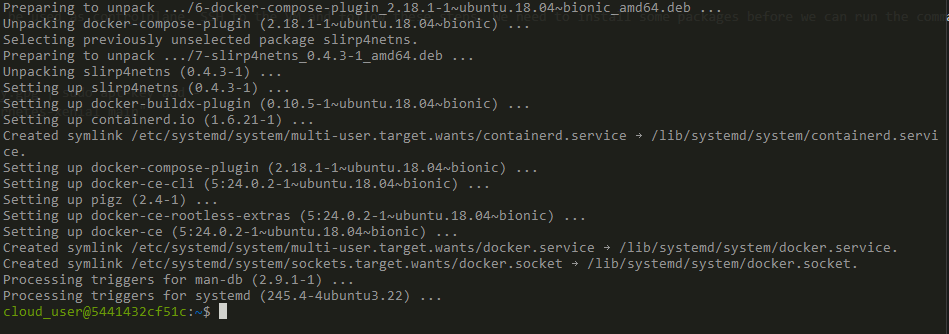
Once these are added, install the docker packages
sudo apt install docker-ce docker-ce-cli containerd.io
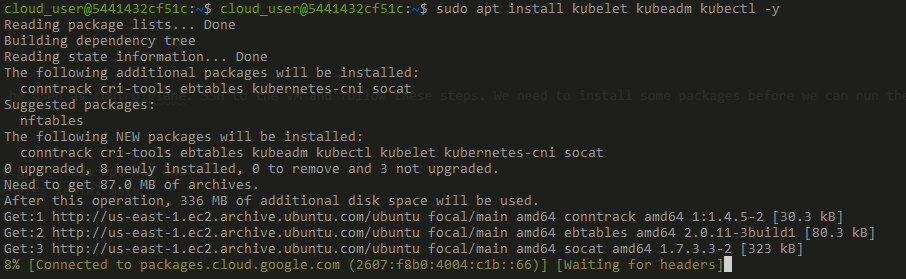
Now we have all the pre-requisites installed. Let's install the tools needed to bootstrap the control plane. Run this command to install the Kubernetes tools:
sudo apt install kubelet kubeadm kubectl -y
Once its done, we need to turn off swap which is a requirement for Kubernetes. Run this command next:
sudo swapoff -a
We need to make a change to the Docker daemon so it can run on the control plane and the runtime can be used by Kubernetes. Run this command to create a file for the daemon settings:
sudo nano /etc/docker/daemon.json
Update this content to the file:
{
  "exec-opts": ["native.cgroupdriver=systemd"]
}
Save the file. To make the changes effective, restart the Docker service:
sudo systemctl restart docker
Let's see if docker is running. Run a basic docker command to verify:
docker container ls

Run this command to get containerd ready for initializing the Control plane processes:
sudo rm -f /etc/containerd/config.toml
sudo systemctl restart containerd

Now we are ready to initialize the control plane. Run this command to start the initialization:
sudo kubeadm init --pod-network-cidr=10.244.0.0/16

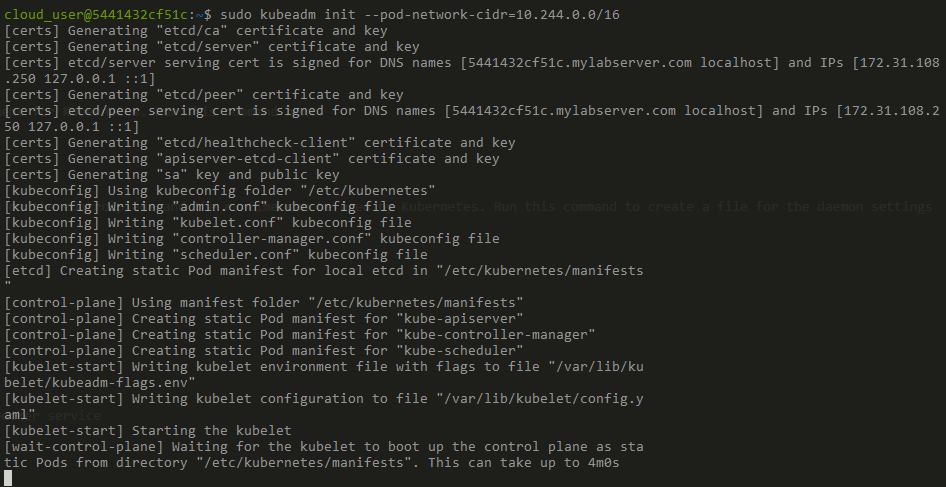
It will take a while to complete the whole step. Wait for it to finish. Once it completes it shows few commands useful for the cluster. Note these down:
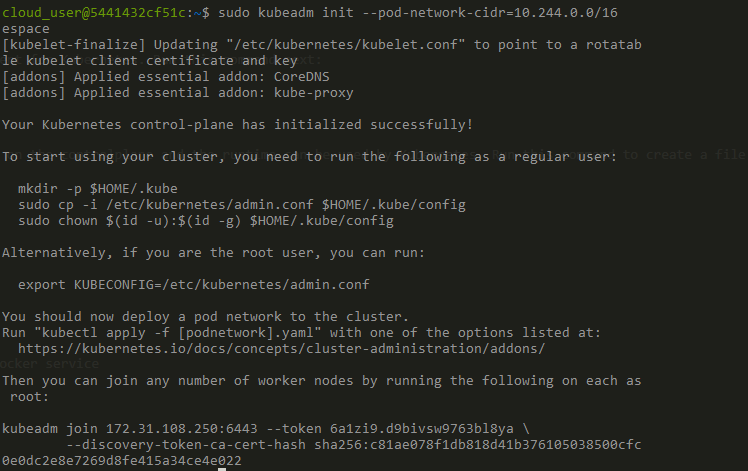
kubeadm join 172.31.108.250:6443 --token 6a1zi9.d9bivsw9763bl8ya --discovery-token-ca-cert-hash sha256:c81ae078f1db818d41b376105038500cfc0e0dc2e8e7269d8fe415a34ce4e022
As shown in the output, lts save the config file for the cluster. Run these commands to save the config file:
mkdir -p $HOME/.kube
sudo cp -i /etc/kubernetes/admin.conf $HOME/.kube/config
sudo chown $(id -u):$(id -g) $HOME/.kube/config
Once these are done, we need to setup the networking for the cluster. Here we will install a networking plugin called flannel. There are many plugins available and any one can be used. But here I am using Flannel for this example. Run this command to install the Flannel networking:
kubectl apply -f https://raw.githubusercontent.com/coreos/flannel/master/Documentation/kube-flannel.yml

Our control plane is now up and running. We can now join some nodes to the cluster. Right now we only have one node.
kubectl get nodes

Setup the Node
For the steps in this section, SSH to the VM which you want to add as a node to the cluster. If there are multiple nodes, repeat the same steps in each of those VMs. As a first step, we will need to install Docker on the node, because thats the container runtime we are using. Follow the same steps as above where we installed Docker on control plane:
wget -qO - https://download.docker.com/linux/ubuntu/gpg | sudo apt-key add -
sudo add-apt-repository "deb [arch=amd64] https://download.docker.com/linux/ubuntu bionic stable"
apt-get update
Once these are added, install the docker packages
sudo apt install docker-ce docker-ce-cli containerd.io -y
After Docker is installed, we need to install the same Kubernetes tools on the node too. Follow the same steps above, which we ran on control plane. Just stop before the step where we initialize the control plane. Because we dont want to init another control plane.
sudo apt install kubelet kubeadm kubectl -y
sudo swapoff -a
Update the Docker daemon file.
sudo nano /etc/docker/daemon.json
Update this content to the file:
{
  "exec-opts": ["native.cgroupdriver=systemd"]
}
Save the file. To make the changes effective, restart the Docker service:
sudo systemctl restart docker
sudo rm -f /etc/containerd/config.toml
sudo systemctl restart containerd
Now we have everything installed on the Node. We copied a command earlier from the output of the control plane init command. We need to run that command so this node can join the cluster. Run the command to have this node join the cluster:
sudo kubeadm join 172.31.108.250:6443 --token 6a1zi9.d9bivsw9763bl8ya --discovery-token-ca-cert-hash sha256:c81ae078f1db818d41b376105038500cfc0e0dc2e8e7269d8fe415a34ce4e022
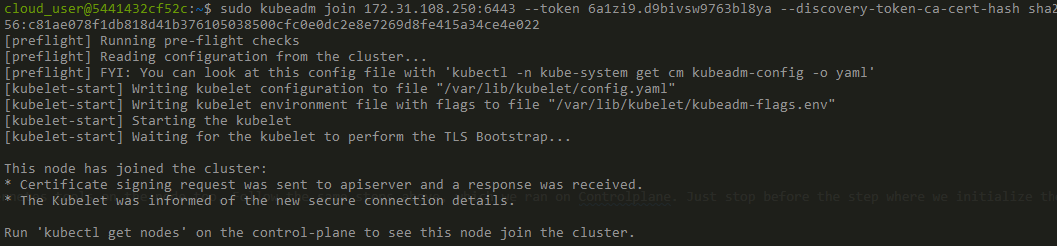
So now we have a node joined to the cluster. The same steps can be repeated in as many nodes needed to be joined to the cluster. Let's see how many nodes do we have in the cluster now. Here I have installed and added 2 nodes to the cluster:
kubectl get nodes

Great! We now have a Kubernetes cluster up and running with 1 control plane and 2 nodes. Now we can use this to cluster to launch some sample deployments.
Let's Deploy an app
Let's deploy a sample to the cluster we just spun up. We will deploy a Nginx proxy and expose the port 80 via a clusterip service. A Yaml file is the easiest way to specify deployment specs for the pods. Here is a Yaml deployment spec for the Nginx deployment along with the Service:
apiVersion: apps/v1
kind: Deployment
metadata:
  name: nginx-deployment
  labels:
    app: nginx
spec:
  replicas: 2
  selector:
    matchLabels:
      app: nginx
  template:
    metadata:
      labels:
        app: nginx
    spec:
      containers:
      - name: nginx
        image: nginx:latest
        ports:
        - containerPort: 80
---
apiVersion: v1
kind: Service
metadata:
  name: nginx-service
spec:
  selector:
    app: nginx
  ports:
    - protocol: TCP
      port: 80
      targetPort: 80
Copy the above manifest to a file called deploy.yml. Then run this command to apply the manifest and create the components on the cluster:
kubectl apply -f deploy.yml

Let's check what got created. Run this command to list all objects in the default namespace:
kubectl get all
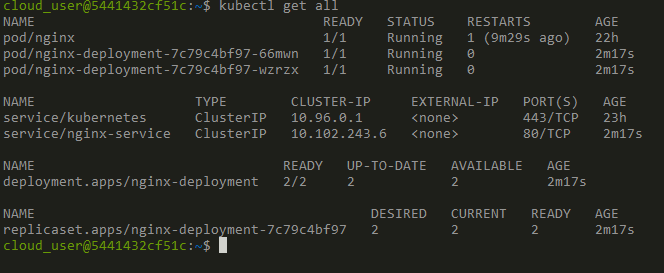
We can see our deployment is created along with the service. Let's test the nginx proxy and see if we can access it via the service we created. Now one point to note about ClusterIP is that, it is only accessible from within the cluster. So we can only hit the nginx endpoint from something within the cluster. Let's try accessing the service from within one of the pods itself. Run this command to run a curl command and hit the service endpoint:
kubectl exec -it pod/nginx-deployment-7c79c4bf97-66mwn -- curl nginx-service:80
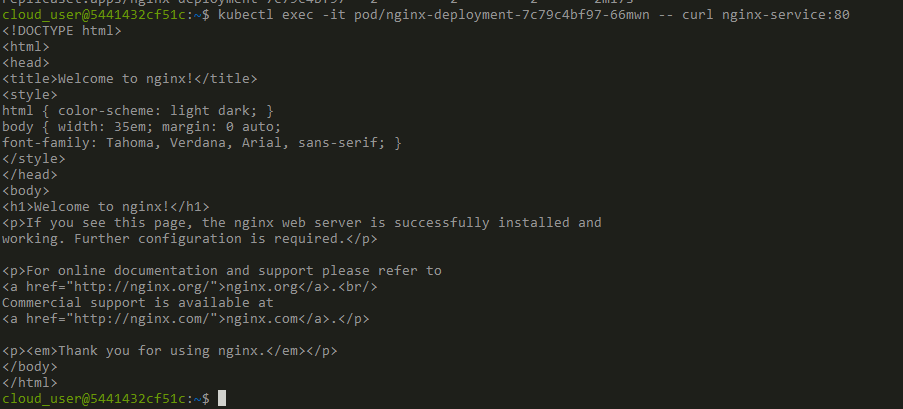
Great! We can see the nginx default page was loaded and printed on the console. So we have a nginx proxy up and running on the Kubernetes cluster. Now let's create secret and see how that gets stored and used. Run this command to create a secret:
kubectl create secret generic mysecret --from-literal=username=admin --from-literal=password=pass123

So we have the secret created. Let's see how the data got stored. Run this command to view the secret details:
kubectl get secret mysecret -o yaml
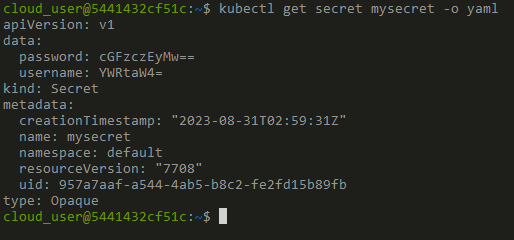
As you can see the value is not actually encrypted. It is base64 encoded. So its not really secure. But this is how Kubernetes stores the secrets. We can see the decoded version of the data by running this command:
kubectl get secret mysecret -o jsonpath='{.data.password}' | base64 --decode

Some useful commands
Now let's see some useful common commands which we use to manage objects on cluster.
List Pods:
kubectl get pods

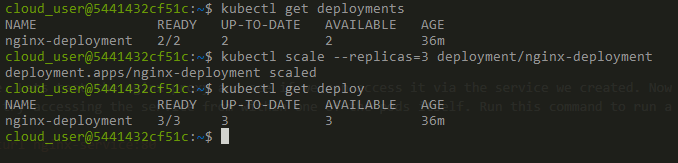
Scale a Deployment:
kubectl scale --replicas=3 deployment/nginx-deployment
Conclusion
In this post I went through some of the very basics of Kubernetes. Kubernetes is a vast platform and each component will be an article topic in itself. But this is a good starting point to get a basic cluster up and running and deploy some sample apps. With the ability to create your own cluster, you can further your learning along with hands on practice.
Want to deploy a backend without managing Kubernetes? Try deploying to AWS or GCP in minutes.
Want to jump straight to a running app? Clone this starter and deploy it to your own cloud.
About the author
Amlan Chakladar is an AWS Certified Architect & Developer with extensive expertise in cloud architecture and systems design. You can connect with Amlan via LinkedIn.