BetterAuth Integration with Encore.ts
Implementing authentication with BetterAuth and Encore
Authentication is one of those things that sounds simple until you're knee-deep in session management, password hashing, and token validation. Better Auth handles all of that. It's an open-source TypeScript auth framework that gives you email/password, OAuth, 2FA, and more through a plugin system.
In this tutorial we'll wire it up with Encore.ts so you get a working auth backend with automatic database provisioning, session validation on protected endpoints, and type-safe API clients for your frontend. The whole thing is about 5 files.
You can find the complete source code in the example repo on GitHub.
Want to jump straight to a running app? Clone this starter and deploy it to your own cloud.
Setup
Install Encore if you haven't already, then create a new app:
# macOS
brew install encoredev/tap/encore

# Linux
curl -L https://encore.dev/install.sh | bash

# Windows
iwr https://encore.dev/install.ps1 | iex
encore app create my-auth-app --example=ts/hello-world
cd my-auth-app
npm install better-auth pg
You only need two dependencies: better-auth for authentication, and pg for the PostgreSQL driver that Better Auth uses to connect to the database.
Database
Better Auth needs tables for users, sessions, accounts, and verification tokens. With Encore, you define a database by creating an SQLDatabase instance and pointing it at a migrations folder. When you run encore run, Encore provisions a local PostgreSQL instance automatically using Docker, and applies any pending migrations on startup.
// auth/db.ts
import { SQLDatabase } from "encore.dev/storage/sqldb";

// Encore provisions and manages the database automatically.
// Locally it uses Docker, in the cloud it provisions the appropriate
// managed database (e.g. Cloud SQL on GCP, RDS on AWS).
export const db = new SQLDatabase("auth", {
  migrations: "./migrations",
});
Create the migration file with the tables Better Auth expects. These follow Better Auth's required schema, so you don't need an ORM on top of this since Better Auth handles all reads and writes to these tables internally:
-- auth/migrations/1_create_auth_tables.up.sql

-- Core user table. Better Auth stores profile data here.
CREATE TABLE IF NOT EXISTS "user" (
    "id" TEXT PRIMARY KEY NOT NULL,
    "name" TEXT NOT NULL,
    "email" TEXT NOT NULL UNIQUE,
    "emailVerified" BOOLEAN NOT NULL DEFAULT false,
    "image" TEXT,
    "createdAt" TIMESTAMP NOT NULL DEFAULT CURRENT_TIMESTAMP,
    "updatedAt" TIMESTAMP NOT NULL DEFAULT CURRENT_TIMESTAMP
);

-- Active sessions with expiration tracking.
CREATE TABLE IF NOT EXISTS "session" (
    "id" TEXT PRIMARY KEY NOT NULL,
    "expiresAt" TIMESTAMP NOT NULL,
    "token" TEXT NOT NULL UNIQUE,
    "createdAt" TIMESTAMP NOT NULL DEFAULT CURRENT_TIMESTAMP,
    "updatedAt" TIMESTAMP NOT NULL DEFAULT CURRENT_TIMESTAMP,
    "ipAddress" TEXT,
    "userAgent" TEXT,
    "userId" TEXT NOT NULL REFERENCES "user"("id") ON DELETE CASCADE
);

-- OAuth provider connections (also stores password credentials).
CREATE TABLE IF NOT EXISTS "account" (
    "id" TEXT PRIMARY KEY NOT NULL,
    "accountId" TEXT NOT NULL,
    "providerId" TEXT NOT NULL,
    "userId" TEXT NOT NULL REFERENCES "user"("id") ON DELETE CASCADE,
    "accessToken" TEXT,
    "refreshToken" TEXT,
    "idToken" TEXT,
    "accessTokenExpiresAt" TIMESTAMP,
    "refreshTokenExpiresAt" TIMESTAMP,
    "scope" TEXT,
    "password" TEXT,
    "createdAt" TIMESTAMP NOT NULL DEFAULT CURRENT_TIMESTAMP,
    "updatedAt" TIMESTAMP NOT NULL DEFAULT CURRENT_TIMESTAMP
);

-- Email verification and password reset tokens.
CREATE TABLE IF NOT EXISTS "verification" (
    "id" TEXT PRIMARY KEY NOT NULL,
    "identifier" TEXT NOT NULL,
    "value" TEXT NOT NULL,
    "expiresAt" TIMESTAMP NOT NULL,
    "createdAt" TIMESTAMP,
    "updatedAt" TIMESTAMP
);
Better Auth config
Every Encore service starts with a service definition file. Create the auth service and configure the Better Auth instance:
// auth/encore.service.ts
import { Service } from "encore.dev/service";

// Define the auth service. Encore uses this to identify the service boundary.
export default new Service("auth");
// auth/auth.ts
import { betterAuth } from "better-auth";
import { Pool } from "pg";
import { secret } from "encore.dev/config";
import { db } from "./db";

// Store secrets using the Encore CLI:
//   encore secret set --type dev,local,pr,production AuthSecret
// Generate a strong value with: openssl rand -base64 32
const authSecret = secret("AuthSecret");

// Create a pg Pool for Better Auth using Encore's connection string.
const pool = new Pool({
  connectionString: db.connectionString,
});

export const auth = betterAuth({
  secret: authSecret(),
  basePath: "/auth",
  database: pool,
  // Origins that are allowed to make authenticated requests.
  // Add your frontend's URL here.
  trustedOrigins: [
    "http://localhost:4000",
    "http://localhost:3000",
  ],
  emailAndPassword: {
    enabled: true,
  },
});
Set the auth secret using Encore's secrets management. You'll be prompted to enter the value securely:
encore secret set --type dev,local,pr,production AuthSecret
Mounting the handler
Better Auth provides all auth routes out of the box, including sign-up, sign-in, sign-out, OAuth callbacks, and session management. Rather than wrapping each one in a separate Encore endpoint, you can mount the entire Better Auth handler on a single catch-all route using toNodeHandler from better-auth/node:
// auth/routes.ts
import { api } from "encore.dev/api";
import { toNodeHandler } from "better-auth/node";
import { auth } from "./auth";

// Expose all Better Auth routes (sign-in, sign-up, OAuth callbacks, etc.)
// under /auth/*. Encore's api.raw() gives us Node.js req/res types,
// and toNodeHandler bridges those to Better Auth's handler.
export const authRoutes = api.raw(
  { expose: true, path: "/auth/*path", method: "*" },
  toNodeHandler(auth)
);
Every route Better Auth supports is now available under /auth/*. If you add a Better Auth plugin later (like two-factor auth or organizations), its routes show up automatically without any additional wiring.
Protecting endpoints
Encore has a built-in auth handler pattern that lets you validate incoming requests in one place. You define a handler function that extracts and validates credentials, and Encore automatically runs it before any endpoint marked with auth: true. The data you return from the handler becomes available to the endpoint via getAuthData().
The auth handler below calls auth.api.getSession() with the request headers. This works with both bearer tokens (via the Authorization header) and cookies (for browser-based flows), so the same handler covers API clients and frontend apps:
// auth/handler.ts
import { APIError, Gateway, Header } from "encore.dev/api";
import { authHandler } from "encore.dev/auth";
import { auth } from "./auth";

// AuthParams defines what Encore extracts from incoming requests.
// These are passed to the auth handler automatically.
interface AuthParams {
  authorization: Header<"Authorization">;
  cookie: Header<"Cookie">;
}

// AuthData is what gets returned to protected endpoints
// via getAuthData(). Add more fields here as needed.
interface AuthData {
  userID: string;
}

// Validate Better Auth sessions for protected endpoints.
// Any endpoint with `auth: true` will run this handler first.
const handler = authHandler<AuthParams, AuthData>(async (params) => {
  // Forward the relevant headers to Better Auth for validation.
  // This supports both cookie-based (browser) and token-based (API) auth.
  const headers = new Headers();
  if (params.authorization) {
    headers.set("Authorization", params.authorization);
  }
  if (params.cookie) {
    headers.set("Cookie", params.cookie);
  }

  const session = await auth.api.getSession({ headers });

  if (!session) {
    throw APIError.unauthenticated("invalid session");
  }

  return { userID: session.user.id };
});

// The gateway applies the auth handler to all incoming requests.
export const gateway = new Gateway({ authHandler: handler });
With the auth handler in place, you can create protected endpoints in any service. Here's a simple profile endpoint that returns the authenticated user's ID:
// api/encore.service.ts
import { Service } from "encore.dev/service";

export default new Service("api");
// api/profile.ts
import { api } from "encore.dev/api";
import { getAuthData } from "~encore/auth";

interface ProfileResponse {
  userID: string;
}

// A protected endpoint. Requires a valid Better Auth session.
// Encore validates the session automatically before this handler runs.
export const getProfile = api(
  { auth: true, expose: true, method: "GET", path: "/profile" },
  async (): Promise<ProfileResponse> => {
    const data = getAuthData()!;
    return { userID: data.userID };
  }
);
getAuthData() returns the data from your auth handler, and it's type-safe and available in any service across your application. There's no need to pass tokens or session objects between services.
Testing
Start the backend with encore run (make sure Docker is running, since Encore uses it for the local PostgreSQL instance):
encore run
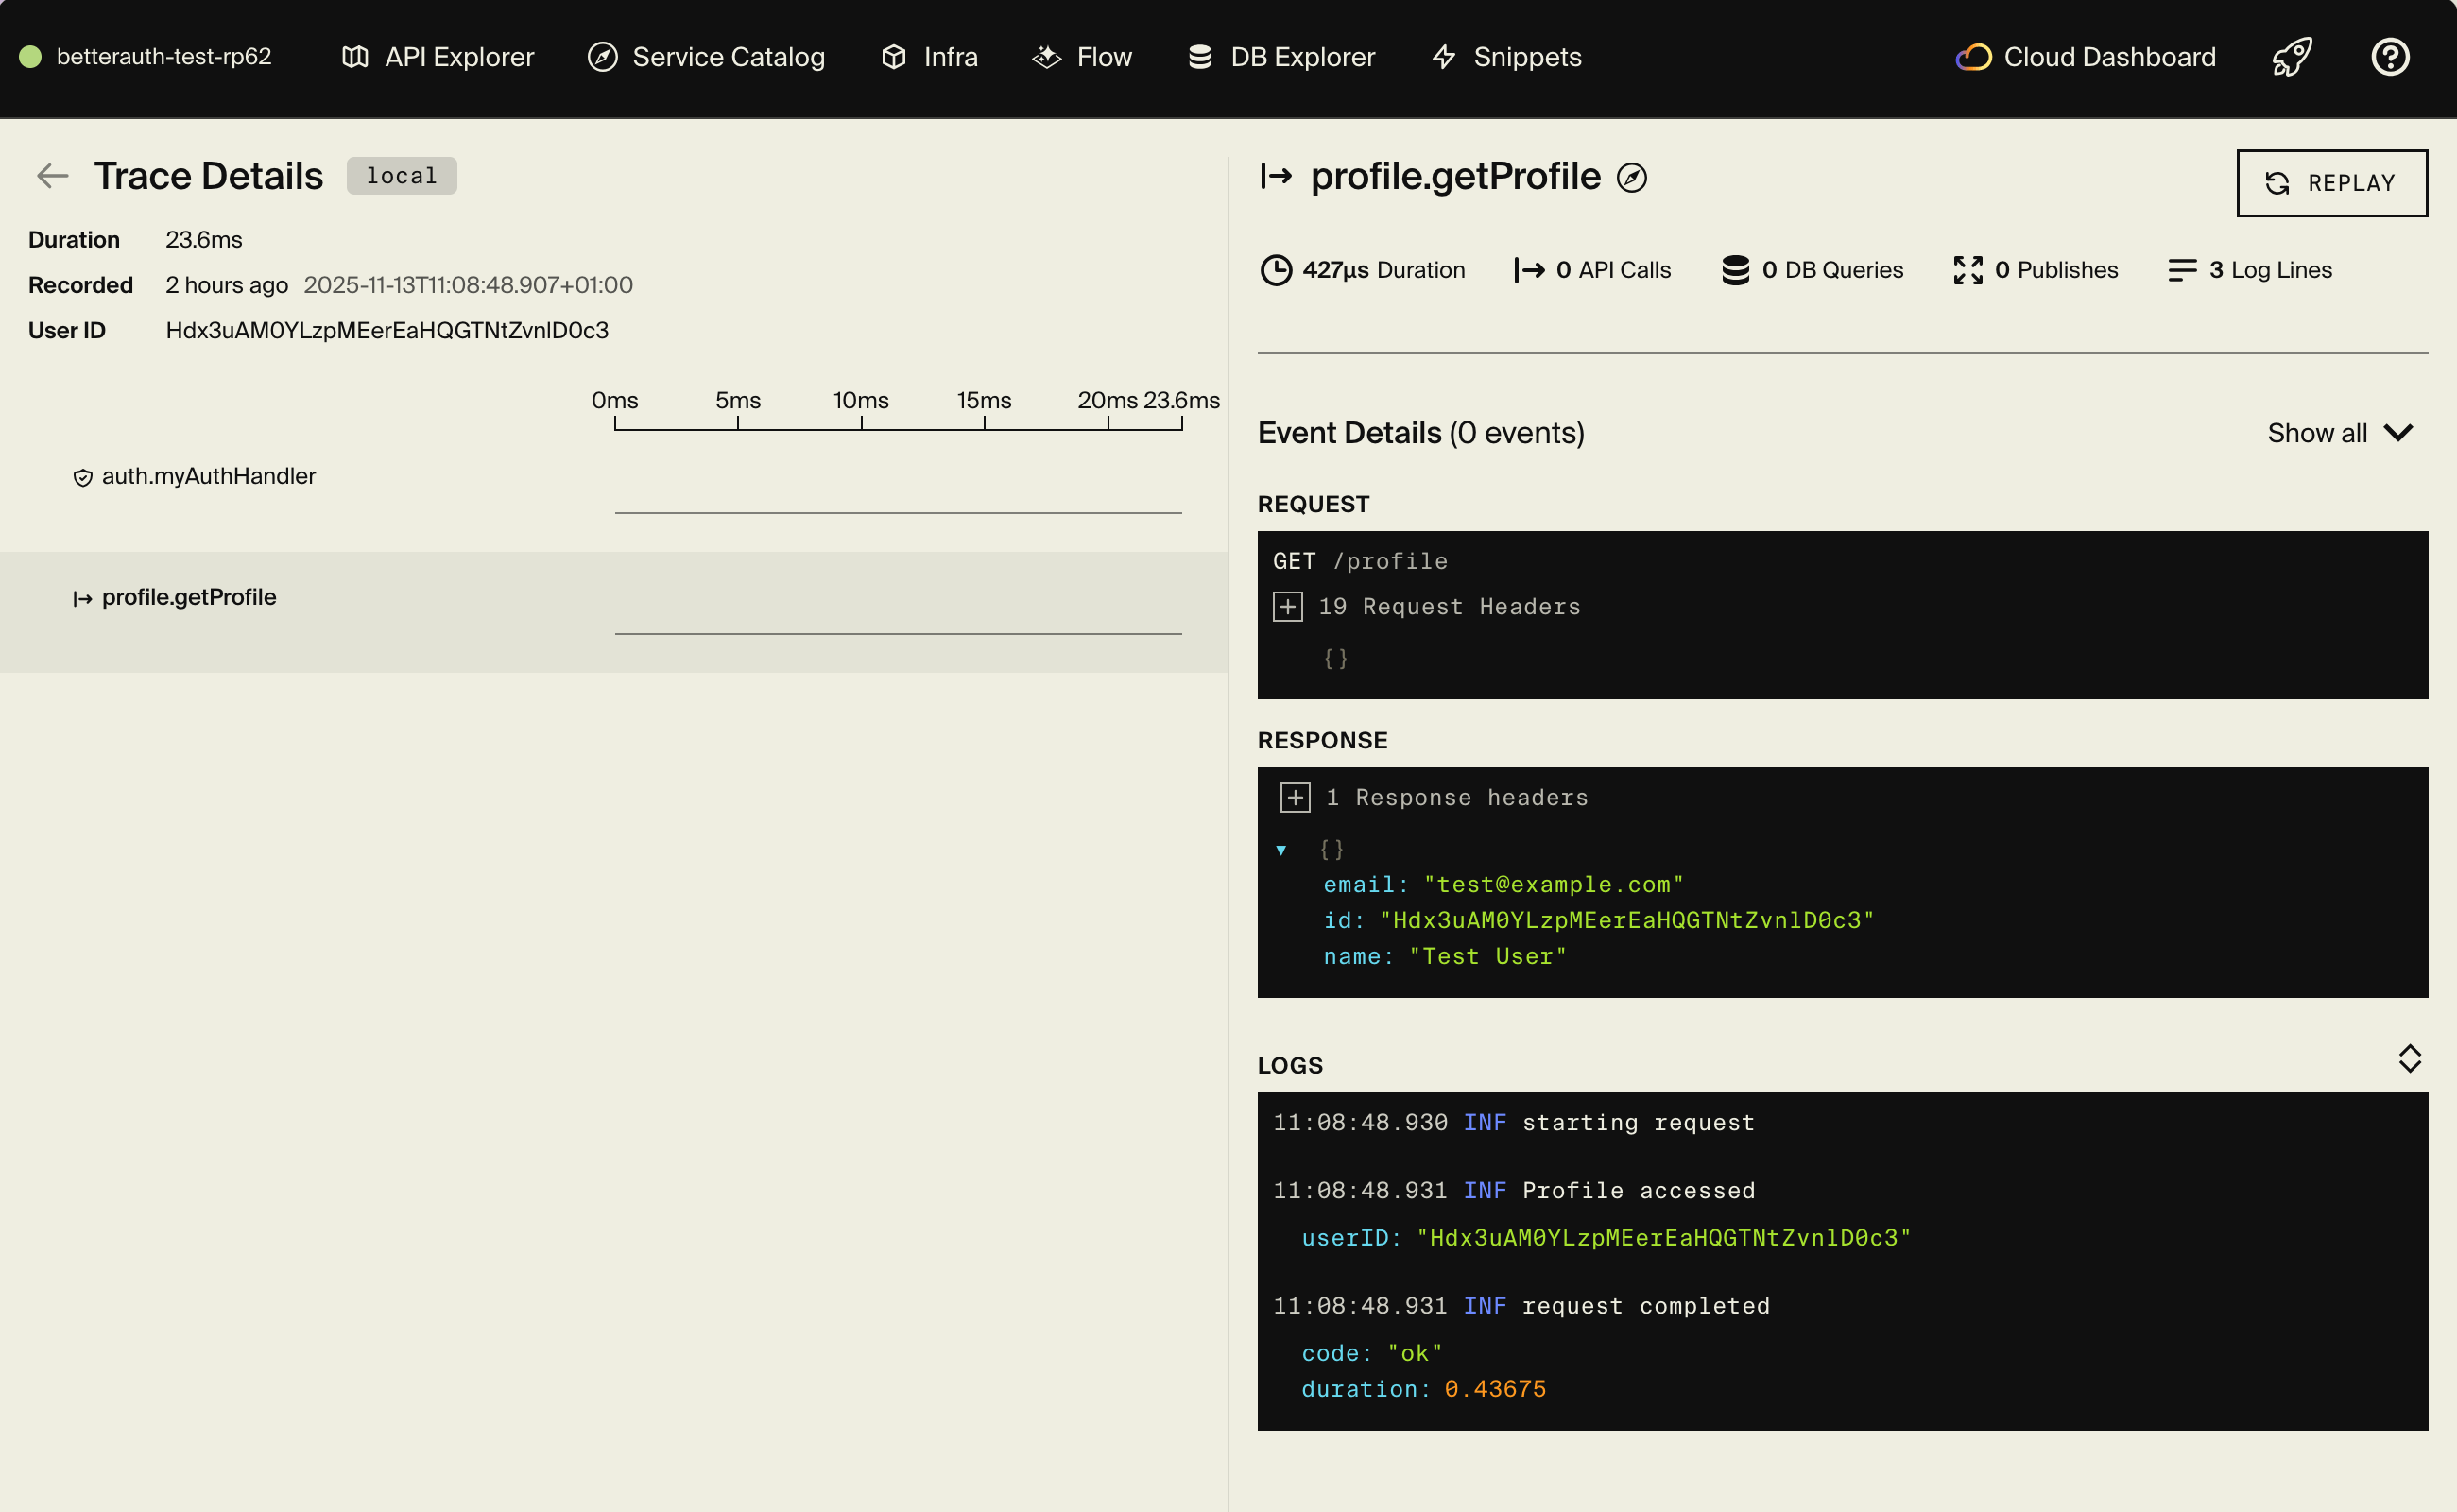
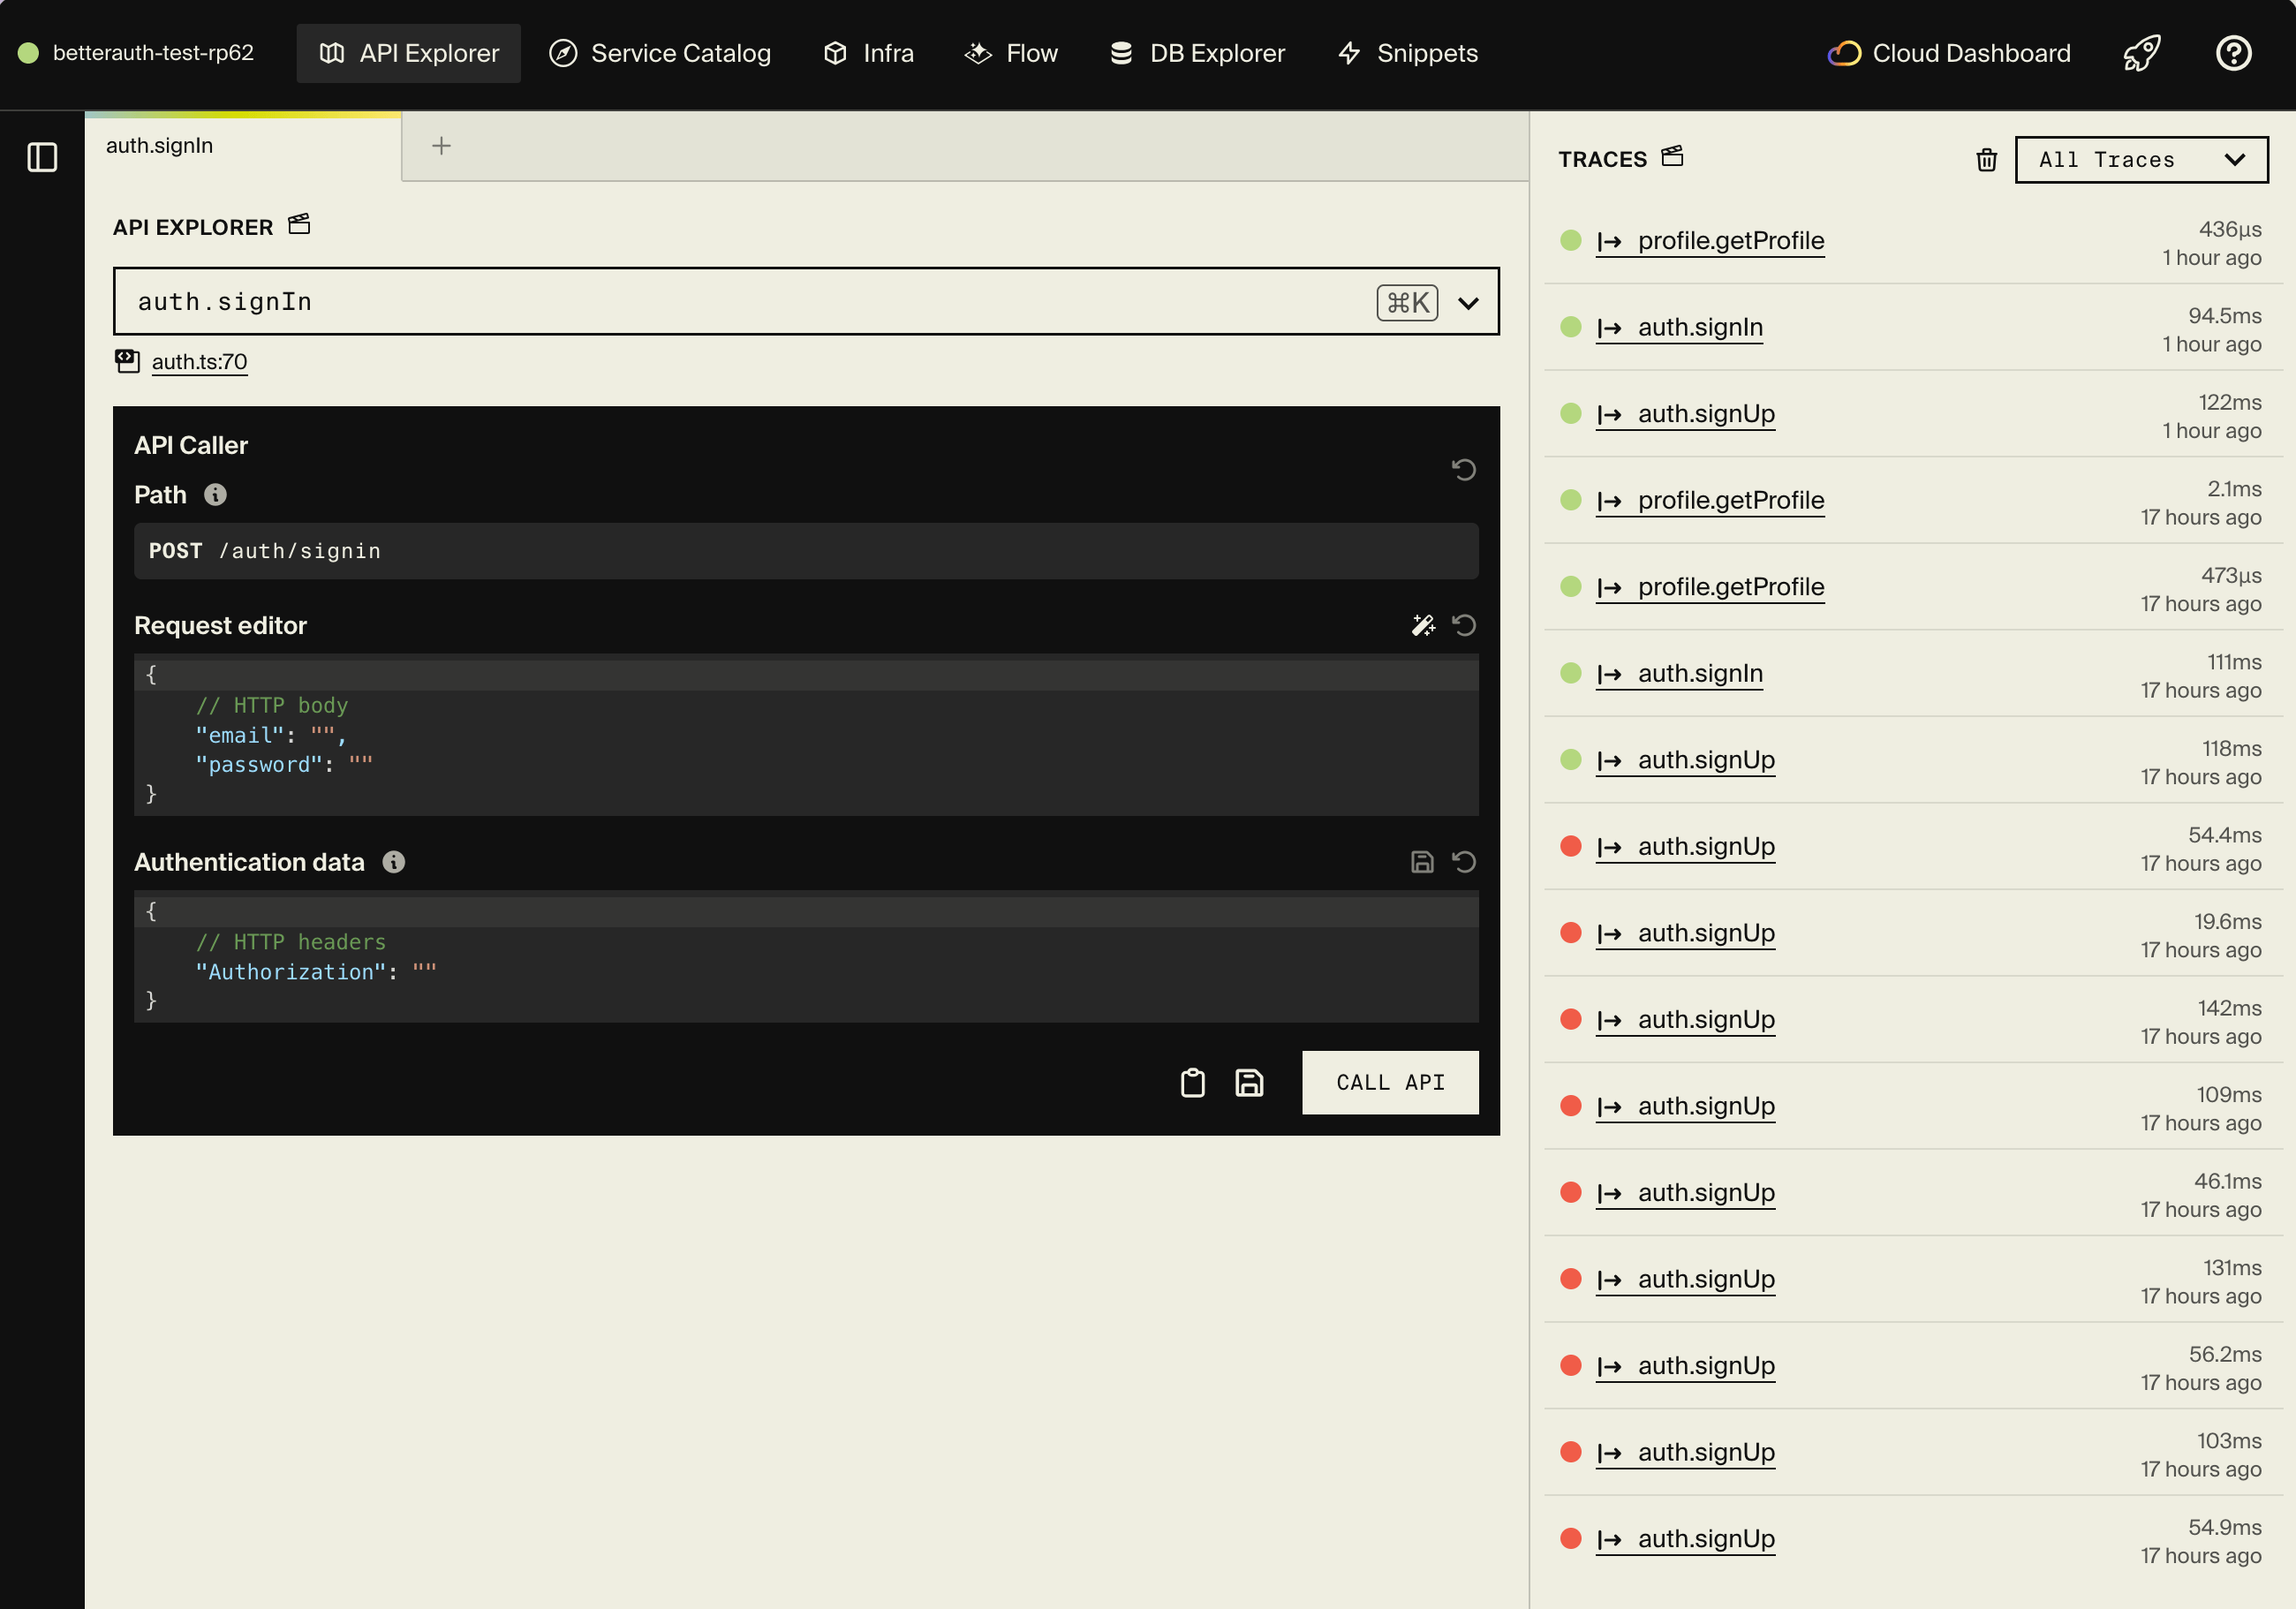
Encore starts PostgreSQL, runs your migrations, and serves the API on localhost:4000. You also get a local dashboard at localhost:9400 with API docs, distributed tracing, and a database explorer.
Sign up:
curl -X POST http://localhost:4000/auth/sign-up/email \
  -H "Content-Type: application/json" \
  -d '{
    "email": "[email protected]",
    "password": "SecurePass123!",
    "name": "John Doe"
  }'
Sign in:
curl -X POST http://localhost:4000/auth/sign-in/email \
  -H "Content-Type: application/json" \
  -d '{
    "email": "[email protected]",
    "password": "SecurePass123!"
  }'
Copy the session token from the response and use it on protected endpoints:
curl http://localhost:4000/profile \
  -H "Authorization: Bearer YOUR_SESSION_TOKEN"
Every request generates a trace you can inspect in the dashboard. You'll see the auth handler validation, the getSession call to Better Auth, and the endpoint execution.
Frontend integration
Encore can generate a type-safe TypeScript client that matches your backend API, so your frontend stays in sync without any manual work:
# Generate a client for your frontend project
encore gen client frontend/src/lib/client.ts
If your frontend runs on a different origin (e.g. localhost:3000 for Next.js or localhost:5173 for Vite), configure CORS in your encore.app file to allow credentials (cookies) to be sent with requests:
{
  "id": "my-auth-app",
  "global_cors": {
    "allow_origins_with_credentials": ["http://localhost:3000"]
  }
}
Since Better Auth uses cookies by default in the browser, the client SDK handles sessions automatically. See the frontend integration docs for more details, and the example repo's frontend for a working React implementation.
Adding OAuth providers
Better Auth supports social login with Google, GitHub, Discord, and many more. To add a provider, include it in your Better Auth config and store the credentials using Encore secrets:
// auth/auth.ts
export const auth = betterAuth({
  // ...existing config
  socialProviders: {
    github: {
      clientId: secret("GithubClientId")(),
      clientSecret: secret("GithubClientSecret")(),
    },
  },
});
Because we mounted the handler on /auth/*path, OAuth callback routes (like /auth/callback/github) work automatically without any extra wiring.
Deployment
Push your code to deploy. Encore builds your application, provisions the database, and runs migrations automatically:
git add .
git commit -m "Add Better Auth authentication"
git push encore
Make sure to set the production secret before your first deploy:
encore secret set --type production AuthSecret
Encore Cloud is a good fit for prototyping and smaller workloads with fair use limits. For production, you have two options: connect your AWS or GCP account and let Encore provision managed infrastructure directly in your cloud, or self-host by generating a Docker image with encore build docker and deploying it wherever you like.
What's next
Better Auth has a plugin system that covers most common auth needs. Since all routes are mounted through the catch-all handler, adding a plugin is a matter of updating your config and Better Auth takes care of the rest:
- Two-factor authentication with TOTP
- Organizations for multi-tenant apps
- Email verification with Resend or SendGrid
- Session management for multi-device control
Check out the complete example on GitHub for a working implementation you can clone and run, and the Better Auth integration guide in the Better Auth docs for more details on the integration.
Related Articles

 Ivan Cernja
 Ivan Cernja
 Ivan Cernja