Quick Start Guide
Build your first Encore.ts app in 5 minutes
Follow the steps below or use Leap (our AI builder) to get started.
Try Encore.ts with Leap
Let Leap generate a complete application that demonstrates Encore's capabilities.
In this short guide, you'll learn key concepts and experience the Encore workflow. It should only take about 5 minutes to complete and by the end you'll have an API running in Encore's free development Cloud (Encore Cloud).
To make it easy to follow along, we've laid out a trail of croissants to guide your way. Whenever you see a 🥐 it means there's something for you to do.
1. Install the Encore CLI
To develop with Encore, you need the Encore CLI. It provisions your local environment, and runs your local development dashboard complete with tracing and API documentation.
🥐 Install Encore by running the appropriate command for your system:
$ brew install encoredev/tap/encorePrerequisites
2. Create your app
🥐 Create your app by running:
If this is your first time using Encore, you’ll be prompted to create a free Encore Cloud account. This enables Encore to manage things like secrets and fully automate cloud deployments (which you’ll use later in the tutorial).
🥐 Select TypeScript as your app’s language.
🥐 Choose a starter template. Pick Hello World and continue.
Optional: Install AI instructions to improve how tools like Cursor and Claude Code work with Encore. After selecting your template, choose the AI instructions for the tool you plan to use.
🥐 Pick a name for your app.
Encore will now create your app in a folder named after your app.
Let's take a look at the code
Part of what makes Encore different is the simple developer experience when building distributed systems. Let's look at the code to better understand how to build applications with Encore.
🥐 Open the hello.ts file in your code editor. It's located in the folder: your-app-name/hello/.
You should see this:
hello/hello.tsimport { api } from "encore.dev/api";

export const world = api(
  { method: "GET", path: "/hello/:name", expose: true },
  async ({ name }: { name: string }): Promise<Response> => {
    return { message: `Hello ${name}!` };
  }
);

interface Response {
  message: string;
}
As you can see, it's all standard TypeScript.
You define an API endpoint by wrapping a regular async function in a call to api. Doing this makes Encore identify the world function as a public API endpoint. Encore automatically handles authentication, HTTP routing, request validation, error handling, observability, API documentation, and more.
The world endpoint is part of the hello service because in the same folder you will also find a file named encore.service.ts which looks like this:
hello/encore.service.tsimport { Service } from "encore.dev/service";

export default new Service("hello");
This is how you define services with Encore. Encore will now consider files in the hello directory and all its subdirectories as part of the hello service. If you want to create more services, simply create a new folders, add a encore.service.ts file that is exporting a new Service. If you're curious, you can read more about defining services and APIs.
The Encore.ts Backend Framework provides several declarative ways of using backend primitives like databases, Pub/Sub, and scheduled tasks by simply writing code.
3. Start your app & Explore Local Development Dashboard
🥐 Now let's run your app locally:
$ cd your-app-name # replace with the app name you picked$ encore runYou should see this:
That means your local development environment is up and running! Encore takes care of setting up all the necessary infrastructure for your applications, even including databases and Pub/Sub.
Open the Local Development Dashboard
You can now start using your Local Development Dashboard.
🥐 Open http://localhost:9400 in your browser to access it.
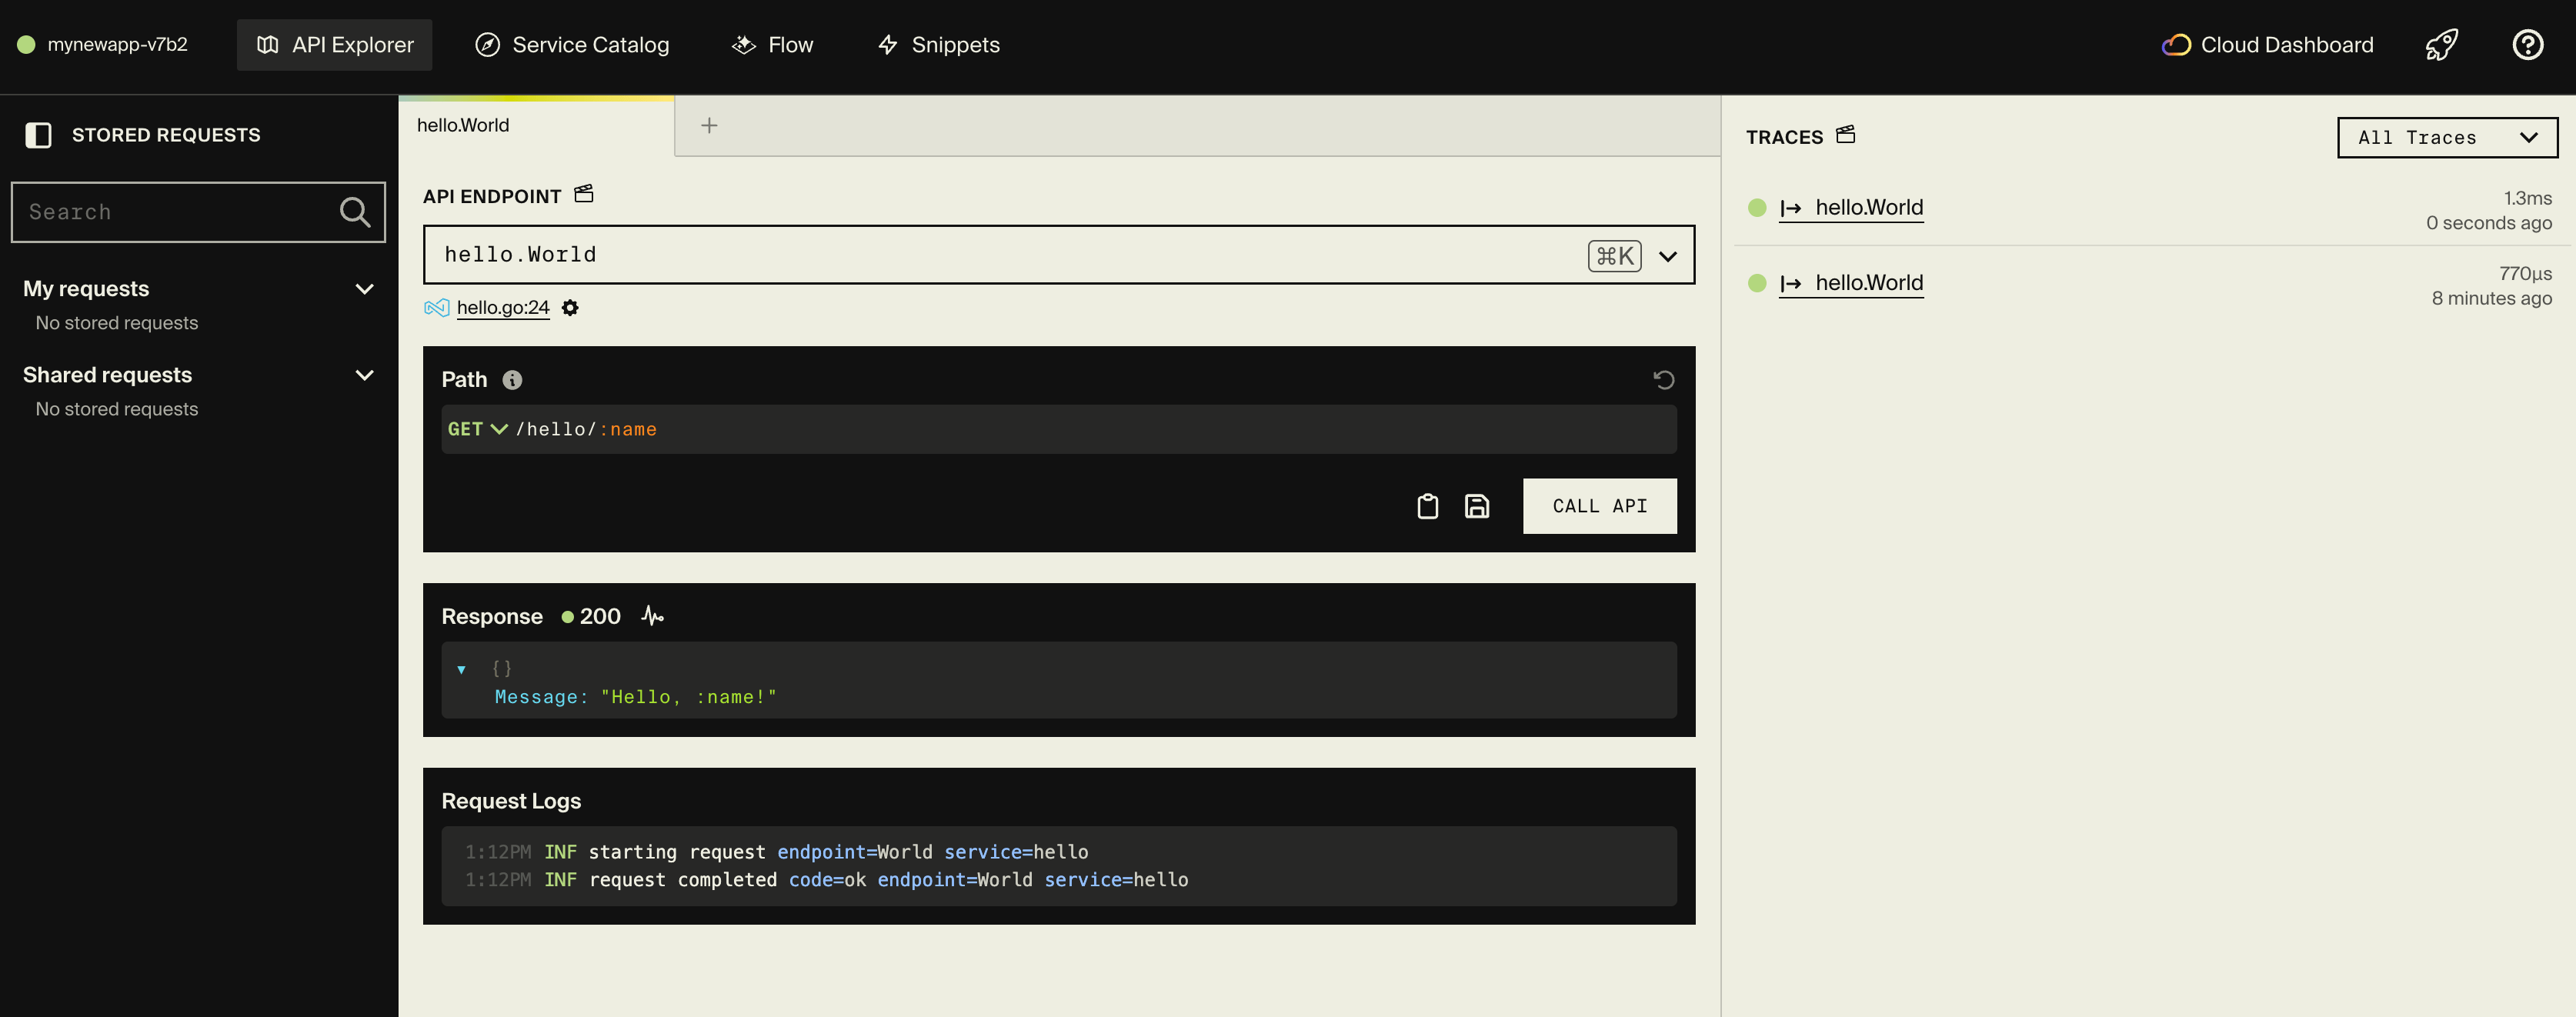
The Local Development Dashboard is a powerful tool to help you move faster when you're developing new features.
It comes with an API explorer, a Service Catalog with automatically generated documentation, and powerful observability features like distributed tracing.
Through the Local Development Dashboard you also have access to Encore Flow, a visual representation of your microservice architecture that updates in real-time as you develop your application.
Call your API
🥐 While you keep the app running, call your API from the API Explorer:

You can also open a separate terminal to call your API endpoint:
If you see this JSON response, you've successfully made an API call to your very first Encore application. Well done, you're on your way!
Review a trace of the request
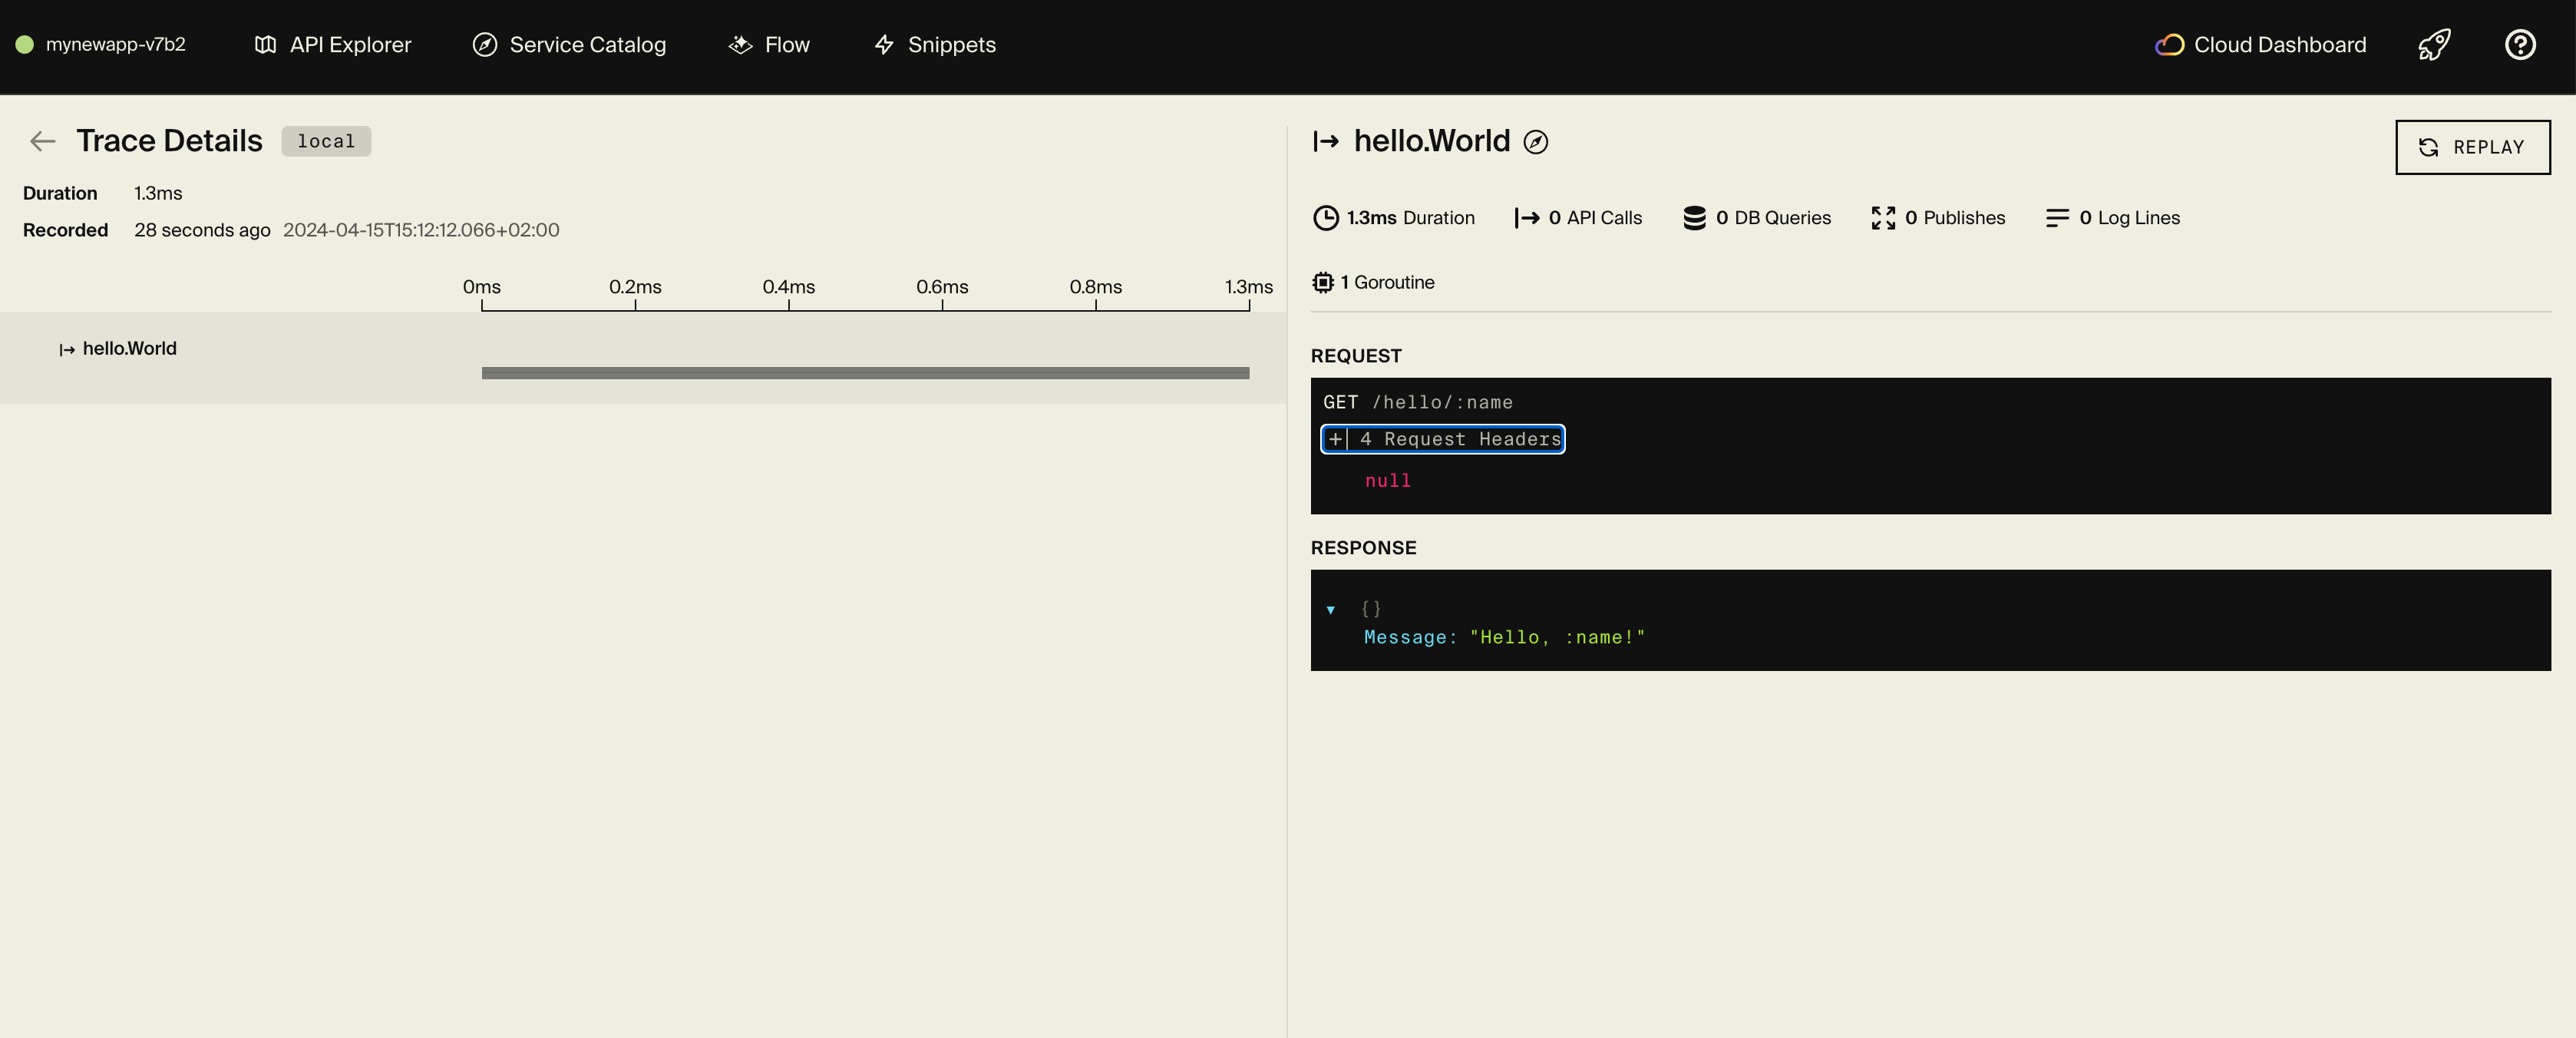
You can now take a look at the trace for the request you just made by clicking on it in the right column in the local dashboard.

With such a simple API, there's not much to it, just a simple request and response.
However, just imagine how powerful it is to have tracing when you're developing a more complex system with multiple services, Pub/Sub, and databases. (Learn more about Encore's tracing capabilities in the tracing docs.)
4. Make a code change
Let's put our mark on this API and make our first code change.
🥐 Head back to your code editor and look at the hello.ts file again.
If you can't come up a creative change yourself, why not simply change the "Hello" message to a more sassy "Howdy"?
🥐 Once you've made your change, save the file.
When you save, the daemon run by the Encore CLI instantly detects the change and automatically recompiles your application and reloads your local development environment.
The output where you're running your app will look something like this:
Changes detected, recompiling...
Reloaded successfully.
TRC registered endpoint endpoint=World path=/hello/:name service=hello
TRC listening for incoming HTTP requests
🥐 Test your change by calling your API again.
Great job, you made a change and your app was reloaded automatically.
Now you're ready to head to the cloud!
5. Deploy your app
Generating Docker image
You can either deploy by generating a Docker image for your app using:
This will compile your application using the host machine and then produce a Docker image containing the compiled application. You can now deploy this anywhere you like. Learn more in the self-host docs.
Deploy using Encore Cloud
Optionally, you can use Encore Cloud to automatically deploy your application. It comes with built-in free development hosting, and for production offers fully automated deployment to your own cloud on AWS or GCP.
🥐 To deploy, simply push your changes to Encore:
$ git add -A .$ git commit -m 'Initial commit'$ git push encoreEncore Cloud will now build and test your app, provision the needed infrastructure, and deploy your application to a staging environment.
After triggering the deployment, you will see a URL where you can view its progress in the Encore Cloud dashboard.
It will look something like: https://app.encore.cloud/$APP_ID/deploys/...
🥐 Open the URL to access the Cloud Dashboard and check the progress of your deployment.
You can now use the Cloud Dashboard to view production traces, connect your cloud account, integrate with GitHub, and much more.
What's next?
- Check out the REST API tutorial to learn how to create endpoints, use databases, and more.
- Join the friendly community on Discord to ask questions and meet other Encore developers.