Building Email Workflows with Inbound and Encore
Send and receive emails programmatically without running a mail server.
Email is one of those things that seems simple until you try to build it yourself. Sending transactional emails requires dealing with deliverability, SPF records, and bounce handling. Receiving emails is even more complex, typically requiring you to run your own mail server or parse raw MIME messages.
Inbound handles all of this with a clean API. You can send emails with a Resend-compatible SDK, receive incoming emails via webhooks, and manage full conversation threads. In this tutorial, we'll build an email processing backend using Inbound and Encore.ts.
Prefer to skip the setup? Clone the complete example with encore app create --example=ts/inbound to start with a working implementation.
What we're building
We'll create a backend that:
- Sends transactional emails using Inbound's API
- Receives incoming emails via webhooks
- Stores email history in a database
- Manages conversation threads for replies
This is useful for building support ticket systems, notification services, or any app that needs email communication.
Getting started
First, install Encore if you haven't already:
# macOS
brew install encoredev/tap/encore

# Linux
curl -L https://encore.dev/install.sh | bash

# Windows
iwr https://encore.dev/install.ps1 | iex
Create a new Encore application:
encore app create inbound-app --example=ts/hello-world
cd inbound-app
Setting up Inbound
Creating your Inbound account
- Sign up at inbound.new
- Go to Settings and generate an API key
- Add and verify your domain for sending/receiving emails
Installing the SDK
Install the Inbound SDK:
npm install inboundemail
Backend implementation
Creating the email service
Start by creating an email service. In Encore, a service is defined by creating an encore.service.ts file in a directory. All API endpoints and infrastructure resources in that directory become part of the service.
// email/encore.service.ts
import { Service } from "encore.dev/service";

export default new Service("email");
Configuring Inbound
The Inbound SDK needs an API key to authenticate requests. Rather than hardcoding this or using environment variables, we'll use Encore's built-in secrets management which encrypts secrets at rest and injects them securely at runtime.
// email/inbound.ts
import { Inbound } from "inboundemail";
import { secret } from "encore.dev/config";

const inboundApiKey = secret("InboundApiKey");

export const inbound = new Inbound(inboundApiKey());
Set your secret key for local development and production:
encore secret set --dev InboundApiKey
encore secret set --prod InboundApiKey
Sending emails
Inbound's SDK follows a similar pattern to Resend, so if you've used Resend before, this will feel familiar. The emails.send method accepts a recipient, subject, and HTML body. It returns either the sent email's ID or an error.
// email/send.ts
import { api, APIError } from "encore.dev/api";
import { inbound } from "./inbound";
import log from "encore.dev/log";

interface SendEmailRequest {
  to: string;
  subject: string;
  html: string;
  from?: string;
  replyTo?: string;
}

interface SendEmailResponse {
  id: string;
}

export const sendEmail = api(
  { expose: true, method: "POST", path: "/email/send" },
  async (req: SendEmailRequest): Promise<SendEmailResponse> => {
    const { data, error } = await inbound.emails.send({
      from: req.from ?? "[email protected]",
      to: req.to,
      subject: req.subject,
      html: req.html,
      replyTo: req.replyTo,
    });

    if (error) {
      log.error("Failed to send email", { error: error.message });
      throw APIError.internal(`Failed to send email: ${error.message}`);
    }

    log.info("Email sent", { id: data?.id, to: req.to });

    return { id: data!.id };
  }
);
Receiving emails via webhooks
This is where Inbound really shines. Instead of running your own mail server or parsing raw MIME messages, Inbound receives emails on your behalf and forwards them to your webhook as structured JSON.
We use Encore's raw endpoint here because we need direct access to the request body. The webhook payload includes the sender, recipients, subject, body (both text and HTML), and threading information like threadId and inReplyTo for conversation tracking.
// email/webhook.ts
import { api } from "encore.dev/api";
import { SQLDatabase } from "encore.dev/storage/sqldb";
import log from "encore.dev/log";

const db = new SQLDatabase("email", {
  migrations: "./migrations",
});

interface InboundWebhookPayload {
  id: string;
  from: string;
  to: string[];
  subject: string;
  text?: string;
  html?: string;
  date: string;
  threadId?: string;
  inReplyTo?: string;
}

export const inboundWebhook = api.raw(
  { expose: true, method: "POST", path: "/email/webhook" },
  async (req, res) => {
    const chunks: Buffer[] = [];
    for await (const chunk of req) {
      chunks.push(chunk);
    }
    const body = Buffer.concat(chunks).toString();
    const payload: InboundWebhookPayload = JSON.parse(body);

    log.info("Received email", {
      id: payload.id,
      from: payload.from,
      subject: payload.subject,
    });

    // Store the email in the database
    await db.exec`
      INSERT INTO emails (id, sender, recipient, subject, body_text, body_html, received_at, thread_id)
      VALUES (
        ${payload.id},
        ${payload.from},
        ${payload.to[0]},
        ${payload.subject},
        ${payload.text ?? null},
        ${payload.html ?? null},
        ${new Date(payload.date)},
        ${payload.threadId ?? null}
      )
    `;

    res.writeHead(200, { "Content-Type": "application/json" });
    res.end(JSON.stringify({ received: true }));
  }
);
Database schema
We need a table to store incoming emails. Encore uses SQL migration files to define your database schema. These migrations are automatically applied when your application starts, both locally and in deployed environments. The thread_id column lets us group related emails into conversations.
-- email/migrations/1_create_emails.up.sql
CREATE TABLE emails (
  id TEXT PRIMARY KEY,
  sender TEXT NOT NULL,
  recipient TEXT NOT NULL,
  subject TEXT NOT NULL,
  body_text TEXT,
  body_html TEXT,
  received_at TIMESTAMPTZ NOT NULL,
  thread_id TEXT,
  created_at TIMESTAMPTZ NOT NULL DEFAULT NOW()
);

CREATE INDEX idx_emails_recipient ON emails(recipient);
CREATE INDEX idx_emails_thread_id ON emails(thread_id);
Replying to emails
When building a support system or any email-based workflow, you need replies to show up as part of the same conversation in the recipient's email client. This is done through email headers: In-Reply-To references the email you're replying to, and References maintains the full conversation chain.
The endpoint below looks up the original email, constructs a proper reply with threading headers, and sends it through Inbound.
// email/reply.ts
import { api, APIError } from "encore.dev/api";
import { inbound } from "./inbound";
import { SQLDatabase } from "encore.dev/storage/sqldb";
import log from "encore.dev/log";

const db = SQLDatabase.named("email");

interface ReplyRequest {
  emailId: string;
  html: string;
}

interface ReplyResponse {
  id: string;
}

export const replyToEmail = api(
  { expose: true, method: "POST", path: "/email/reply" },
  async (req: ReplyRequest): Promise<ReplyResponse> => {
    // Get the original email
    const original = await db.queryRow<{
      sender: string;
      subject: string;
      thread_id: string | null;
    }>`
      SELECT sender, subject, thread_id FROM emails WHERE id = ${req.emailId}
    `;

    if (!original) {
      throw APIError.notFound("Email not found");
    }

    const { data, error } = await inbound.emails.send({
      from: "[email protected]",
      to: original.sender,
      subject: original.subject.startsWith("Re:")
        ? original.subject
        : `Re: ${original.subject}`,
      html: req.html,
      headers: {
        "In-Reply-To": req.emailId,
        References: req.emailId,
      },
    });

    if (error) {
      throw APIError.internal(`Failed to send reply: ${error.message}`);
    }

    log.info("Reply sent", { id: data?.id, to: original.sender });

    return { id: data!.id };
  }
);
Listing emails
Finally, we need a way to retrieve stored emails. This endpoint queries the database and returns the most recent 50 emails, ordered by when they were received. In a production app, you'd add pagination, filtering by recipient or thread, and search functionality.
// email/list.ts
import { api } from "encore.dev/api";
import { SQLDatabase } from "encore.dev/storage/sqldb";

const db = SQLDatabase.named("email");

interface Email {
  id: string;
  sender: string;
  recipient: string;
  subject: string;
  receivedAt: Date;
  threadId: string | null;
}

interface ListEmailsResponse {
  emails: Email[];
}

export const listEmails = api(
  { expose: true, method: "GET", path: "/emails" },
  async (): Promise<ListEmailsResponse> => {
    const rows = await db.query<{
      id: string;
      sender: string;
      recipient: string;
      subject: string;
      received_at: Date;
      thread_id: string | null;
    }>`
      SELECT id, sender, recipient, subject, received_at, thread_id
      FROM emails
      ORDER BY received_at DESC
      LIMIT 50
    `;

    const emails: Email[] = [];
    for await (const row of rows) {
      emails.push({
        id: row.id,
        sender: row.sender,
        recipient: row.recipient,
        subject: row.subject,
        receivedAt: row.received_at,
        threadId: row.thread_id,
      });
    }

    return { emails };
  }
);
Setting up the webhook in Inbound
After deploying your app, configure Inbound to send emails to your webhook:
- Go to the Inbound dashboard
- Navigate to Endpoints
- Create a new webhook endpoint pointing to
https://your-app.encorecloud.dev/email/webhook - Associate it with your email address or set it as a catch-all for your domain
Testing locally
Start your backend:
encore run
Open the local development dashboard to explore and test your API.
Send a test email
curl -X POST http://localhost:4000/email/send \
  -H "Content-Type: application/json" \
  -d '{
    "to": "[email protected]",
    "subject": "Hello from Encore!",
    "html": "<p>This is a test email.</p>"
  }'
List received emails
curl http://localhost:4000/emails
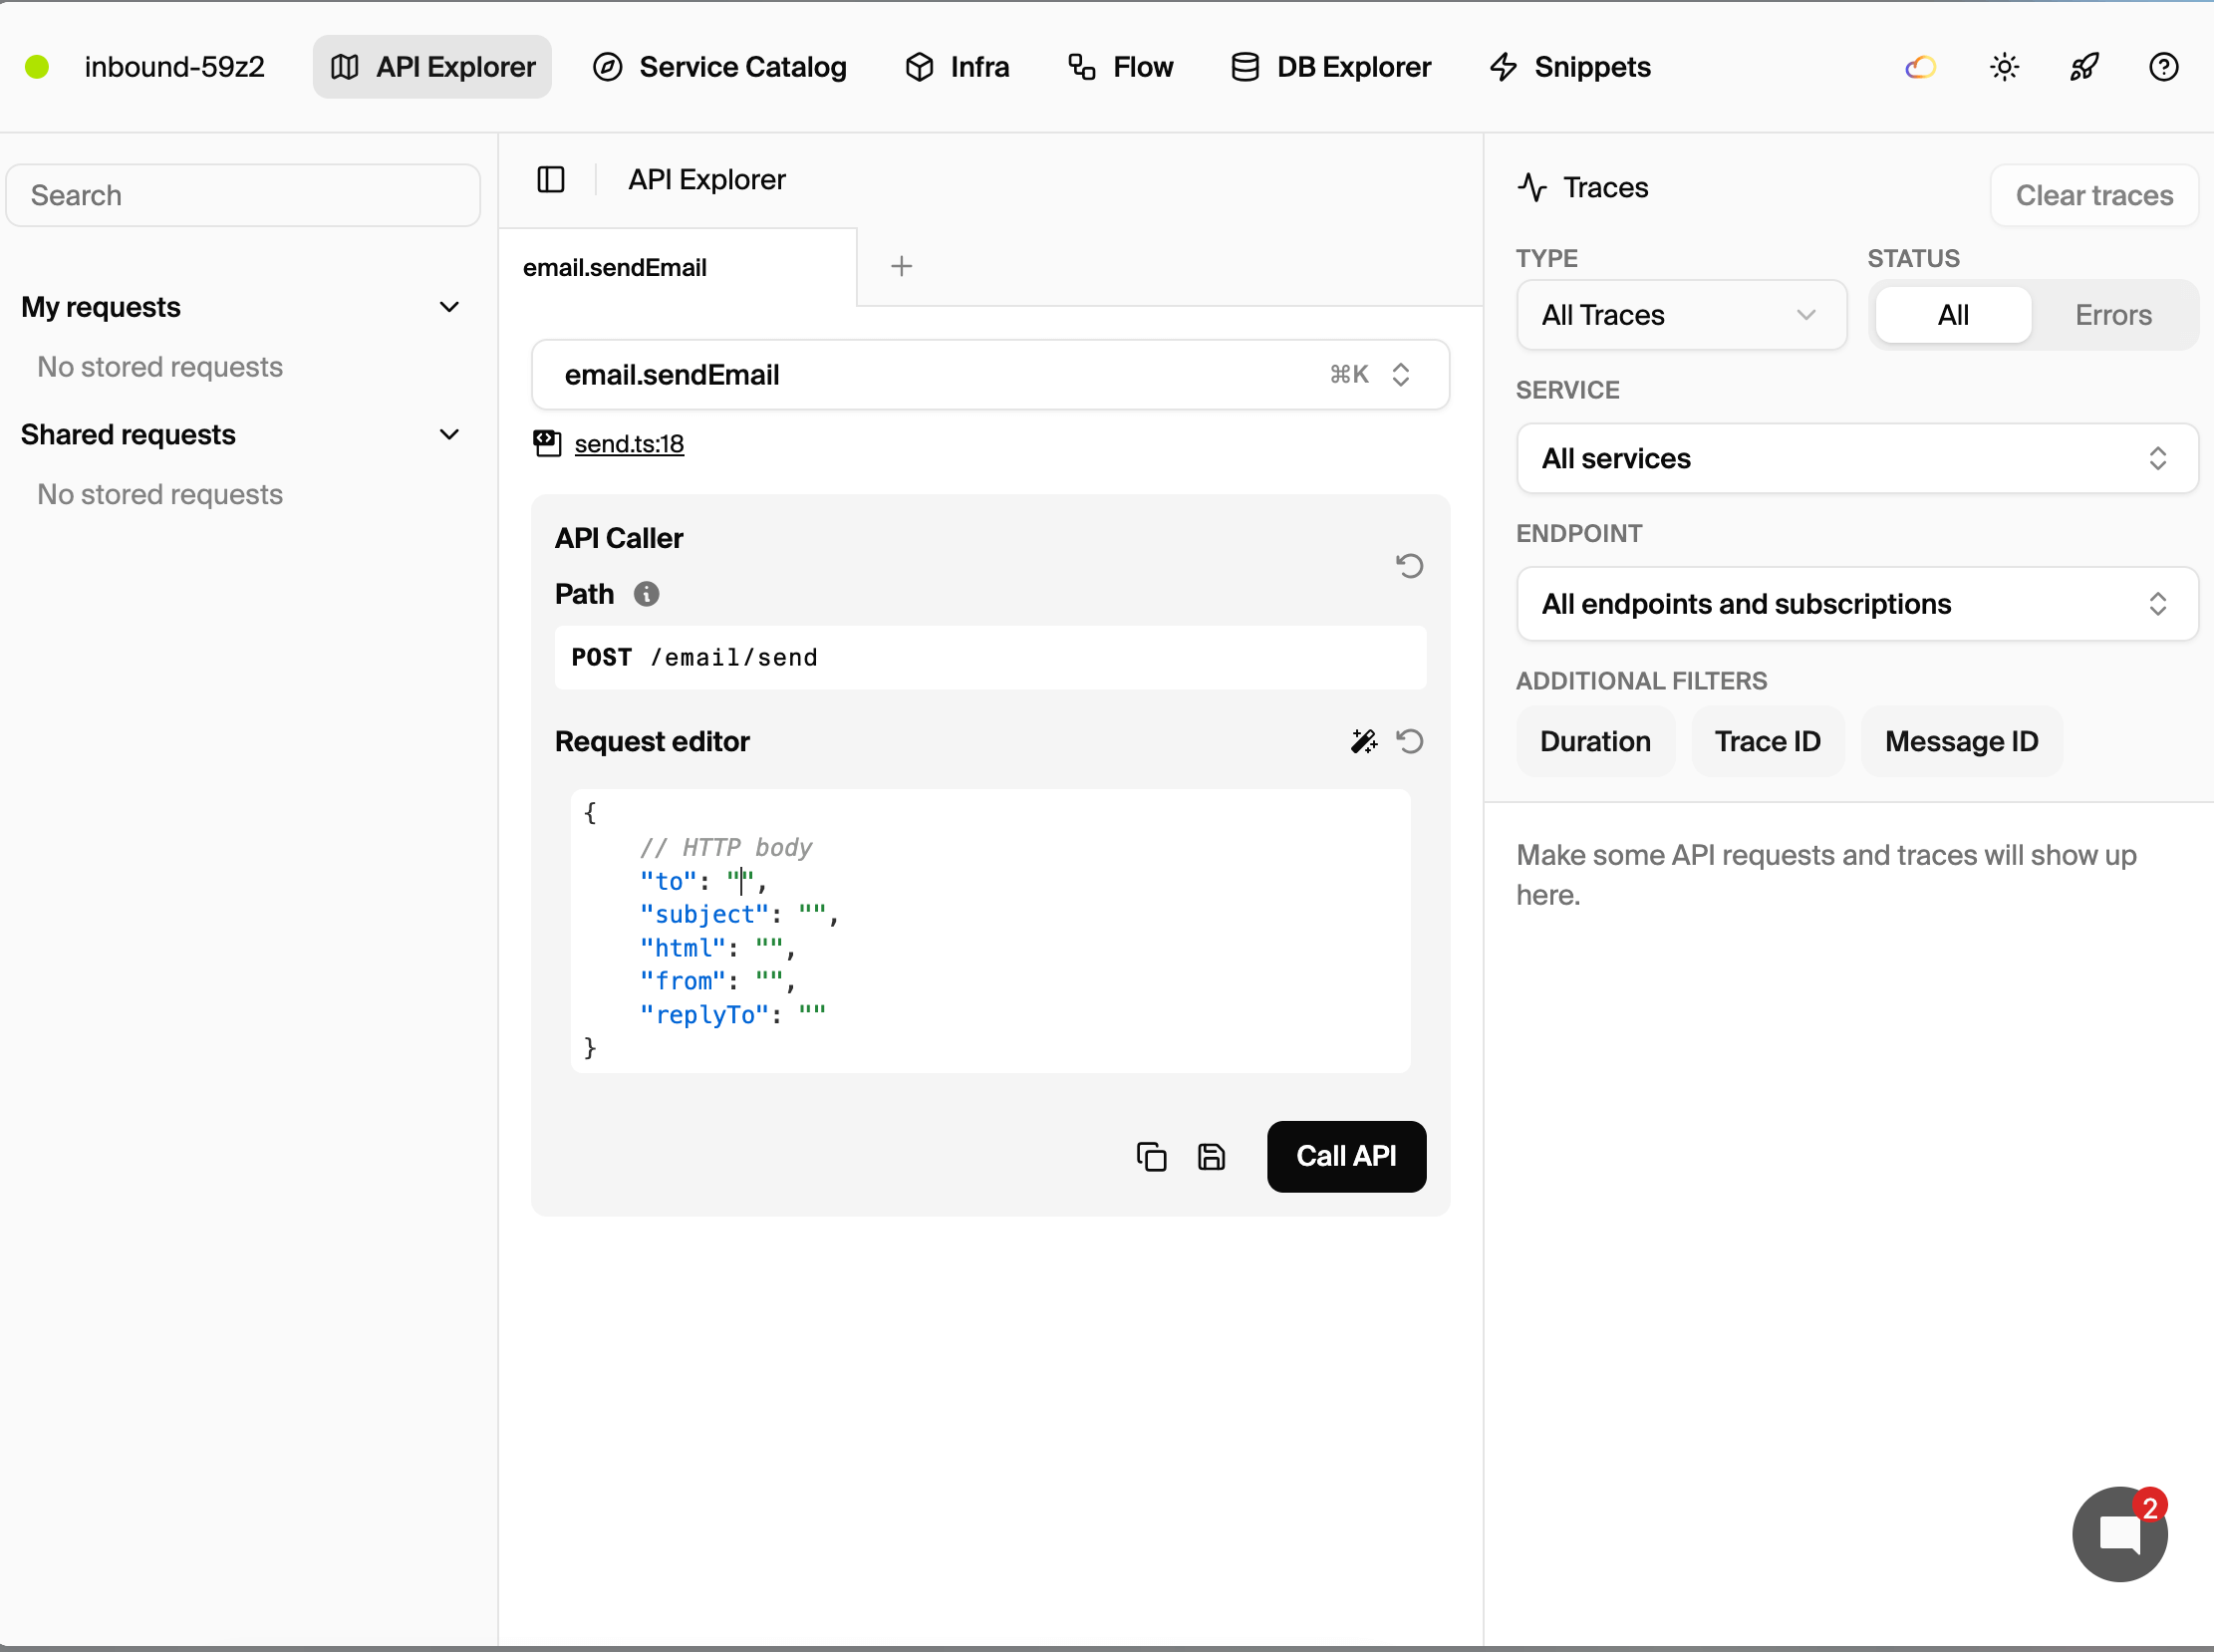
Exploring the local dashboard
The local development dashboard at http://localhost:9400 provides:
- API Explorer - Test email endpoints interactively
- Service Catalog - Auto-generated API documentation
- Distributed Tracing - See the full flow including Inbound API calls
Bonus: MCP Server integration
Inbound provides an MCP (Model Context Protocol) server that lets AI assistants like Claude, Cursor, and OpenCode interact with your email account.
Add to your Cursor config (.cursor/mcp.json):
{
  "mcpServers": {
    "inbound": {
      "type": "http",
      "url": "https://mcp.inbound.new/mcp",
      "headers": {
        "x-inbound-api-key": "your-api-key"
      }
    }
  }
}
Now you can ask your AI assistant to:
- "List my recent emails"
- "Send an email to [email protected]"
- "Show me the conversation with [email protected]"
Deployment
Deploy your application with Encore Cloud:
git add -A .
git commit -m "Add Inbound email integration"
git push encore
Set your production secret:
encore secret set --prod InboundApiKey
After deploying, update your Inbound webhook endpoint to point to your production URL.
Next steps
- Browse Inbound's documentation for the full API reference
- Add email scheduling for delayed sending
- Set up domain verification for custom sender addresses
- Implement email templates for consistent transactional emails
Related Articles

 Ivan Cernja
 Ivan Cernja
 Ivan Cernja