Every application needs to send emails. Welcome messages, password resets, notifications, receipts. But setting up SMTP servers, dealing with deliverability, and managing templates is tedious. Resend provides a modern API that makes email simple.
In this tutorial, we'll build email functionality using Resend. You'll learn how to send transactional emails, use React Email templates, track delivery status, handle webhooks, and store email history in a database.
Want to jump straight to a running app? Clone this starter and deploy it to your own cloud.
What is Resend?
Resend is an email API built for developers. It provides:
- Simple API - Send emails with a clean, modern interface
- React Email - Build email templates with React components
- Deliverability - Built-in best practices for inbox delivery
- Webhooks - Real-time events for delivery, opens, clicks
- Analytics - Track email performance and engagement
- Domains - Verify and manage sending domains
Resend handles the complexity of email infrastructure so you can focus on your content.
What we're building
We'll create a backend with complete email functionality:
- Transactional emails - Welcome emails, password resets, notifications
- React Email templates - Type-safe, component-based email design
- Email tracking - Auto-provisioned PostgreSQL database for email history
- Webhook handling - Track delivery, bounces, and complaints
- Batch emails - Send to multiple recipients efficiently
- Domain verification - Set up custom sending domains
The backend will handle all email sending with delivery tracking and analytics.
Getting started
Prefer to skip the setup? Use encore app create --example=ts/resend to start with a complete working example. This tutorial walks through building it from scratch to understand each component.
First, install Encore if you haven't already:
# macOS
brew install encoredev/tap/encore

# Linux
curl -L https://encore.dev/install.sh | bash

# Windows
iwr https://encore.dev/install.ps1 | iex
Create a new Encore application. This will prompt you to create a free Encore account if you don't have one (required for secret management):
encore app create resend-app --example=ts/hello-world
cd resend-app
Setting up Resend
Creating your Resend account
- Go to resend.com and sign up for a free account
- Navigate to API Keys and create a new key
- Verify your domain (required for sending to real email addresses)
Resend offers a generous free tier with 100 emails per day and 3,000 per month.
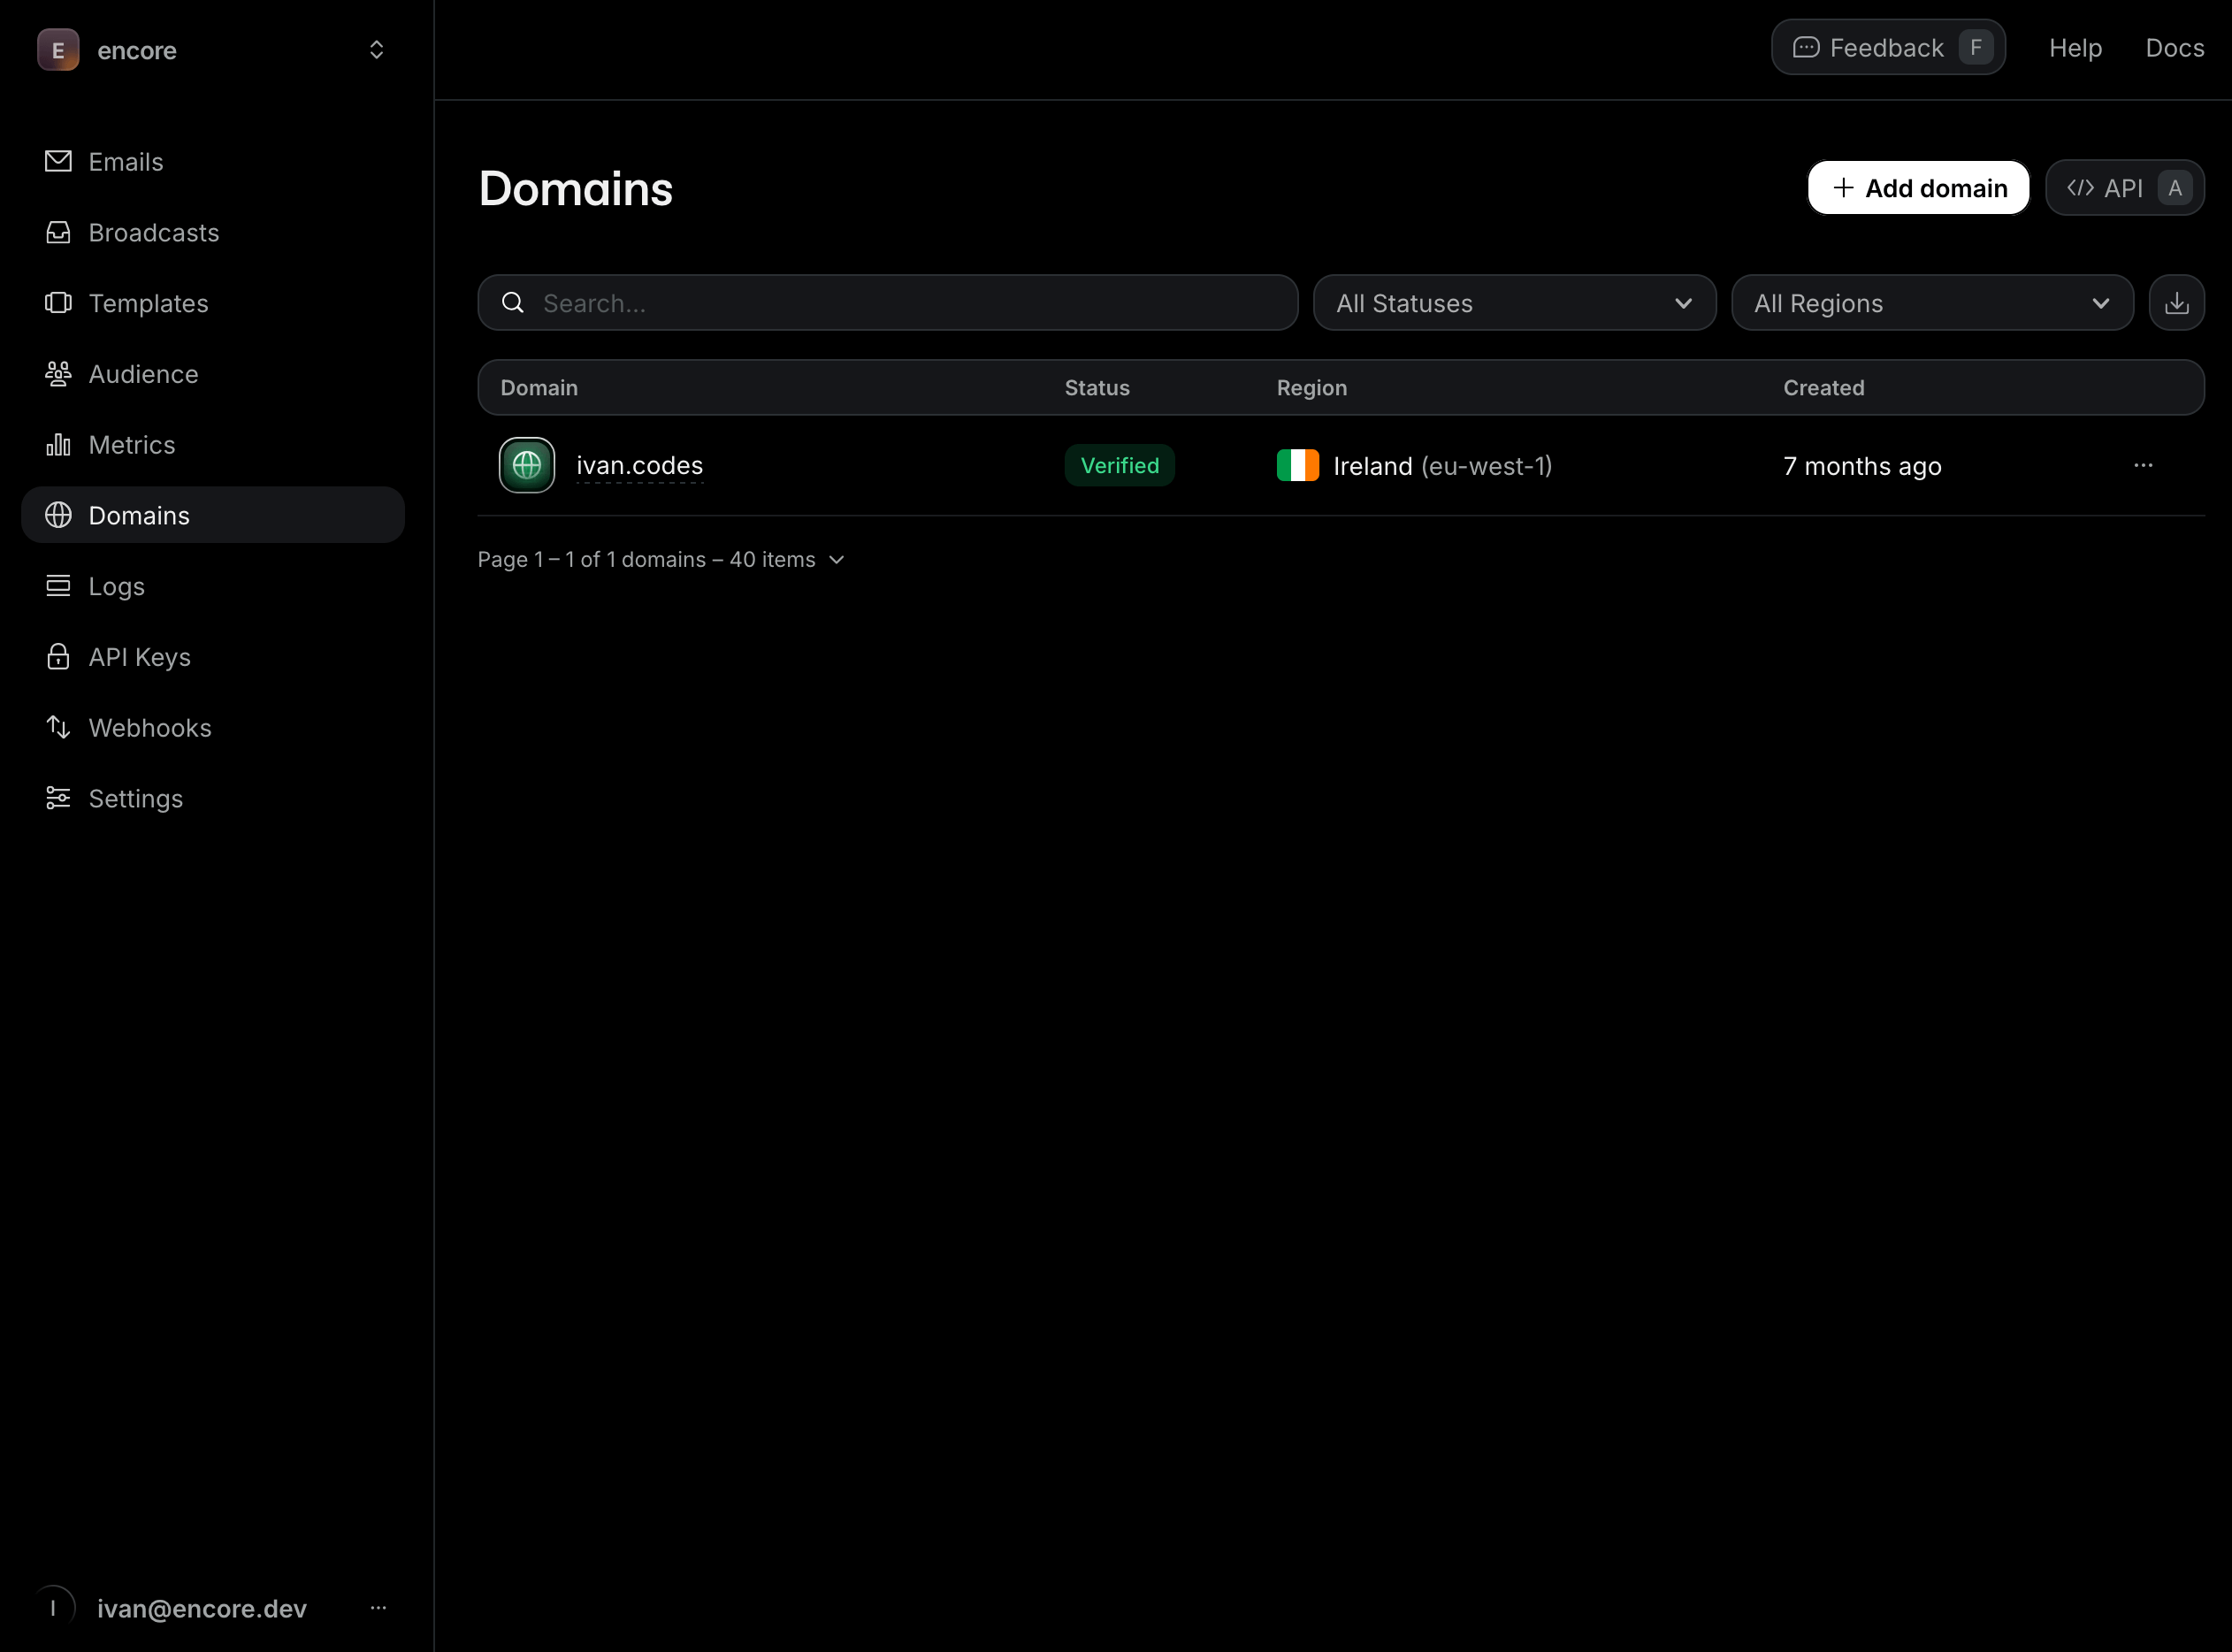
Domain verification
Important: To send emails to real recipients, you must verify your domain with Resend. Without domain verification, you can only send test emails to your own verified email address.
To verify your domain:
- Go to the Domains section in your Resend dashboard
- Click Add Domain and enter your domain (e.g.,
yourdomain.com) - Add the DNS records (SPF, DKIM, DMARC) provided by Resend to your domain's DNS settings
- Wait for DNS propagation (usually 5-15 minutes)
- Click Verify in the Resend dashboard
Once verified, update your from addresses in the code to use your domain:
from: "[email protected]" // Replace with your verified domain
For testing: If you don't have a domain yet, Resend lets you send test emails to your own verified email address using their sandbox domain ([email protected]). This is perfect for development and testing the integration.
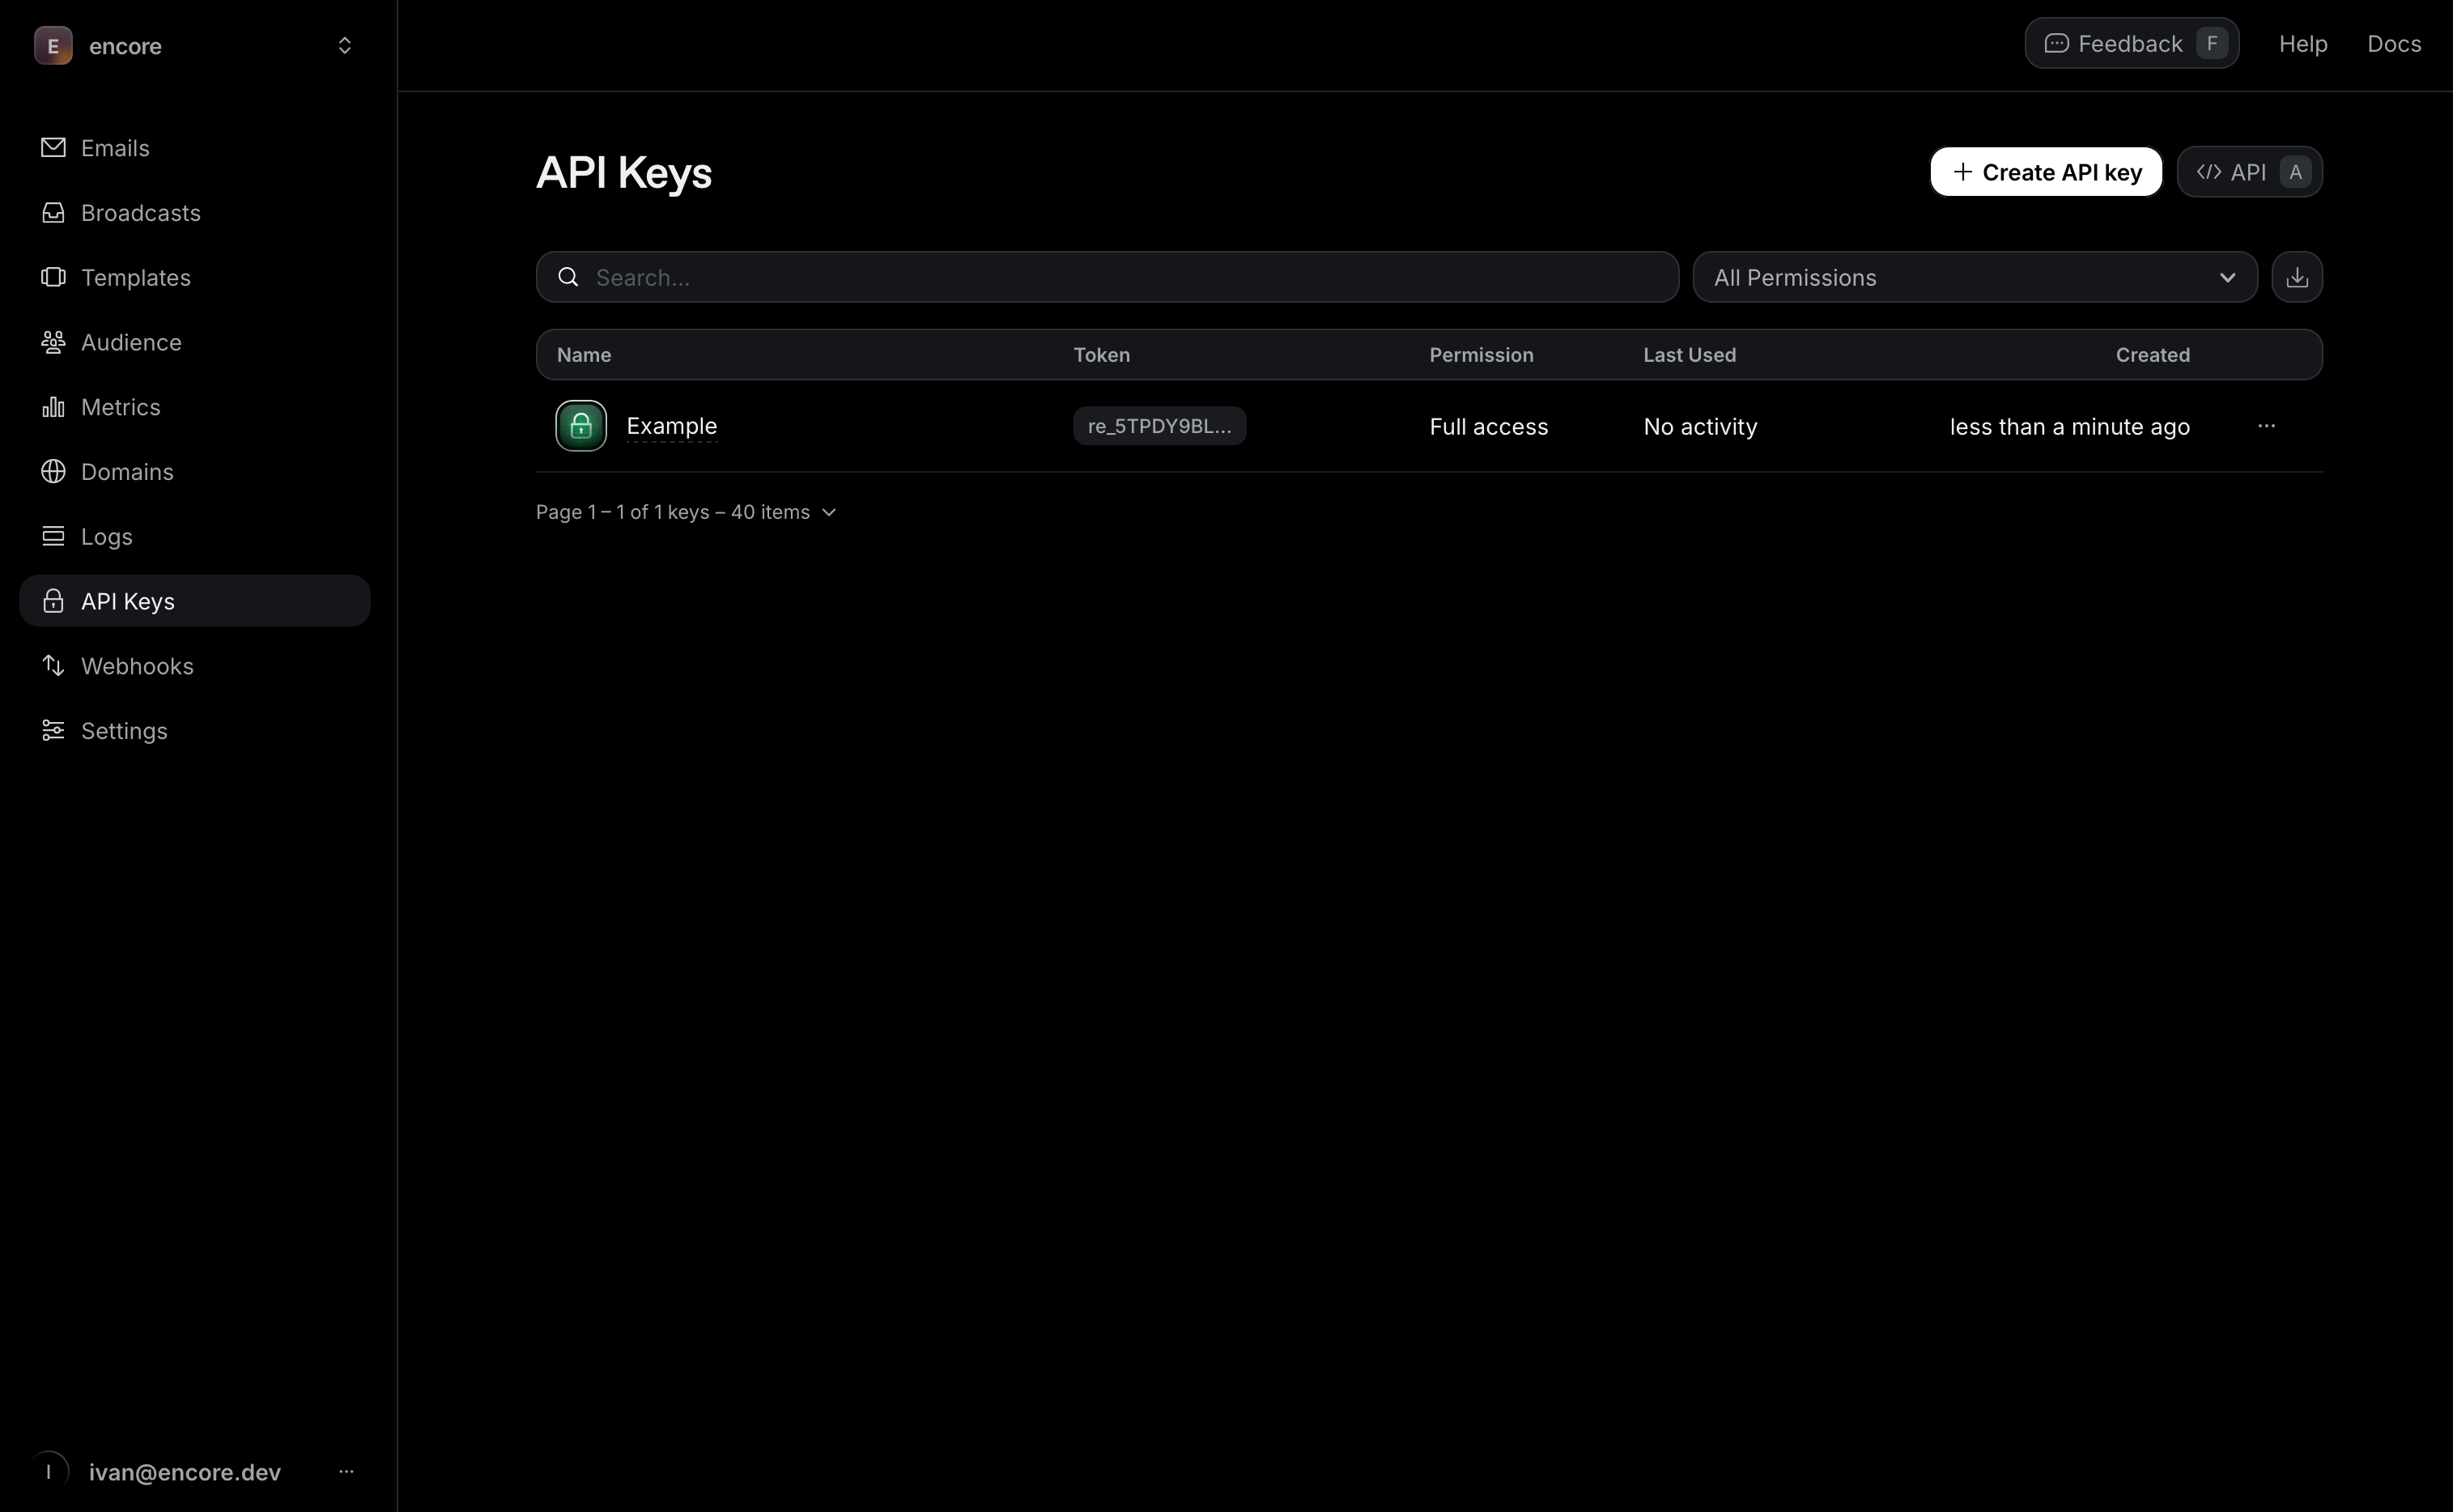
Understanding API key permissions
When creating your API key, Resend offers two permission levels:
- Full Access (
full_access): Can create, delete, get, and update any resource. Use this for development and administrative tasks. - Sending Access (
sending_access): Can only send emails. This is the recommended permission level for production applications following the principle of least privilege.
For production deployments, consider creating a sending access key and optionally restricting it to a specific domain. This limits the blast radius if your API key is ever compromised.
Installing the SDK
Install Resend and React Email:
npm install resend
npm install -D @react-email/components
Backend implementation
Creating the email service
Every Encore service starts with a service definition file (encore.service.ts). Services let you divide your application into logical components. At deploy time, you can decide whether to colocate them in a single process or deploy them as separate microservices, without changing a single line of code:
// email/encore.service.ts
import { Service } from "encore.dev/service";

export default new Service("email");
Configuring Resend
Store your API key securely using Encore's built-in secrets management:
// email/resend.ts
import { Resend } from "resend";
import { secret } from "encore.dev/config";

const resendApiKey = secret("ResendApiKey");

export const resend = new Resend(resendApiKey());
Set your API key for local development:
# Development (use full access for testing)
encore secret set --dev ResendApiKey

# Production (use sending access for security)
encore secret set --prod ResendApiKey
Production Best Practice: Create a separate API key with sending_access permission for production. If you have multiple domains, create domain-specific keys to further isolate access. You can create domain-restricted keys using Resend's API:
// Example: Creating a domain-specific sending key (for admin tools)
const { data } = await resend.apiKeys.create({
  name: 'Production - yourdomain.com',
  permission: 'sending_access',
  domainId: 'your-domain-id', // Get this from Resend dashboard
});
Setting up the database
To track email history and delivery status, create a PostgreSQL database. With Encore, you can create a database by simply defining it in code. The framework automatically provisions the infrastructure locally using Docker.
Create the database instance:
// email/db.ts
import { SQLDatabase } from "encore.dev/storage/sqldb";

export const db = new SQLDatabase("email", {
  migrations: "./migrations",
});
Create the migration file:
-- email/migrations/1_create_emails.up.sql
CREATE TABLE emails (
  id TEXT PRIMARY KEY,
  resend_id TEXT UNIQUE,
  recipient TEXT NOT NULL,
  subject TEXT NOT NULL,
  template TEXT,
  status TEXT NOT NULL DEFAULT 'pending',
  delivered_at TIMESTAMP,
  opened_at TIMESTAMP,
  clicked_at TIMESTAMP,
  bounced_at TIMESTAMP,
  complained_at TIMESTAMP,
  error TEXT,
  metadata JSONB,
  created_at TIMESTAMP NOT NULL DEFAULT CURRENT_TIMESTAMP
);

CREATE INDEX idx_emails_recipient ON emails(recipient, created_at DESC);
CREATE INDEX idx_emails_status ON emails(status);
CREATE INDEX idx_emails_resend_id ON emails(resend_id);
Creating email templates with React Email
React Email lets you build email templates using React components. Create a welcome email template:
// email/templates/welcome.tsx
import {
  Body,
  Button,
  Container,
  Head,
  Heading,
  Html,
  Preview,
  Section,
  Text,
} from "@react-email/components";
import * as React from "react";

interface WelcomeEmailProps {
  name: string;
  loginUrl: string;
}

export function WelcomeEmail({ name, loginUrl }: WelcomeEmailProps) {
  return (
    <Html>
      <Head />
      <Preview>Welcome to our platform!</Preview>
      <Body style={main}>
        <Container style={container}>
          <Heading style={h1}>Welcome, {name}!</Heading>
          <Text style={text}>
            Thanks for joining us. We're excited to have you on board.
          </Text>
          <Section style={buttonContainer}>
            <Button style={button} href={loginUrl}>
              Get Started
            </Button>
          </Section>
          <Text style={footer}>
            If you have any questions, just reply to this email.
          </Text>
        </Container>
      </Body>
    </Html>
  );
}

const main = {
  backgroundColor: "#f6f9fc",
  fontFamily: '-apple-system,BlinkMacSystemFont,"Segoe UI",Roboto,"Helvetica Neue",Ubuntu,sans-serif',
};

const container = {
  backgroundColor: "#ffffff",
  margin: "0 auto",
  padding: "20px 0 48px",
  marginBottom: "64px",
};

const h1 = {
  color: "#333",
  fontSize: "24px",
  fontWeight: "bold",
  margin: "40px 0",
  padding: "0",
  textAlign: "center" as const,
};

const text = {
  color: "#333",
  fontSize: "16px",
  lineHeight: "26px",
  textAlign: "center" as const,
};

const buttonContainer = {
  textAlign: "center" as const,
  margin: "32px 0",
};

const button = {
  backgroundColor: "#5469d4",
  borderRadius: "4px",
  color: "#fff",
  fontSize: "16px",
  textDecoration: "none",
  textAlign: "center" as const,
  display: "block",
  width: "200px",
  padding: "12px",
  margin: "0 auto",
};

const footer = {
  color: "#8898aa",
  fontSize: "14px",
  lineHeight: "24px",
  textAlign: "center" as const,
  marginTop: "32px",
};
Sending emails
Create an endpoint to send welcome emails:
// email/send.ts
import { api } from "encore.dev/api";
import { resend } from "./resend";
import { db } from "./db";
import { render } from "@react-email/components";
import { WelcomeEmail } from "./templates/welcome";
import log from "encore.dev/log";

interface SendWelcomeEmailRequest {
  to: string;
  name: string;
  loginUrl?: string;
}

interface SendWelcomeEmailResponse {
  id: string;
  resendId: string;
}

export const sendWelcomeEmail = api(
  { expose: true, method: "POST", path: "/email/welcome" },
  async (req: SendWelcomeEmailRequest): Promise<SendWelcomeEmailResponse> => {
    const emailId = `email-${Date.now()}-${Math.random().toString(36).slice(2, 11)}`;

    log.info("Sending welcome email", { to: req.to, emailId });

    // Render the React Email template to HTML
    const html = render(
      WelcomeEmail({
        name: req.name,
        loginUrl: req.loginUrl || "https://yourapp.com/login",
      })
    );

    try {
      // Send email via Resend
      const { data, error } = await resend.emails.send({
        from: "[email protected]",
        to: req.to,
        subject: "Welcome to our platform!",
        html,
      });

      if (error) {
        throw new Error(`Failed to send email: ${error.message}`);
      }

      // Store email record
      await db.exec`
        INSERT INTO emails (id, resend_id, recipient, subject, template, status, metadata)
        VALUES (
          ${emailId},
          ${data!.id},
          ${req.to},
          ${"Welcome to our platform!"},
          ${"welcome"},
          ${"sent"},
          ${JSON.stringify({ name: req.name })}
        )
      `;

      log.info("Welcome email sent", { emailId, resendId: data!.id });

      return {
        id: emailId,
        resendId: data!.id, // Resend's unique email ID for tracking
      };
    } catch (error) {
      // Store failed email
      const errorMessage = error instanceof Error ? error.message : "Unknown error";

      await db.exec`
        INSERT INTO emails (id, recipient, subject, template, status, error)
        VALUES (
          ${emailId},
          ${req.to},
          ${"Welcome to our platform!"},
          ${"welcome"},
          ${"failed"},
          ${errorMessage}
        )
      `;

      throw error;
    }
  }
);
Password reset emails
Create another template for password resets:
// email/templates/password-reset.tsx
import {
  Body,
  Button,
  Container,
  Head,
  Heading,
  Html,
  Preview,
  Section,
  Text,
} from "@react-email/components";
import * as React from "react";

interface PasswordResetEmailProps {
  name: string;
  resetUrl: string;
}

export function PasswordResetEmail({ name, resetUrl }: PasswordResetEmailProps) {
  return (
    <Html>
      <Head />
      <Preview>Reset your password</Preview>
      <Body style={main}>
        <Container style={container}>
          <Heading style={h1}>Password Reset</Heading>
          <Text style={text}>Hi {name},</Text>
          <Text style={text}>
            We received a request to reset your password. Click the button below to
            choose a new password:
          </Text>
          <Section style={buttonContainer}>
            <Button style={button} href={resetUrl}>
              Reset Password
            </Button>
          </Section>
          <Text style={footer}>
            If you didn't request this, you can safely ignore this email.
          </Text>
          <Text style={footer}>This link will expire in 1 hour.</Text>
        </Container>
      </Body>
    </Html>
  );
}

// Styles similar to welcome email...
const main = {
  backgroundColor: "#f6f9fc",
  fontFamily: '-apple-system,BlinkMacSystemFont,"Segoe UI",Roboto,"Helvetica Neue",Ubuntu,sans-serif',
};

const container = {
  backgroundColor: "#ffffff",
  margin: "0 auto",
  padding: "20px 0 48px",
  marginBottom: "64px",
};

const h1 = {
  color: "#333",
  fontSize: "24px",
  fontWeight: "bold",
  margin: "40px 0",
  padding: "0",
  textAlign: "center" as const,
};

const text = {
  color: "#333",
  fontSize: "16px",
  lineHeight: "26px",
  textAlign: "left" as const,
  padding: "0 20px",
};

const buttonContainer = {
  textAlign: "center" as const,
  margin: "32px 0",
};

const button = {
  backgroundColor: "#dc3545",
  borderRadius: "4px",
  color: "#fff",
  fontSize: "16px",
  textDecoration: "none",
  textAlign: "center" as const,
  display: "block",
  width: "200px",
  padding: "12px",
  margin: "0 auto",
};

const footer = {
  color: "#8898aa",
  fontSize: "14px",
  lineHeight: "24px",
  textAlign: "center" as const,
  marginTop: "16px",
};
And the endpoint:
// email/send.ts (continued)
import { PasswordResetEmail } from "./templates/password-reset";

interface SendPasswordResetRequest {
  to: string;
  name: string;
  resetUrl: string;
}

interface SendPasswordResetResponse {
  id: string;
  resendId: string;
}

export const sendPasswordReset = api(
  { expose: true, method: "POST", path: "/email/password-reset" },
  async (req: SendPasswordResetRequest): Promise<SendPasswordResetResponse> => {
    const emailId = `email-${Date.now()}-${Math.random().toString(36).slice(2, 11)}`;

    const html = render(
      PasswordResetEmail({
        name: req.name,
        resetUrl: req.resetUrl,
      })
    );

    const { data, error } = await resend.emails.send({
      from: "[email protected]",
      to: req.to,
      subject: "Reset your password",
      html,
    });

    if (error) {
      throw new Error(`Failed to send email: ${error.message}`);
    }

    await db.exec`
      INSERT INTO emails (id, resend_id, recipient, subject, template, status, metadata)
      VALUES (
        ${emailId},
        ${data!.id},
        ${req.to},
        ${"Reset your password"},
        ${"password-reset"},
        ${"sent"},
        ${JSON.stringify({ name: req.name })}
      )
    `;

    return {
      id: emailId,
      resendId: data!.id,
    };
  }
);
Handling webhooks
Resend sends webhooks for email events (delivered, opened, bounced, etc.). Handle these to update your database:
// email/webhooks.ts
import { api } from "encore.dev/api";
import { db } from "./db";
import log from "encore.dev/log";

interface ResendWebhookEvent {
  type: string;
  created_at: string;
  data: {
    email_id: string;
    from: string;
    to: string[];
    subject: string;
    created_at: string;
  };
}

export const handleWebhook = api.raw(
  { expose: true, path: "/webhooks/resend", method: "POST" },
  async (req, res) => {
    const event = (await req.json()) as ResendWebhookEvent;

    log.info("Received Resend webhook", { type: event.type, emailId: event.data.email_id });

    switch (event.type) {
      case "email.sent":
        await db.exec`
          UPDATE emails
          SET status = 'sent'
          WHERE resend_id = ${event.data.email_id}
        `;
        break;

      case "email.delivered":
        await db.exec`
          UPDATE emails
          SET status = 'delivered', delivered_at = NOW()
          WHERE resend_id = ${event.data.email_id}
        `;
        break;

      case "email.opened":
        await db.exec`
          UPDATE emails
          SET opened_at = NOW()
          WHERE resend_id = ${event.data.email_id}
        `;
        break;

      case "email.clicked":
        await db.exec`
          UPDATE emails
          SET clicked_at = NOW()
          WHERE resend_id = ${event.data.email_id}
        `;
        break;

      case "email.bounced":
        await db.exec`
          UPDATE emails
          SET status = 'bounced', bounced_at = NOW()
          WHERE resend_id = ${event.data.email_id}
        `;
        break;

      case "email.complained":
        await db.exec`
          UPDATE emails
          SET status = 'complained', complained_at = NOW()
          WHERE resend_id = ${event.data.email_id}
        `;
        break;
    }

    res.writeHead(200);
    res.end();
  }
);
Configure the webhook URL in Resend Dashboard: https://your-domain.com/webhooks/resend
About Resend Email IDs: Every email sent through Resend gets a unique ID (like re_ABC123xyz). Store this ID in your database to:
- Track email status through webhooks
- Query individual email details via Resend's API
- Debug delivery issues by cross-referencing with Resend's dashboard
- Provide customer support with specific email references
Listing email history
Create an endpoint to retrieve sent emails:
// email/send.ts (continued)
interface EmailRecord {
  id: string;
  recipient: string;
  subject: string;
  template: string | null;
  status: string;
  deliveredAt: Date | null;
  openedAt: Date | null;
  clickedAt: Date | null;
  createdAt: Date;
}

interface ListEmailsRequest {
  recipient?: string;
  limit?: number;
}

interface ListEmailsResponse {
  emails: EmailRecord[];
}

export const listEmails = api(
  { expose: true, method: "GET", path: "/email/list" },
  async (req: ListEmailsRequest): Promise<ListEmailsResponse> => {
    const limit = req.limit || 50;

    let query;
    if (req.recipient) {
      query = db.query<{
        id: string;
        recipient: string;
        subject: string;
        template: string | null;
        status: string;
        delivered_at: Date | null;
        opened_at: Date | null;
        clicked_at: Date | null;
        created_at: Date;
      }>`
        SELECT id, recipient, subject, template, status, delivered_at, opened_at, clicked_at, created_at
        FROM emails
        WHERE recipient = ${req.recipient}
        ORDER BY created_at DESC
        LIMIT ${limit}
      `;
    } else {
      query = db.query<{
        id: string;
        recipient: string;
        subject: string;
        template: string | null;
        status: string;
        delivered_at: Date | null;
        opened_at: Date | null;
        clicked_at: Date | null;
        created_at: Date;
      }>`
        SELECT id, recipient, subject, template, status, delivered_at, opened_at, clicked_at, created_at
        FROM emails
        ORDER BY created_at DESC
        LIMIT ${limit}
      `;
    }

    const emails: EmailRecord[] = [];
    for await (const row of query) {
      emails.push({
        id: row.id,
        recipient: row.recipient,
        subject: row.subject,
        template: row.template,
        status: row.status,
        deliveredAt: row.delivered_at,
        openedAt: row.opened_at,
        clickedAt: row.clicked_at,
        createdAt: row.created_at,
      });
    }

    return { emails };
  }
);
Testing locally
Start your backend (make sure Docker is running first):
encore run
Your API is now running locally. Open the local development dashboard at http://localhost:9400 to explore your API.
Send a welcome email
curl -X POST http://localhost:4000/email/welcome \
  -H "Content-Type: application/json" \
  -d '{
    "to": "[email protected]",
    "name": "John Doe",
    "loginUrl": "https://yourapp.com/login"
  }'
Note: Replace [email protected] with the email address you used to sign up for Resend, or any email address on your verified domain.
Response:
{
  "id": "email-1234567890-abc",
  "resendId": "re_ABC123xyz"
}
Send a password reset email
curl -X POST http://localhost:4000/email/password-reset \
  -H "Content-Type: application/json" \
  -d '{
    "to": "[email protected]",
    "name": "John Doe",
    "resetUrl": "https://yourapp.com/reset/token123"
  }'
List sent emails
# All emails
curl http://localhost:4000/email/list

# For specific recipient
curl "http://localhost:4000/email/[email protected]"
Exploring the local dashboard
The local development dashboard at http://localhost:9400 provides:
- API Explorer - Test email sending interactively
- Service Catalog - Auto-generated API documentation
- Architecture Diagram - Visual representation of your services
- Distributed Tracing - See the full flow including Resend API calls
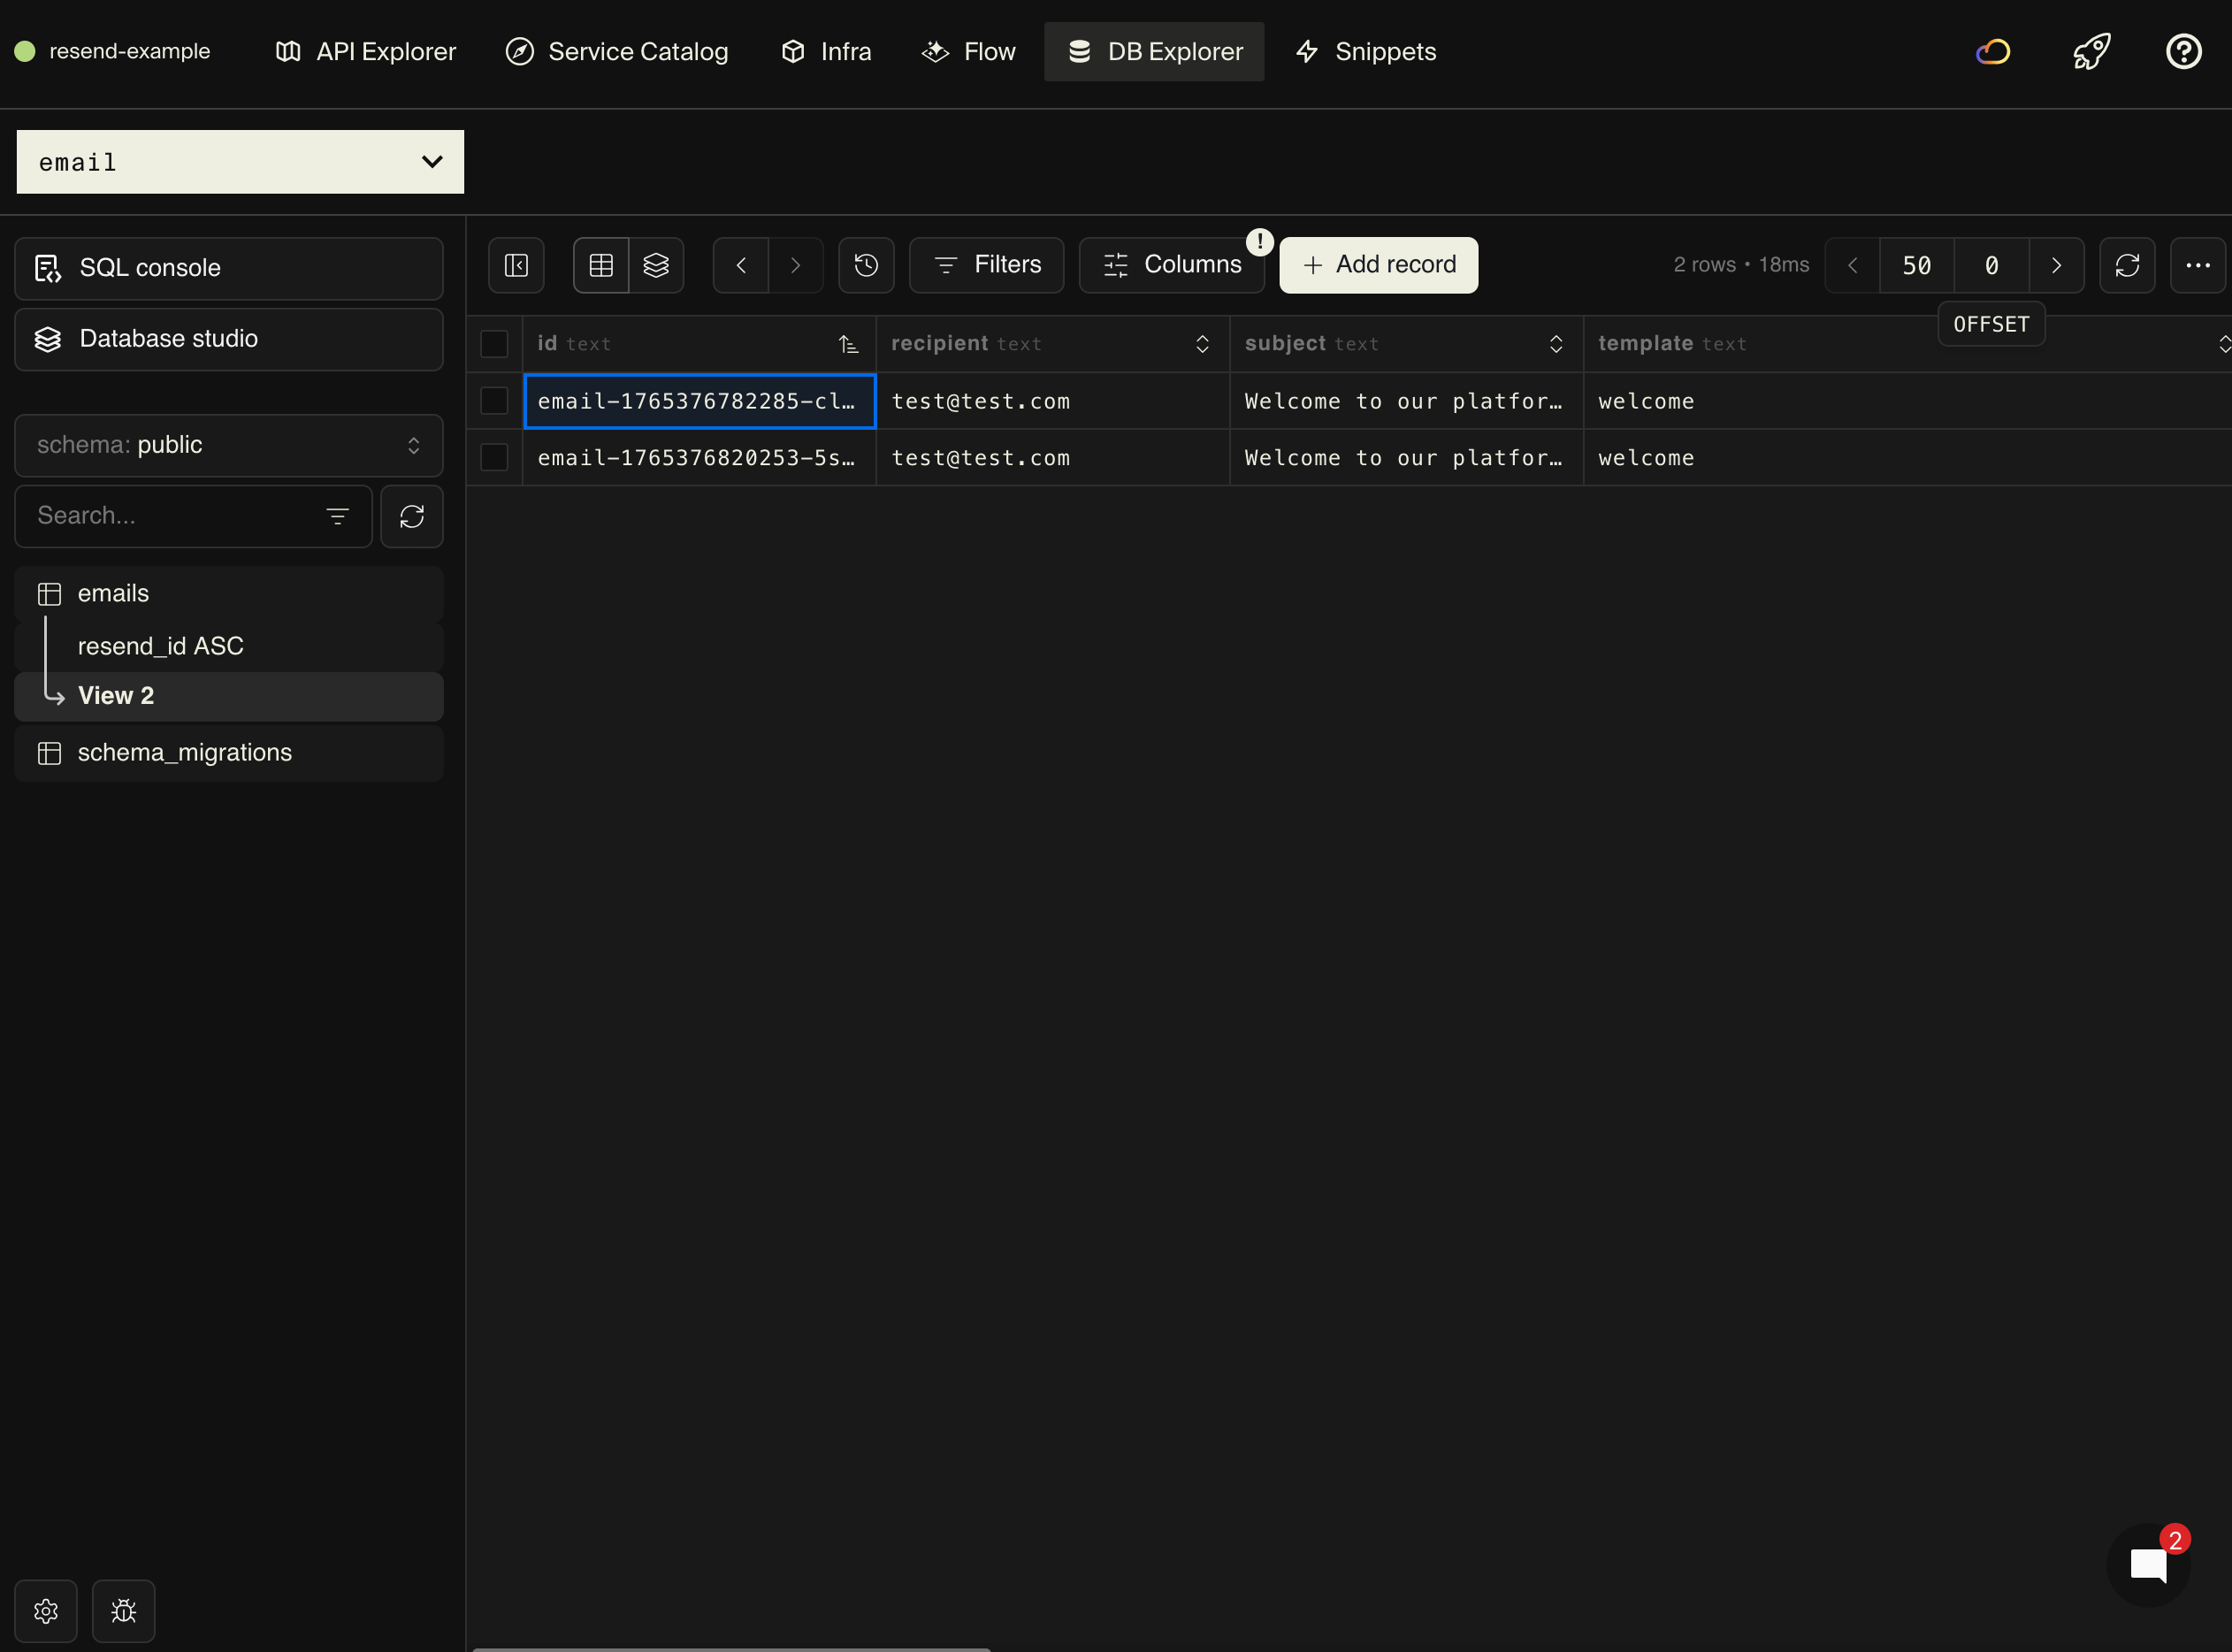
- Database Explorer - Browse email history, delivery status, and engagement
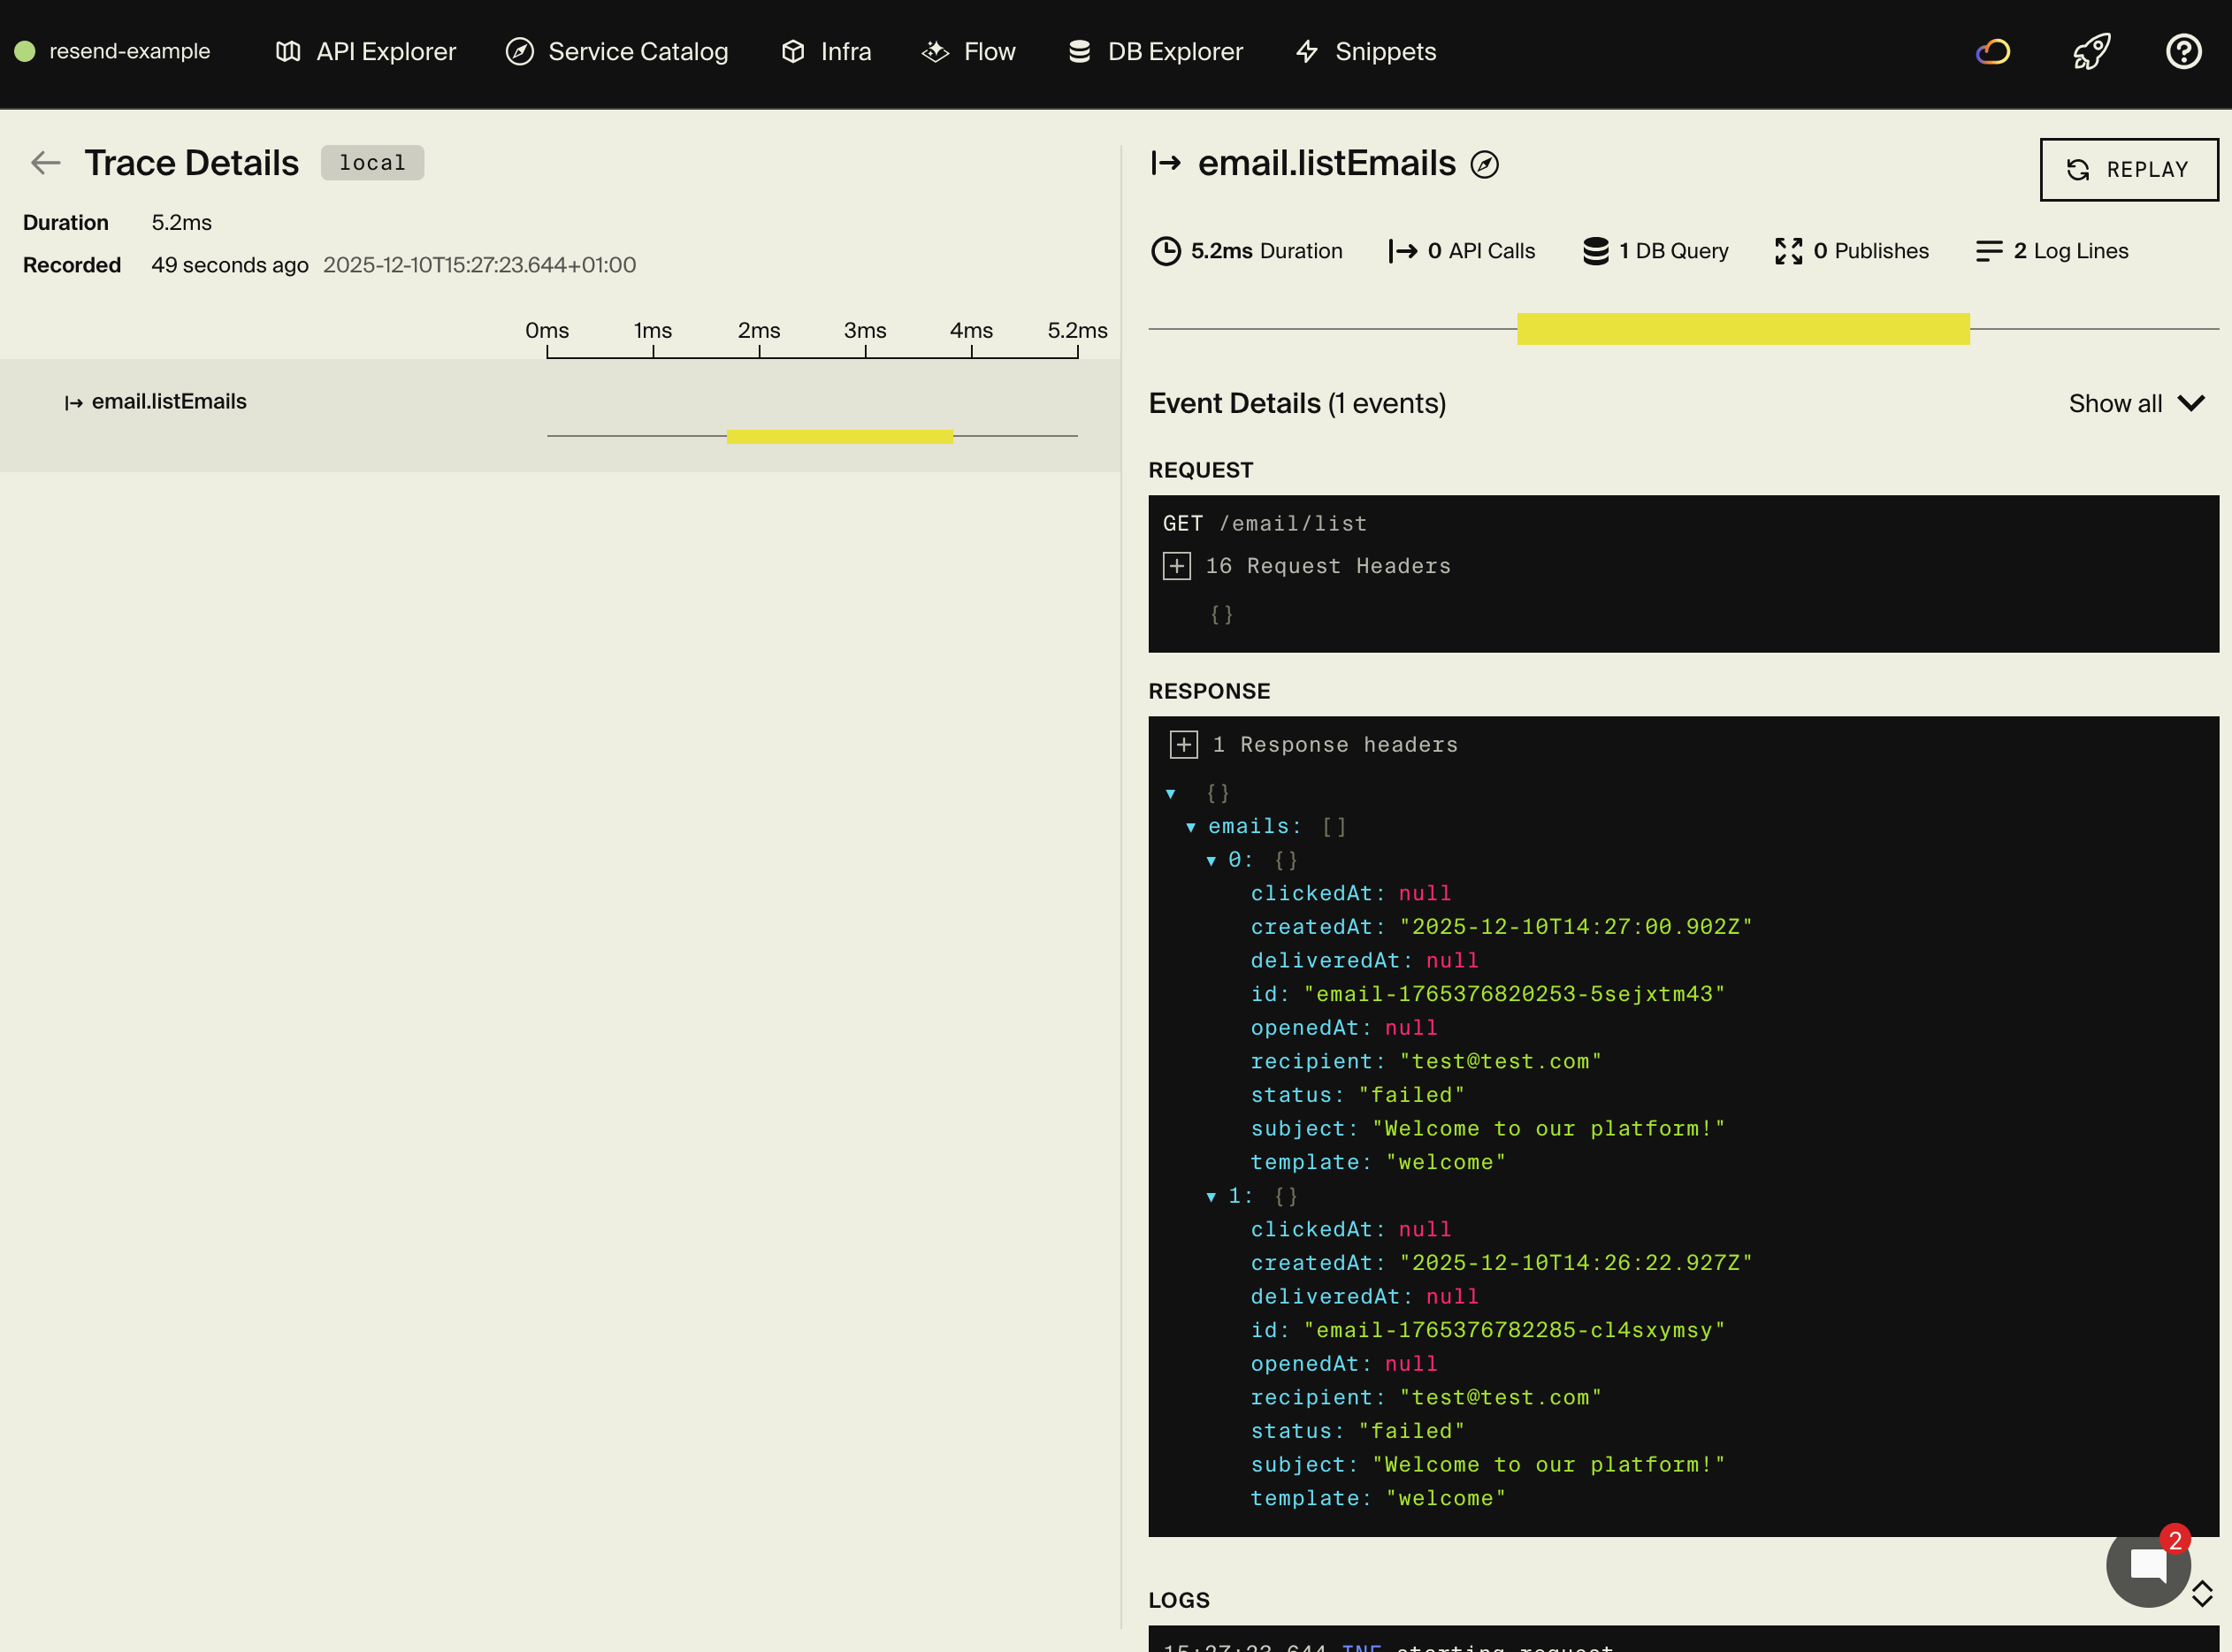
The database explorer shows all your email records with delivery tracking:
Advanced features
Additional email fields
Resend supports many additional email fields beyond the basics. Here's how to use CC, BCC, reply-to addresses, tags, and headers:
export const sendAdvancedEmail = api(
  { expose: true, method: "POST", path: "/email/advanced" },
  async (req: {
    to: string[];
    subject: string;
    html: string;
  }) => {
    const { data, error } = await resend.emails.send({
      from: "[email protected]",
      to: req.to,
      subject: req.subject,
      html: req.html,
      // CC and BCC recipients
      cc: ["[email protected]"],
      bcc: ["[email protected]"],
      // Reply-to address (different from 'from')
      replyTo: "[email protected]",
      // Tags for filtering and analytics
      tags: [
        { name: "category", value: "transactional" },
        { name: "priority", value: "high" },
      ],
      // Custom headers
      headers: {
        "X-Entity-Ref-ID": "123456",
      },
    });

    if (error) {
      throw new Error(`Failed to send email: ${error.message}`);
    }

    return { id: data!.id };
  }
);
Use cases for these fields:
- CC/BCC: Copy managers on customer communications, archive all emails to a compliance inbox
- Reply-To: Direct replies to support@ even when sending from noreply@ or automated systems
- Tags: Filter and analyze emails in Resend dashboard by campaign, user segment, or priority
- Headers: Add custom tracking IDs, reference numbers, or metadata for your internal systems
Batch emails
Send to multiple recipients efficiently:
export const sendBatch = api(
  { expose: true, method: "POST", path: "/email/batch" },
  async (req: {
    recipients: Array<{ email: string; name: string }>;
    subject: string;
    html: string;
  }) => {
    const emails = req.recipients.map((recipient) => ({
      from: "[email protected]",
      to: recipient.email,
      subject: req.subject,
      html: req.html,
    }));

    const { data, error } = await resend.batch.send(emails);

    if (error) {
      throw new Error(`Batch send failed: ${error.message}`);
    }

    // Store each email in database
    for (let i = 0; i < data!.data.length; i++) {
      const emailId = `email-${Date.now()}-${i}`;
      await db.exec`
        INSERT INTO emails (id, resend_id, recipient, subject, status)
        VALUES (
          ${emailId},
          ${data!.data[i].id},
          ${req.recipients[i].email},
          ${req.subject},
          ${"sent"}
        )
      `;
    }

    return { sent: data!.data.length };
  }
);
Email with attachments
Send emails with file attachments:
export const sendWithAttachment = api(
  { expose: true, method: "POST", path: "/email/attachment" },
  async (req: {
    to: string;
    subject: string;
    html: string;
    attachment: {
      filename: string;
      content: string; // Base64 encoded
    };
  }) => {
    const { data, error } = await resend.emails.send({
      from: "[email protected]",
      to: req.to,
      subject: req.subject,
      html: req.html,
      attachments: [
        {
          filename: req.attachment.filename,
          content: Buffer.from(req.attachment.content, "base64"),
        },
      ],
    });

    if (error) {
      throw new Error(`Failed to send email: ${error.message}`);
    }

    return { id: data!.id };
  }
);
Scheduled emails
Use Encore's cron jobs to send scheduled emails:
import { CronJob } from "encore.dev/cron";

const _ = new CronJob("weekly-digest", {
  title: "Send weekly digest emails",
  every: "0 9 * * 1", // Every Monday at 9 AM
  endpoint: sendWeeklyDigest,
});

export const sendWeeklyDigest = api(
  { expose: false },
  async (): Promise<void> => {
    // Fetch users who want weekly digests
    // Send digest email to each user
    log.info("Sending weekly digest emails");
  }
);
Email analytics
Track email performance:
interface EmailAnalyticsResponse {
  totalSent: number;
  delivered: number;
  opened: number;
  clicked: number;
  bounced: number;
  deliveryRate: number;
  openRate: number;
  clickRate: number;
}

export const getAnalytics = api(
  { expose: true, method: "GET", path: "/email/analytics" },
  async (): Promise<EmailAnalyticsResponse> => {
    const stats = await db.queryRow<{
      total: number;
      delivered: number;
      opened: number;
      clicked: number;
      bounced: number;
    }>`
      SELECT
        COUNT(*) as total,
        COUNT(CASE WHEN status = 'delivered' THEN 1 END) as delivered,
        COUNT(CASE WHEN opened_at IS NOT NULL THEN 1 END) as opened,
        COUNT(CASE WHEN clicked_at IS NOT NULL THEN 1 END) as clicked,
        COUNT(CASE WHEN status = 'bounced' THEN 1 END) as bounced
      FROM emails
      WHERE created_at > NOW() - INTERVAL '30 days'
    `;

    const total = Number(stats!.total);
    const delivered = Number(stats!.delivered);
    const opened = Number(stats!.opened);
    const clicked = Number(stats!.clicked);

    return {
      totalSent: total,
      delivered,
      opened,
      clicked,
      bounced: Number(stats!.bounced),
      deliveryRate: delivered / total,
      openRate: opened / delivered,
      clickRate: clicked / opened,
    };
  }
);
Use cases
User onboarding flow
Send a series of onboarding emails:
export const startOnboarding = api(
  { expose: true, method: "POST", path: "/onboarding/start" },
  async (req: { email: string; name: string }) => {
    // Send immediate welcome email
    await sendWelcomeEmail({
      to: req.email,
      name: req.name,
    });

    // Schedule follow-up emails using your job queue
    // Day 1: Getting started tips
    // Day 3: Feature highlights
    // Day 7: Success stories

    return { started: true };
  }
);
Order confirmations
Send transactional receipts:
export const sendOrderConfirmation = api(
  { expose: true, method: "POST", path: "/email/order" },
  async (req: {
    to: string;
    orderId: string;
    items: Array<{ name: string; price: number }>;
    total: number;
  }) => {
    const html = render(
      OrderConfirmationEmail({
        orderId: req.orderId,
        items: req.items,
        total: req.total,
      })
    );

    const { data } = await resend.emails.send({
      from: "[email protected]",
      to: req.to,
      subject: `Order confirmation - ${req.orderId}`,
      html,
    });

    return { sent: true, id: data!.id };
  }
);
Notification digests
Aggregate notifications into daily/weekly emails:
export const sendDigest = api(
  { expose: true, method: "POST", path: "/email/digest" },
  async (req: {
    to: string;
    notifications: Array<{ title: string; message: string; url: string }>;
  }) => {
    const html = render(
      DigestEmail({
        notifications: req.notifications,
      })
    );

    await resend.emails.send({
      from: "[email protected]",
      to: req.to,
      subject: `You have ${req.notifications.length} new notifications`,
      html,
    });

    return { sent: true };
  }
);
Frontend integration
From your frontend, trigger email sends:
// Example React component
import { useState } from "react";

function PasswordResetForm() {
  const [email, setEmail] = useState("");
  const [sent, setSent] = useState(false);

  const handleSubmit = async (e: React.FormEvent) => {
    e.preventDefault();

    await fetch("http://localhost:4000/email/password-reset", {
      method: "POST",
      headers: { "Content-Type": "application/json" },
      body: JSON.stringify({
        to: email,
        name: "User", // Get from your user database
        resetUrl: `https://yourapp.com/reset/${generateToken()}`,
      }),
    });

    setSent(true);
  };

  if (sent) {
    return <p>Check your email for reset instructions!</p>;
  }

  return (
    <form onSubmit={handleSubmit}>
      <input
        type="email"
        value={email}
        onChange={(e) => setEmail(e.target.value)}
        placeholder="Enter your email"
      />
      <button type="submit">Reset Password</button>
    </form>
  );
}
Deployment
Self-hosting
See the self-hosting instructions for how to use encore build docker to create a Docker image and configure it.
Encore Cloud Platform
Deploy your application using git push encore:
git add -A .
git commit -m "Add Resend email functionality"
git push encore
Set your production secret:
encore secret set --prod ResendApiKey
Note: Encore Cloud is great for prototyping and development with fair use limits. For production workloads, you can connect your AWS or GCP account and Encore will provision infrastructure directly in your cloud account.
Next steps
- Set up domain verification for better deliverability
- Build more React Email templates for your use cases
- Configure webhooks for delivery tracking
- Add unsubscribe links for compliance
- Monitor email analytics in the Resend dashboard
- Implement email scheduling for campaigns
If you found this tutorial helpful, consider starring Encore on GitHub to help others discover it.
Related Articles

 Ivan Cernja
 Ivan Cernja
 Ivan Cernja