Clerk handles user authentication as a managed service: sign-in UI, session management, OAuth, organizations, and webhooks. You add it to your frontend with a few components and get a JWT you can verify on the backend.
In this tutorial we'll wire Clerk up with Encore.ts so you get session verification on protected endpoints, a PostgreSQL database for user preferences, and type-safe API clients for your frontend. The backend is about 5 files.
You can find the complete source code in the example repo on GitHub.
Want to jump straight to a running app? Clone this starter and deploy it to your own cloud.
Setup
Install Encore if you haven't already, then create a new app:
# macOS
brew install encoredev/tap/encore

# Linux
curl -L https://encore.dev/install.sh | bash

# Windows
iwr https://encore.dev/install.ps1 | iex
encore app create clerk-app --example=ts/hello-world
cd clerk-app
npm install @clerk/backend
You'll also need a Clerk account. Sign up at clerk.com, create an application, and grab your secret key from API Keys in the dashboard.
Clerk config
Encore stores sensitive values like API keys outside your code using secrets management. The secret() function creates a reference to a value you set through the CLI, and Encore injects it at runtime. Store your Clerk secret key (from the Clerk Dashboard under API Keys):
encore secret set --type dev,local,pr,production ClerkSecretKey
Encore applications are organized into services, each defined by an encore.service.ts file. Services are independent units that can be deployed together or separately. Create an auth service and configure the Clerk client:
// auth/encore.service.ts
import { Service } from "encore.dev/service";

export default new Service("auth");
// auth/clerk.ts
import { createClerkClient } from "@clerk/backend";
import { secret } from "encore.dev/config";

// secret() references a value stored outside your code.
// Encore injects it at runtime, both locally and in production.
const clerkSecretKey = secret("ClerkSecretKey");

export const clerk = createClerkClient({
  secretKey: clerkSecretKey(),
});
Auth handler
Encore has a built-in auth handler pattern that validates incoming requests before they reach your endpoints. The handler below verifies Clerk session tokens from the Authorization header and makes the user's data available to any protected endpoint via getAuthData():
// auth/handler.ts
import { APIError, Gateway, Header } from "encore.dev/api";
import { authHandler } from "encore.dev/auth";
import { verifyToken } from "@clerk/backend";
import { secret } from "encore.dev/config";
import { clerk } from "./clerk";

const clerkSecretKey = secret("ClerkSecretKey");

// AuthParams defines what Encore extracts from incoming requests.
interface AuthParams {
  authorization: Header<"Authorization">;
}

// AuthData is what protected endpoints receive via getAuthData().
export interface AuthData {
  userID: string;
  email: string;
  firstName?: string;
  lastName?: string;
}

// The auth handler runs before any endpoint with auth: true.
// It verifies the Clerk JWT and returns user data.
const handler = authHandler<AuthParams, AuthData>(async (params) => {
  const token = params.authorization?.replace("Bearer ", "");

  if (!token) {
    throw APIError.unauthenticated("missing session token");
  }

  try {
    // Verify the JWT with Clerk's secret key
    const payload = await verifyToken(token, {
      secretKey: clerkSecretKey(),
    });

    const userId = payload.sub;
    if (!userId) {
      throw new Error("No user ID in token");
    }

    // Fetch full user details from Clerk
    const user = await clerk.users.getUser(userId);

    return {
      userID: user.id,
      email: user.emailAddresses.find((e) => e.id === user.primaryEmailAddressId)
        ?.emailAddress || "",
      firstName: user.firstName || undefined,
      lastName: user.lastName || undefined,
    };
  } catch (err) {
    throw APIError.unauthenticated("invalid session token");
  }
});

// The gateway applies this auth handler to all incoming requests.
export const gateway = new Gateway({ authHandler: handler });
Database
Clerk handles authentication, but you'll often want to store additional user data in your own database. With Encore, you create a database by declaring an SQLDatabase instance and pointing it at a migrations folder. Encore provisions PostgreSQL automatically when you run encore run (using Docker locally, and managed databases like RDS or Cloud SQL when deployed to the cloud).
Create a separate user service for profile data:
// user/encore.service.ts
import { Service } from "encore.dev/service";

export default new Service("user");
// user/db.ts
import { SQLDatabase } from "encore.dev/storage/sqldb";

// Encore provisions and manages this database automatically.
// Migrations in ./migrations are applied on startup.
export const db = new SQLDatabase("user", {
  migrations: "./migrations",
});
-- user/migrations/1_create_user_profile.up.sql
CREATE TABLE user_profile (
  clerk_user_id TEXT PRIMARY KEY,
  theme TEXT DEFAULT 'light',
  notifications BOOLEAN DEFAULT true,
  bio TEXT,
  created_at TIMESTAMP NOT NULL DEFAULT CURRENT_TIMESTAMP,
  updated_at TIMESTAMP NOT NULL DEFAULT CURRENT_TIMESTAMP
);
Protected endpoints
Any endpoint with auth: true requires a valid Clerk session. Encore runs the auth handler automatically before the endpoint executes, and getAuthData() gives you type-safe access to the user data returned by the handler:
// user/profile.ts
import { api } from "encore.dev/api";
import { getAuthData } from "~encore/auth";
import { db } from "./db";

interface ProfileResponse {
  userId: string;
  email: string;
  firstName?: string;
  lastName?: string;
  theme?: string;
  notifications?: boolean;
  bio?: string;
}

// auth: true means Encore runs the auth handler before this endpoint.
// getAuthData() returns the AuthData from the handler (userID, email, etc).
export const getProfile = api(
  { expose: true, method: "GET", path: "/user/profile", auth: true },
  async (): Promise<ProfileResponse> => {
    const auth = getAuthData()!;

    // Combine Clerk user data with local preferences from our database
    let profile = await db.queryRow<{
      theme: string;
      notifications: boolean;
      bio: string | null;
    }>`
      SELECT theme, notifications, bio
      FROM user_profile
      WHERE clerk_user_id = ${auth.userID}
    `;

    // Create profile with defaults on first access
    if (!profile) {
      await db.exec`
        INSERT INTO user_profile (clerk_user_id, theme, notifications)
        VALUES (${auth.userID}, 'light', true)
      `;
      profile = { theme: "light", notifications: true, bio: null };
    }

    return {
      userId: auth.userID,
      email: auth.email,
      firstName: auth.firstName,
      lastName: auth.lastName,
      theme: profile.theme,
      notifications: profile.notifications,
      bio: profile.bio || undefined,
    };
  }
);

interface UpdatePreferencesRequest {
  theme?: "light" | "dark";
  notifications?: boolean;
  bio?: string;
}

// Upsert user preferences (create or update if already exists)
export const updatePreferences = api(
  { expose: true, method: "POST", path: "/user/preferences", auth: true },
  async (req: UpdatePreferencesRequest): Promise<{ success: boolean }> => {
    const auth = getAuthData()!;

    await db.exec`
      INSERT INTO user_profile (clerk_user_id, theme, notifications, bio, updated_at)
      VALUES (${auth.userID}, ${req.theme || "light"}, ${req.notifications ?? true}, ${req.bio || null}, NOW())
      ON CONFLICT (clerk_user_id)
      DO UPDATE SET
        theme = COALESCE(${req.theme}, user_profile.theme),
        notifications = COALESCE(${req.notifications}, user_profile.notifications),
        bio = COALESCE(${req.bio}, user_profile.bio),
        updated_at = NOW()
    `;

    return { success: true };
  }
);
Testing
Start the backend with encore run (Docker needs to be running for the local PostgreSQL instance):
encore run
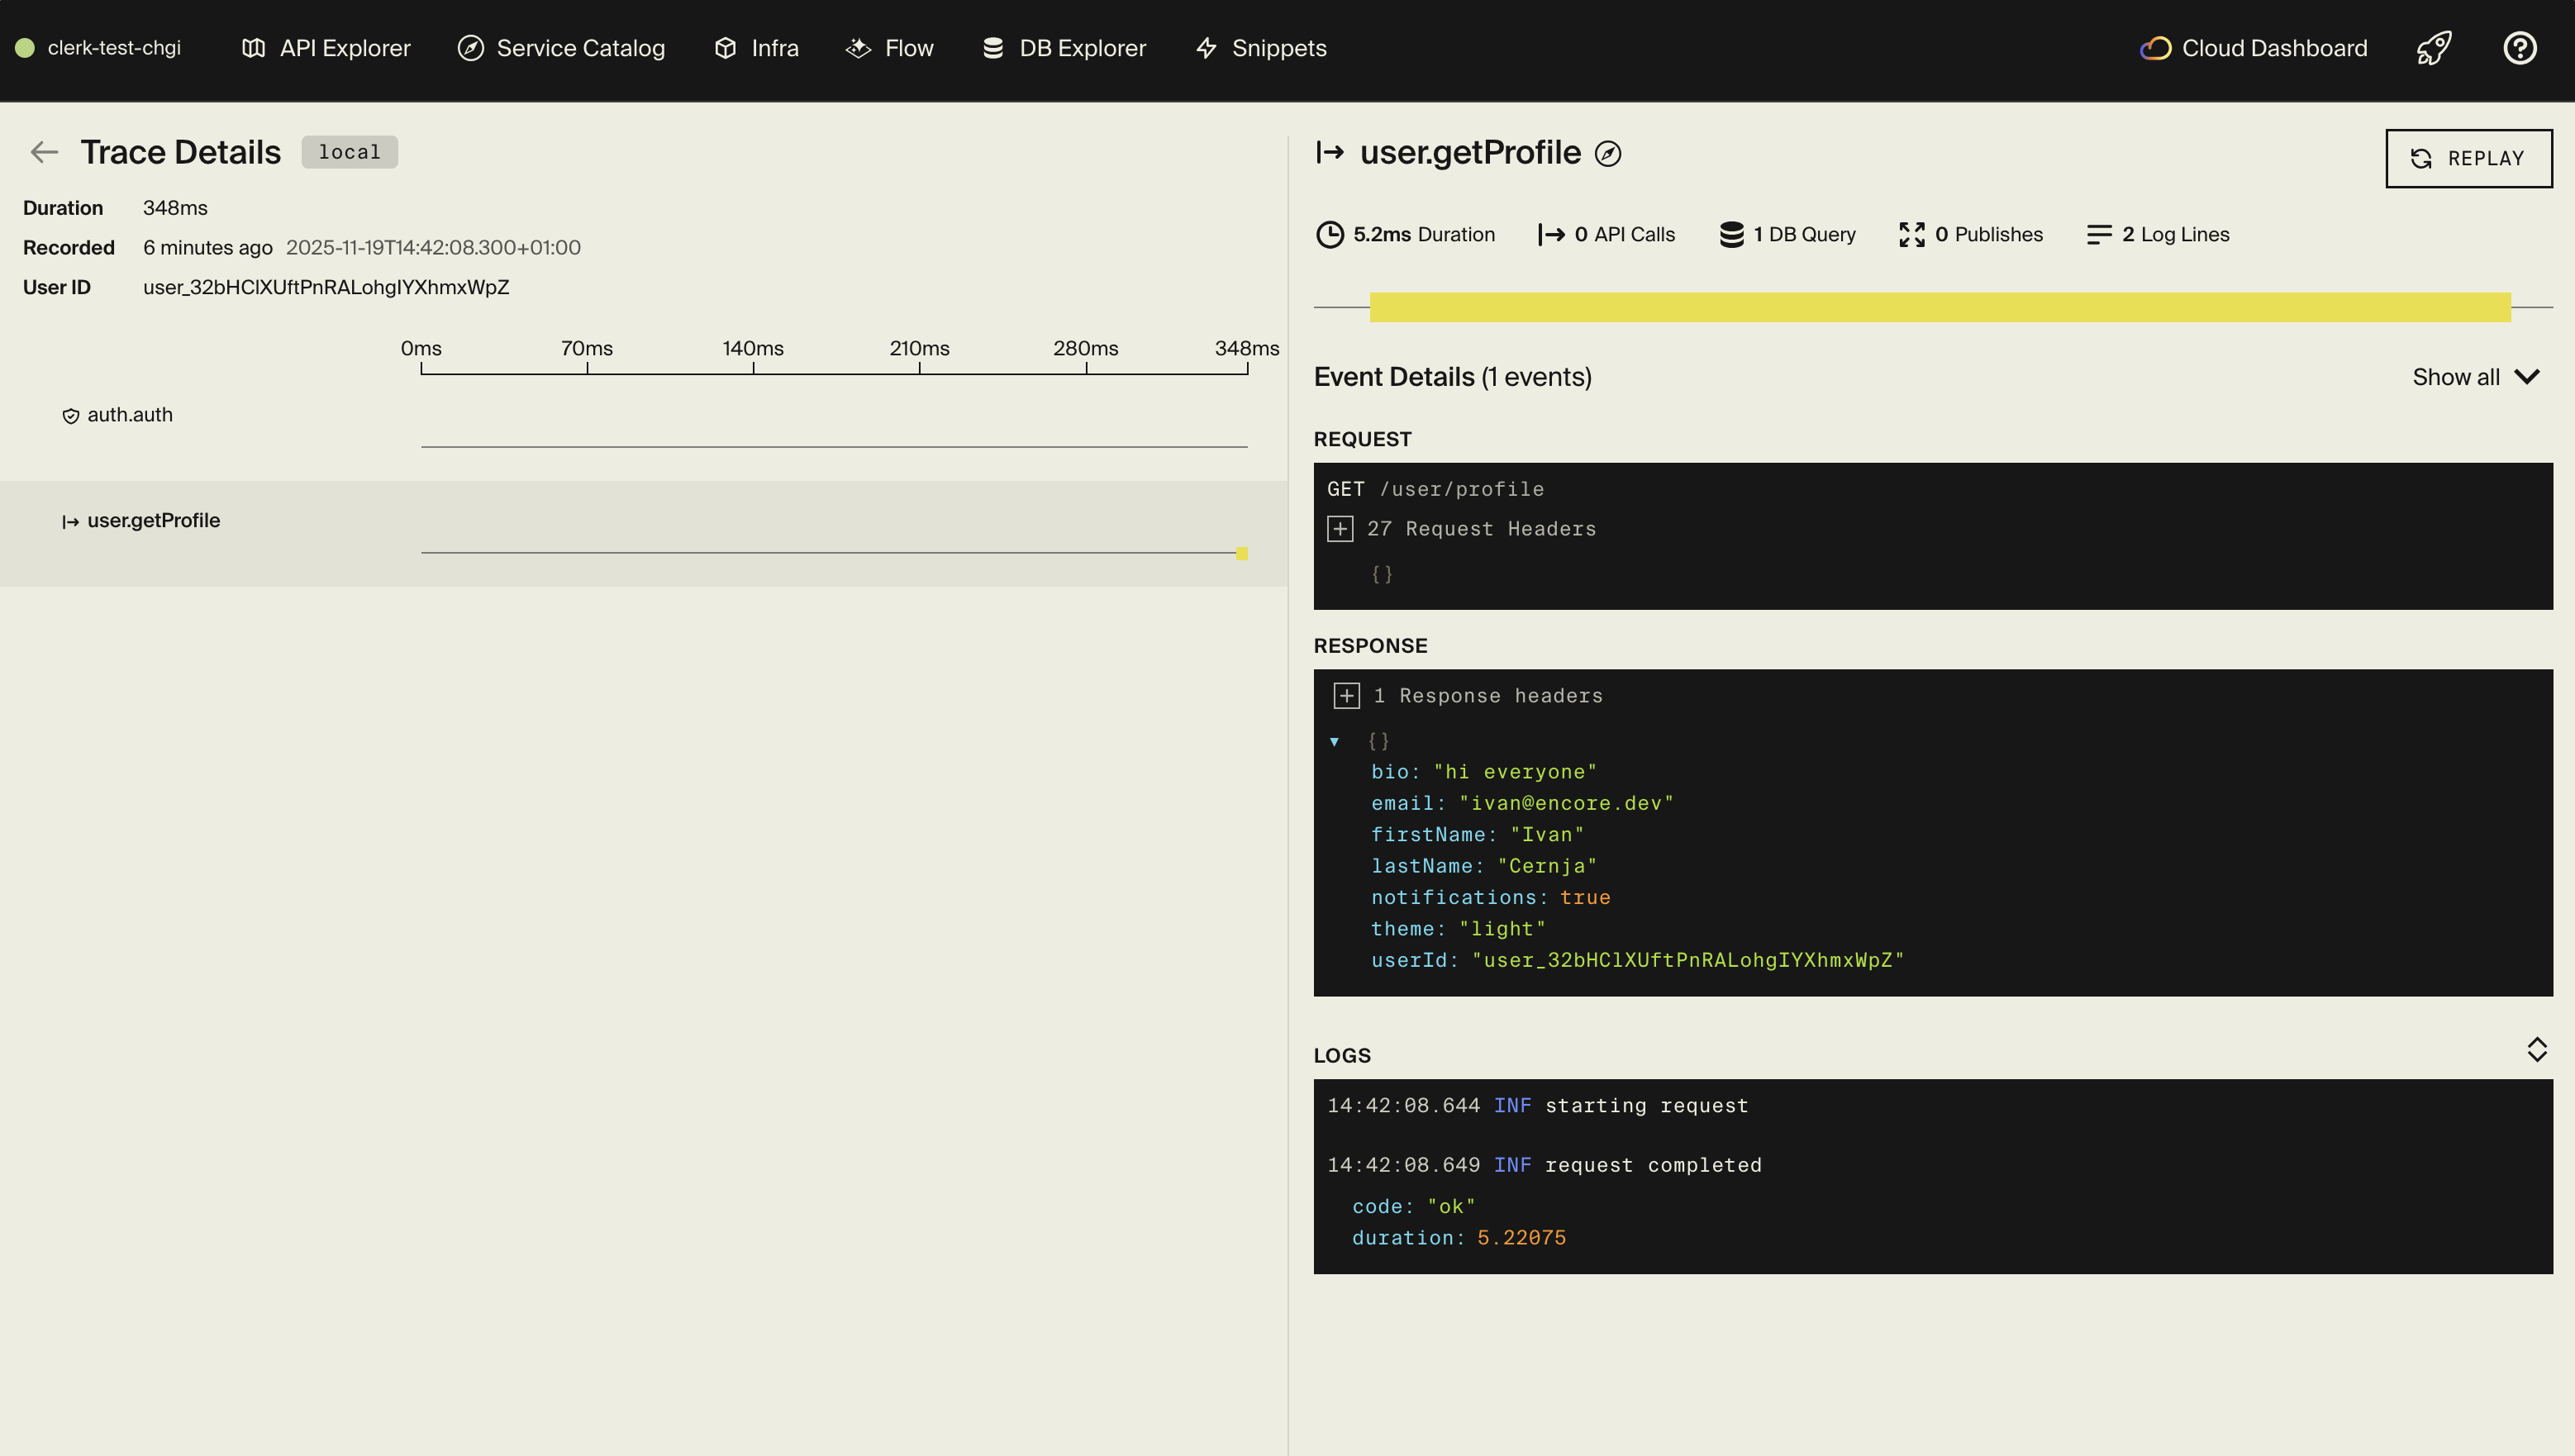
Encore starts PostgreSQL, runs migrations, and serves the API on localhost:4000. You also get a local dashboard at localhost:9400 with API docs, distributed tracing, and a database explorer.
To test protected endpoints, you need a valid Clerk session token. The quickest way is to set up a frontend with Clerk's React SDK, sign in, and get the token with await getToken() from useAuth().
curl http://localhost:4000/user/profile \
  -H "Authorization: Bearer <your-clerk-session-token>"
curl -X POST http://localhost:4000/user/preferences \
  -H "Authorization: Bearer <your-clerk-session-token>" \
  -H "Content-Type: application/json" \
  -d '{"theme":"dark","notifications":true}'
Every request generates a trace in the dashboard showing the Clerk token verification, database queries, and endpoint execution.
Frontend integration
Encore can generate a type-safe TypeScript client that matches your backend API:
encore gen client frontend/src/lib/client.ts
If your frontend runs on a different origin, configure CORS in encore.app to allow credentials:
{
  "id": "",
  "global_cors": {
    "allow_origins_with_credentials": ["http://localhost:3000"]
  }
}
For a quick test frontend, Clerk's browser SDK works with a simple HTML file that calls your Encore API with clerk.session.getToken(). For production apps, use Clerk's React or Next.js SDK. See the frontend integration docs for more details.
Deployment
Push your code to deploy. Encore builds the application, provisions the database, and runs migrations:
git add .
git commit -m "Add Clerk authentication"
git push encore
Set the production secret before your first deploy:
encore secret set --type production ClerkSecretKey
Encore Cloud works well for prototyping and smaller workloads with fair use limits. For production, you can connect your AWS or GCP account and let Encore provision managed infrastructure in your cloud, or self-host with encore build docker.
Organizations
Clerk supports organizations for multi-tenant apps. The organization ID and role are available in the JWT payload, so you can extend the auth handler to include them:
// In your auth handler, after verifyToken:
const orgId = payload.org_id as string | undefined;
const orgRole = payload.org_role as string | undefined;

return {
  userID: user.id,
  email: /* ... */,
  organizationID: orgId || undefined,
  role: orgRole || undefined,
};
Then check organization membership in your endpoints:
const auth = getAuthData()!;
if (!auth.organizationID) {
  throw APIError.permissionDenied("not in an organization");
}
Enable organizations in the Clerk Dashboard under Organizations to get started.
Check out the complete example on GitHub for a working implementation, and the Clerk docs for more on webhooks, social login, MFA, and custom session claims.
Related Articles

 Ivan Cernja
 Ivan Cernja
 Ivan Cernja