Building a Slack bot
Learn how to build a Slack bot with an Encore backend
In this tutorial you will create a Slack bot that brings the greatness of the cowsay utility to Slack!

This is the end result:
Project
Please note
To make it easier to follow along, we've laid out a trail of croissants to guide your way. Whenever you see a 🥐 it means there's something for you to do.
1. Create your Encore application
🥐 Create a new Encore application by running encore app create and select Empty app as the template.
Take a note of your app id, we'll need it in the next step.
2. Create a Slack app
🥐 The first step is to create a new Slack app:
- Head over to Slack's API site and create a new app.
- When prompted, choose to create the app from an app manifest.
- Choose a workspace to install the app in.
🥐 Enter the following manifest (replace $APP_ID in the URL below with your app id from above):
_metadata:
  major_version: 1
display_information:
  name: Encore Bot
  description: Cowsay for the cloud age.
features:
  slash_commands:
    - command: /cowsay
      # Replace $APP_ID below
      url: https://staging-$APP_ID.encr.app/cowsay
      description: Say things with a flair!
      usage_hint: your message here
      should_escape: false
  bot_user:
    display_name: encore-bot
    always_online: true
oauth_config:
  scopes:
    bot:
      - commands
      - chat:write
      - chat:write.public
settings:
  org_deploy_enabled: false
  socket_mode_enabled: false
  token_rotation_enabled: false
Once created, we're ready to move on with implementing our Encore endpoint!
3. Implement the Slack endpoint
Since Slack sends custom HTTP headers that we need to pay attention to, we're going to use a raw endpoint in Encore. For more information on this check out Slack's documentation on Enabling interactivity with Slash Commands.
🥐 In your Encore app, create a new directory named slack and create a file slack/slack.ts with the following contents:
import { api } from "encore.dev/api";
import type { IncomingMessage } from "node:http";

// cowart is the formatting string for printing the cow art.
const cowart = (msg: string) => `Moo! ${msg}
`;

export const cowsay = api.raw(
  { expose: true, path: "/cowsay", method: "*" },
  async (req, resp) => {
    const body = await getBody(req);

    const text = new URLSearchParams(body).get("text");
    const msg = cowart(text || "Moo!");
    resp.setHeader("Content-Type", "application/json");
    resp.end(JSON.stringify({ response_type: "in_channel", text: msg }));
  },
);

// Extract the body from an incoming request.
function getBody(req: IncomingMessage): Promise<string> {
  return new Promise((resolve) => {
    const bodyParts: any[] = [];
    req
      .on("data", (chunk) => {
        bodyParts.push(chunk);
      })
      .on("end", () => {
        resolve(Buffer.concat(bodyParts).toString());
      });
  });
}
Let's try it out locally.
🥐 Start your app with encore run and then call it in another terminal:
$ curl http://localhost:4000/cowsay -d 'text=Eat your greens!'{"response_type":"in_channel","text":"Moo! Eat your greens!"}Looks great!
🥐 Next, let's deploy it to the cloud:
$ git add -A .$ git commit -m 'Initial commit'$ git push encoreOnce deployed, we're ready to try our Slack command!
🥐 Head over to the workspace you installed the app in and run /cowsay Hello there.
You should see something like this:
")
And just like that we have a fully working Slack integration.
4. Secure the webhook endpoint
In order to get up and running quickly we ignored one important aspect for a production-ready Slack app: verifying that the webhook requests are actually coming from Slack. Let's do that now!
The Slack documentation covers this really well on the Verifying requests from Slack page.
In short, what we need to do is:
- Save a shared secret that Slack provides us
- Use the secret to verify that the request comes from Slack, using HMAC (Hash-based Message Authentication Code).
Save the shared secret
Let's define a secret using Encore's secrets management functionality.
🥐 Add this to your slack.ts file:
import { secret } from "encore.dev/config";

const slackSigningSecret = secret("SlackSigningSecret");
🥐 Head over to the configuration section for your Slack app (go to Your Apps → select your app → Basic Information).
🥐 Copy the Signing Secret and then run encore secret set --type prod SlackSigningSecret and paste the secret.
🥐 For development you will also want to set encore secret set --type dev,local,pr SlackSigningSecret.
You can use the same secret value or a placeholder value.
Compute the HMAC
TypeScript makes computing HMAC very straightforward, but it's still a fair amount of code.
🥐 Add a few more imports to your file, so that it reads:
import { createHmac, timingSafeEqual } from "node:crypto";
import type { IncomingHttpHeaders } from "http";
🥐 Next, we'll add the verifySignature function:
// Verifies the signature of an incoming request from Slack.
const verifySignature = async function (
  body: string,
  headers: IncomingHttpHeaders,
) {
  const requestTimestampSec = parseInt(
    headers["x-slack-request-timestamp"] as string,
  );
  const signature = headers["x-slack-signature"] as string;
  if (Number.isNaN(requestTimestampSec)) {
    throw new Error(
      `Failed to verify authenticity: header x-slack-request-timestamp did not have the expected type (${requestTimestampSec})`,
    );
  }

  // Calculate time-dependent values
  const nowMs = Date.now();
  const requestTimestampMaxDeltaMin = 5;
  const fiveMinutesAgoSec =
    Math.floor(nowMs / 1000) - 60 * requestTimestampMaxDeltaMin;

  // Enforce verification rules

  // Rule 1: Check staleness
  if (requestTimestampSec < fiveMinutesAgoSec) {
    throw new Error(
      `Failed to verify authenticity: x-slack-request-timestamp must differ from system time by no more than ${requestTimestampMaxDeltaMin} minutes or request is stale`,
    );
  }

  // Rule 2: Check signature
  // Separate parts of signature
  const [signatureVersion, signatureHash] = signature.split("=");
  // Only handle known versions
  if (signatureVersion !== "v0") {
    throw new Error(`Failed to verify authenticity: unknown signature version`);
  }
  // Compute our own signature hash
  const hmac = createHmac("sha256", slackSigningSecret());
  hmac.update(`${signatureVersion}:${requestTimestampSec}:${body}`);
  const ourSignatureHash = hmac.digest("hex");
  if (
    !signatureHash ||
    !timingSafeEqual(
      Buffer.from(signatureHash, "utf8"),
      Buffer.from(ourSignatureHash, "utf8"),
    )
  ) {
    throw new Error(`Failed to verify authenticity: signature mismatch`);
  }
};
We're now ready to verify the signature.
🥐 Update the cowsay function to look like this:
export const cowsay = api.raw(
  { expose: true, path: "/cowsay", method: "*" },
  async (req, resp) => {
    const body = await getBody(req);

    try {
      await verifySignature(body, req.headers);
    } catch (err) {
      const e = err as Error;
      resp.statusCode = 500;
      resp.end(e.message);
      return;
    }

    const text = new URLSearchParams(body).get("text");
    const msg = cowart(text || "Moo!");
    resp.setHeader("Content-Type", "application/json");
    resp.end(JSON.stringify({ response_type: "in_channel", text: msg }));
  },
);
5. Put it all together and deploy
Finally we're ready to put it all together.
🥐 Update the cowart like so:
const cowart = (msg: string) => `
\`\`\`
+-${"-".repeat(msg.length)}-+
| ${msg} |
+-${"-".repeat(msg.length)}-+
      \\  __n__n__
  .------\`-\\00/-'
 /  ##  ## (oo)
/ \\## __   ./
   |//YY \\|/
   |||   |||
\`\`\`
`;
🥐 Finally, let's commit our changes and deploy it:
$ git add -A .$ git commit -m 'Verify webhook requests and improve art'$ git push encore🥐 Once deployed, head back to Slack and run /cowsay Hello there.
If everything is set up correctly, you should see:
And there we go, a production-ready Slack bot in less than 100 lines of code.
Well done!
Celebrate with fireworks
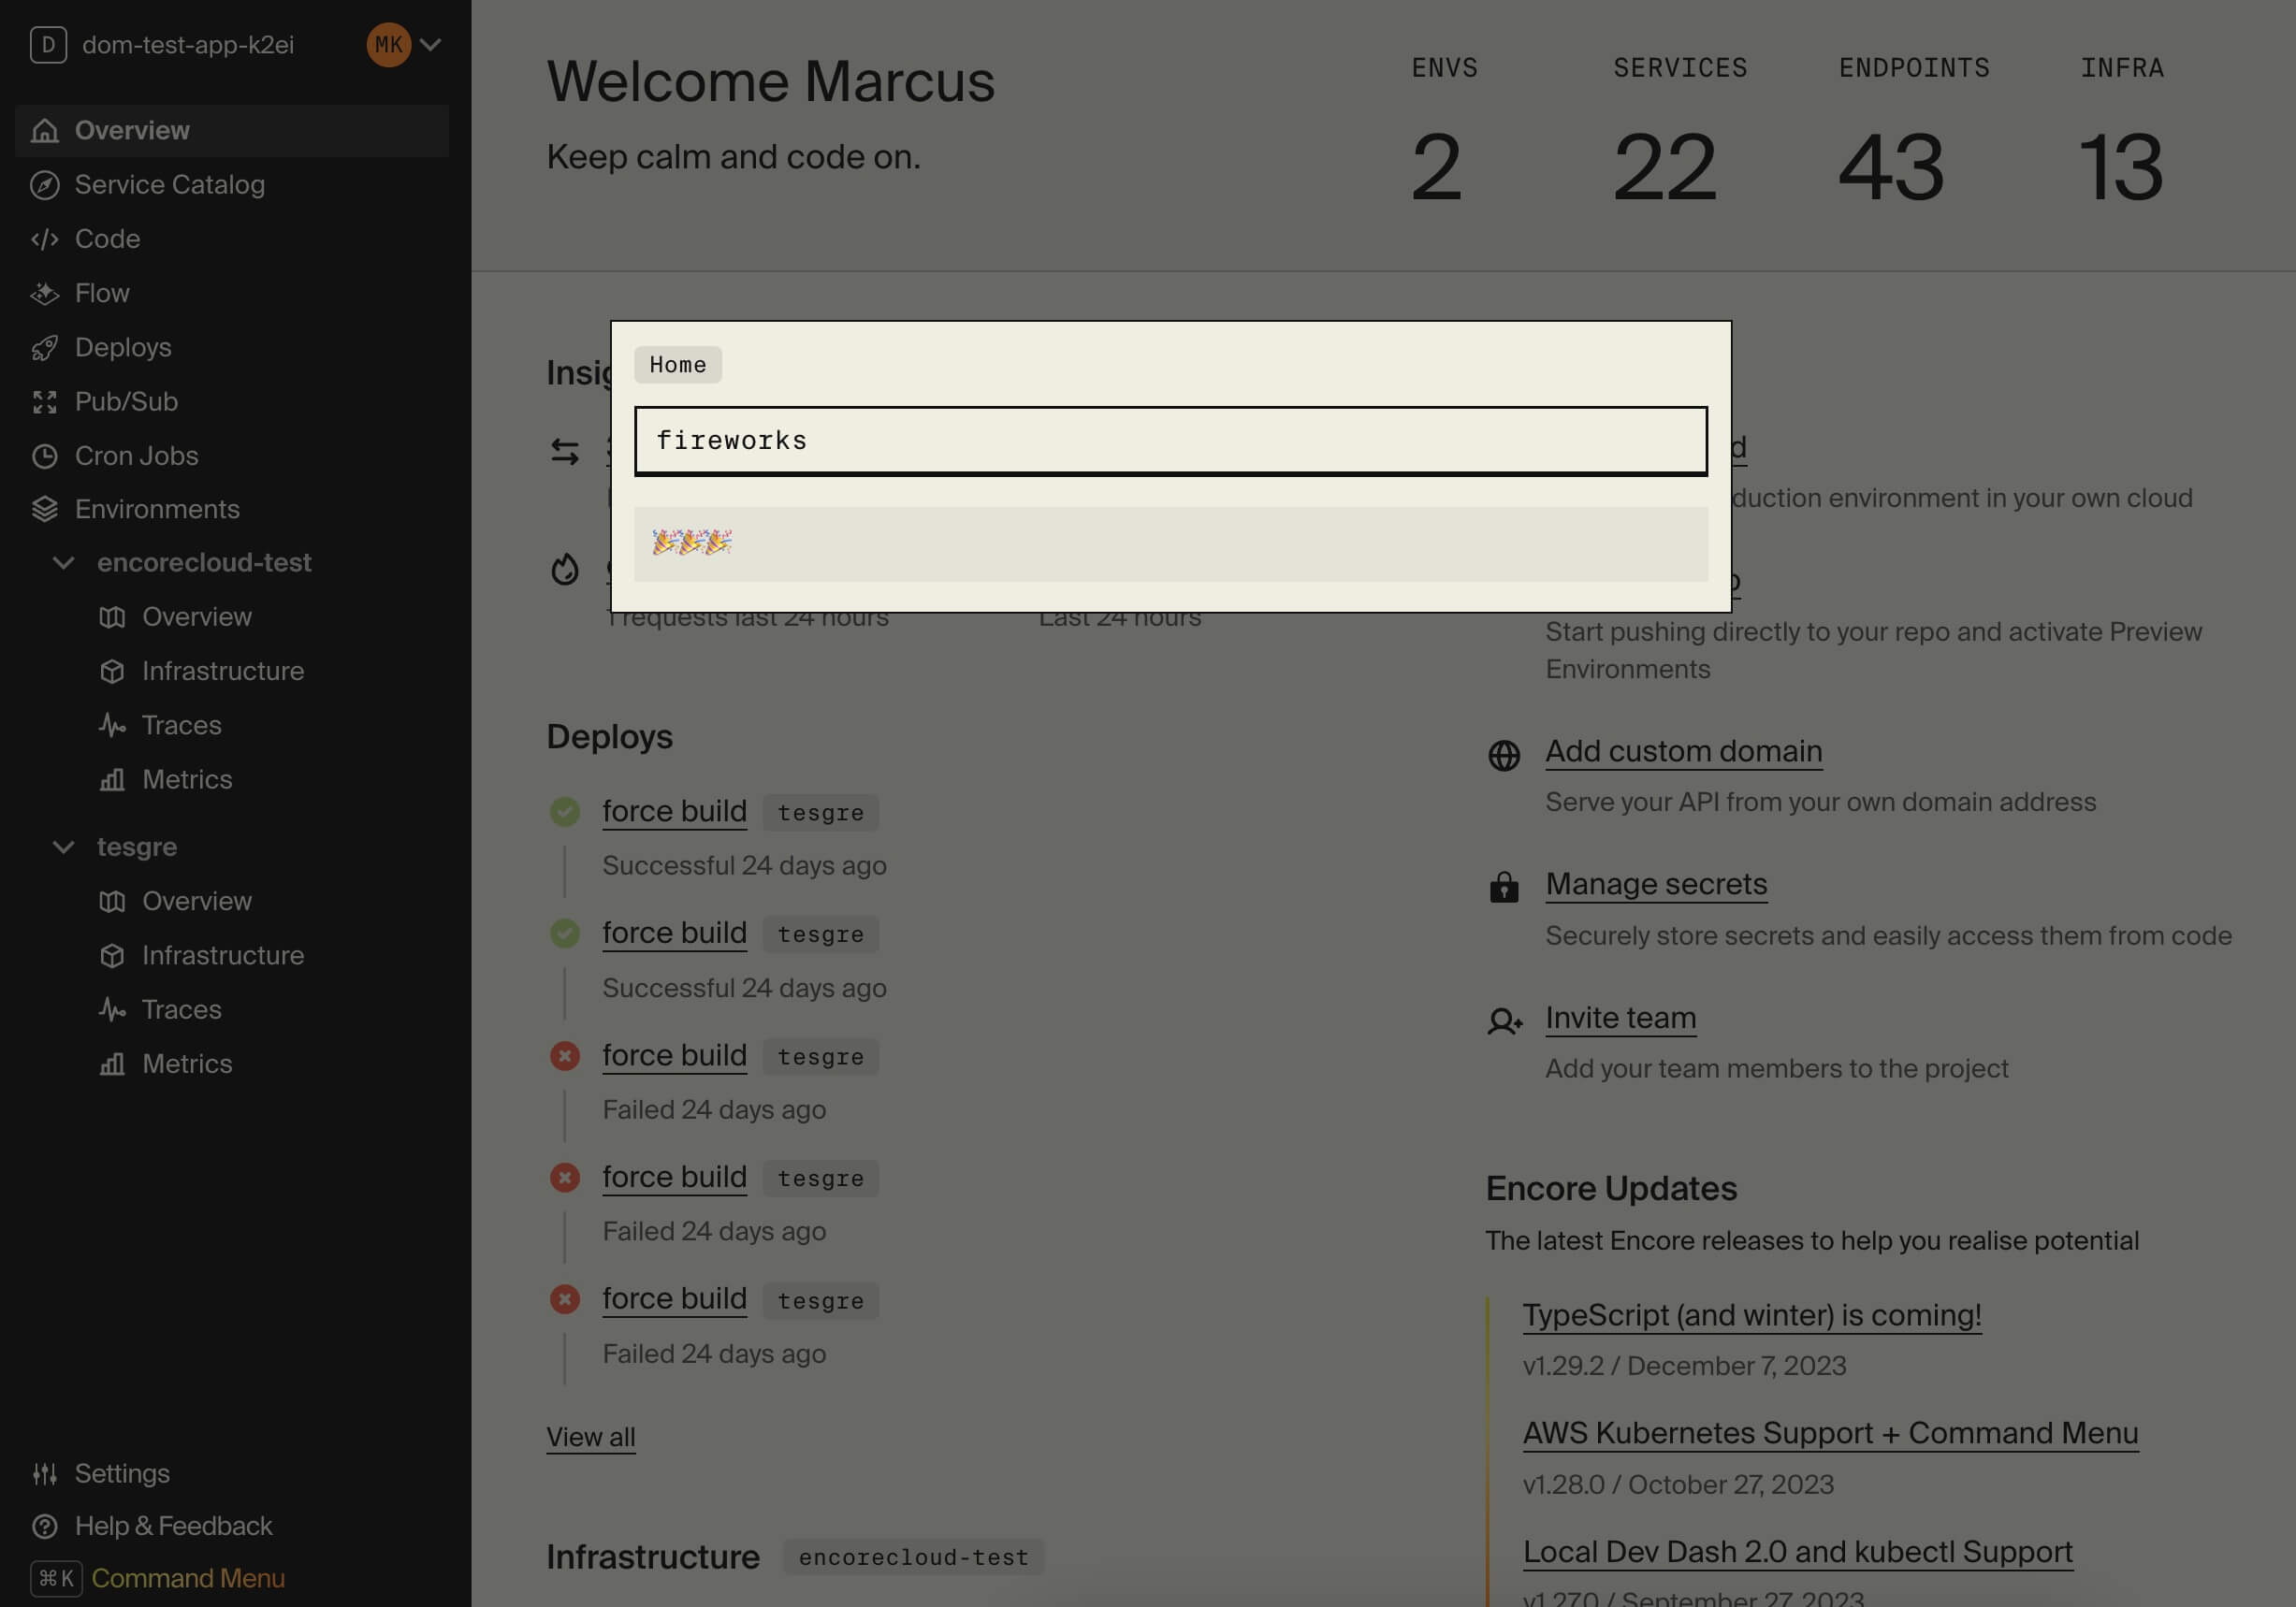
Now that your app is running in the cloud, let's celebrate with some fireworks:
🥐 In the Cloud Dashboard, open the Command Menu by pressing Cmd + K (Mac) or Ctrl + K (Windows/Linux).
From here you can easily access all Cloud Dashboard features and for example jump straight to specific services in the Service Catalog or view Traces for specific endpoints.
🥐 Type fireworks in the Command Menu and press enter. Sit back and enjoy the show!