# Building a Slack bot
> Learn how to build a Slack bot with an Encore backend
In this tutorial you will create a Slack bot that brings the greatness of the `cowsay` utility to Slack!

This is the end result:
To make it easier to follow along, we've laid out a trail of croissants to guide your way.
Whenever you see a 🥐 it means there's something for you to do.
## 1. Create your Encore application
🥐 Create a new Encore application by running `encore app create` and select `Empty app` as the template.
**Take a note of your app id, we'll need it in the next step.**
## 2. Create a Slack app
🥐 The first step is to create a new Slack app:
1. Head over to [Slack's API site](https://api.slack.com/apps) and create a new app.
2. When prompted, choose to create the app **from an app manifest**.
3. Choose a workspace to install the app in.
🥐 Enter the following manifest (replace `$APP_ID` in the URL below with your app id from above):
```yaml
_metadata:
major_version: 1
display_information:
name: Encore Bot
description: Cowsay for the cloud age.
features:
slash_commands:
- command: /cowsay
# Replace $APP_ID below
url: https://staging-$APP_ID.encr.app/cowsay
description: Say things with a flair!
usage_hint: your message here
should_escape: false
bot_user:
display_name: encore-bot
always_online: true
oauth_config:
scopes:
bot:
- commands
- chat:write
- chat:write.public
settings:
org_deploy_enabled: false
socket_mode_enabled: false
token_rotation_enabled: false
```
Once created, we're ready to move on with implementing our Encore endpoint!
## 3. Implement the Slack endpoint
Since Slack sends custom HTTP headers that we need to pay attention to, we're going to
use a raw endpoint in Encore. For more information on this check out Slack's documentation
on [Enabling interactivity with Slash Commands](https://api.slack.com/interactivity/slash-commands).
🥐 In your Encore app, create a new directory named `slack` and create a file `slack/slack.go` with the following contents:
```go
-- slack/slack.go --
// Service slack implements a cowsaw Slack bot.
package slack
import (
"encoding/json"
"fmt"
"net/http"
)
// cowart is the formatting string for printing the cow art.
const cowart = "Moo! %s"
//encore:api public raw path=/cowsay
func Cowsay(w http.ResponseWriter, req *http.Request) {
text := req.FormValue("text")
data, _ := json.Marshal(map[string]string{
"response_type": "in_channel",
"text": fmt.Sprintf(cowart, text),
})
w.Header().Set("Content-Type", "application/json")
w.WriteHeader(200)
w.Write(data)
}
```
Let's try it out locally.
🥐 Start your app with `encore run` and then call it in another terminal:
```shell
$ curl http://localhost:4000/cowsay -d 'text=Eat your greens!'
{"response_type":"in_channel","text":"Moo! Eat your greens!"}
```
Looks great!
🥐 Next, let's deploy it to the cloud:
```shell
$ git add -A .
$ git commit -m 'Initial commit'
$ git push encore
```
Once deployed, we're ready to try our Slack command!
🥐 Head over to the workspace you installed the app in and run `/cowsay Hello there`.
You should see something like this:
")
And just like that we have a fully working Slack integration.
## 4. Secure the webhook endpoint
In order to get up and running quickly we ignored one important aspect for a production-ready Slack app:
verifying that the webhook requests are actually coming from Slack. Let's do that now!
The Slack documentation covers this really well on the [Verifying requests from Slack](https://api.slack.com/authentication/verifying-requests-from-slack) page.
In short, what we need to do is:
1. Save a shared secret that Slack provides us
2. Use the secret to verify that the request comes from Slack, using HMAC (Hash-based Message Authentication Code).
### Save the shared secret
Let's define a secret using Encore's secrets management functionality.
🥐 Add this to your `slack.go` file:
```go
-- slack/slack.go --
var secrets struct {
SlackSigningSecret string
}
```
🥐 Head over to the configuration section for your Slack app (go to [Your Apps](https://api.slack.com/apps) → select your app → Basic Information).
🥐 Copy the **Signing Secret** and then run `encore secret set --type prod SlackSigningSecret` and paste the secret.
🥐 For development you will also want to set `encore secret set --type dev,local,pr SlackSigningSecret`.
You can use the same secret value or a placeholder value.
### Compute the HMAC
Go makes computing HMAC very straightforward, but it's still a fair amount of code.
🥐 Add a few more imports to your file, so that it reads:
```go
-- slack/slack.go --
import (
"crypto/hmac"
"crypto/sha256"
"encoding/hex"
"encoding/json"
"fmt"
"io/ioutil"
"net/http"
"net/url"
"strconv"
"strings"
"time"
"encore.dev/beta/errs"
"encore.dev/rlog"
)
```
🥐 Next, we'll add the `verifyRequest` function:
```go
-- slack/slack.go --
// verifyRequest verifies that a request is coming from Slack.
func verifyRequest(req *http.Request) (body []byte, err error) {
eb := errs.B().Code(errs.InvalidArgument)
body, err = ioutil.ReadAll(req.Body)
if err != nil {
return nil, eb.Cause(err).Err()
}
// Compare timestamps to prevent replay attack
ts := req.Header.Get("X-Slack-Request-Timestamp")
threshold := int64(5 * 60)
n, _ := strconv.ParseInt(ts, 10, 64)
if diff := time.Now().Unix() - n; diff > threshold || diff < -threshold {
return body, eb.Msg("message not recent").Err()
}
// Compare HMAC signature
sig := req.Header.Get("X-Slack-Signature")
prefix := "v0="
if !strings.HasPrefix(sig, prefix) {
return body, eb.Msg("invalid signature").Err()
}
gotMac, _ := hex.DecodeString(sig[len(prefix):])
mac := hmac.New(sha256.New, []byte(secrets.SlackSigningSecret))
fmt.Fprintf(mac, "v0:%s:", ts)
mac.Write(body)
expectedMac := mac.Sum(nil)
if !hmac.Equal(gotMac, expectedMac) {
return body, eb.Msg("bad mac").Err()
}
return body, nil
}
```
As you can see, this function needs to consume the whole HTTP body in order to compute the HMAC.
This breaks the use of `req.FormValue("text")` that we used earlier, since it relies on reading the HTTP body. That's the reason we're returning the body from `verifyRequest`, so that we can parse the form values from that directly instead.
We're now ready to verify the signature.
🥐 Update the `Cowsay` function to look like this:
```go
-- slack/slack.go --
//encore:api public raw path=/cowsay
func Cowsay(w http.ResponseWriter, req *http.Request) {
body, err := verifyRequest(req)
if err != nil {
errs.HTTPError(w, err)
return
}
q, _ := url.ParseQuery(string(body))
text := q.Get("text")
data, _ := json.Marshal(map[string]string{
"response_type": "in_channel",
"text": fmt.Sprintf(cowart, text),
})
w.Header().Set("Content-Type", "application/json")
w.WriteHeader(200)
w.Write(data)
}
```
## 5. Put it all together and deploy
Finally we're ready to put it all together.
🥐 Add the `cowart` like so:
```go
-- slack/slack.go --
const cowart = `
________________________________________
< %- 38s >
----------------------------------------
\ ^__^
\ (oo)\_______
(__)\ )\/\
||----w |
|| ||
`
```
🥐 Finally, let's commit our changes and deploy it:
```shell
$ git add -A .
$ git commit -m 'Verify webhook requests and improve art'
$ git push encore
```
🥐 Once deployed, head back to Slack and run `/cowsay Hello there`.
If everything is set up correctly, you should see:

And there we go, a production-ready Slack bot in less than 100 lines of code.
Well done!
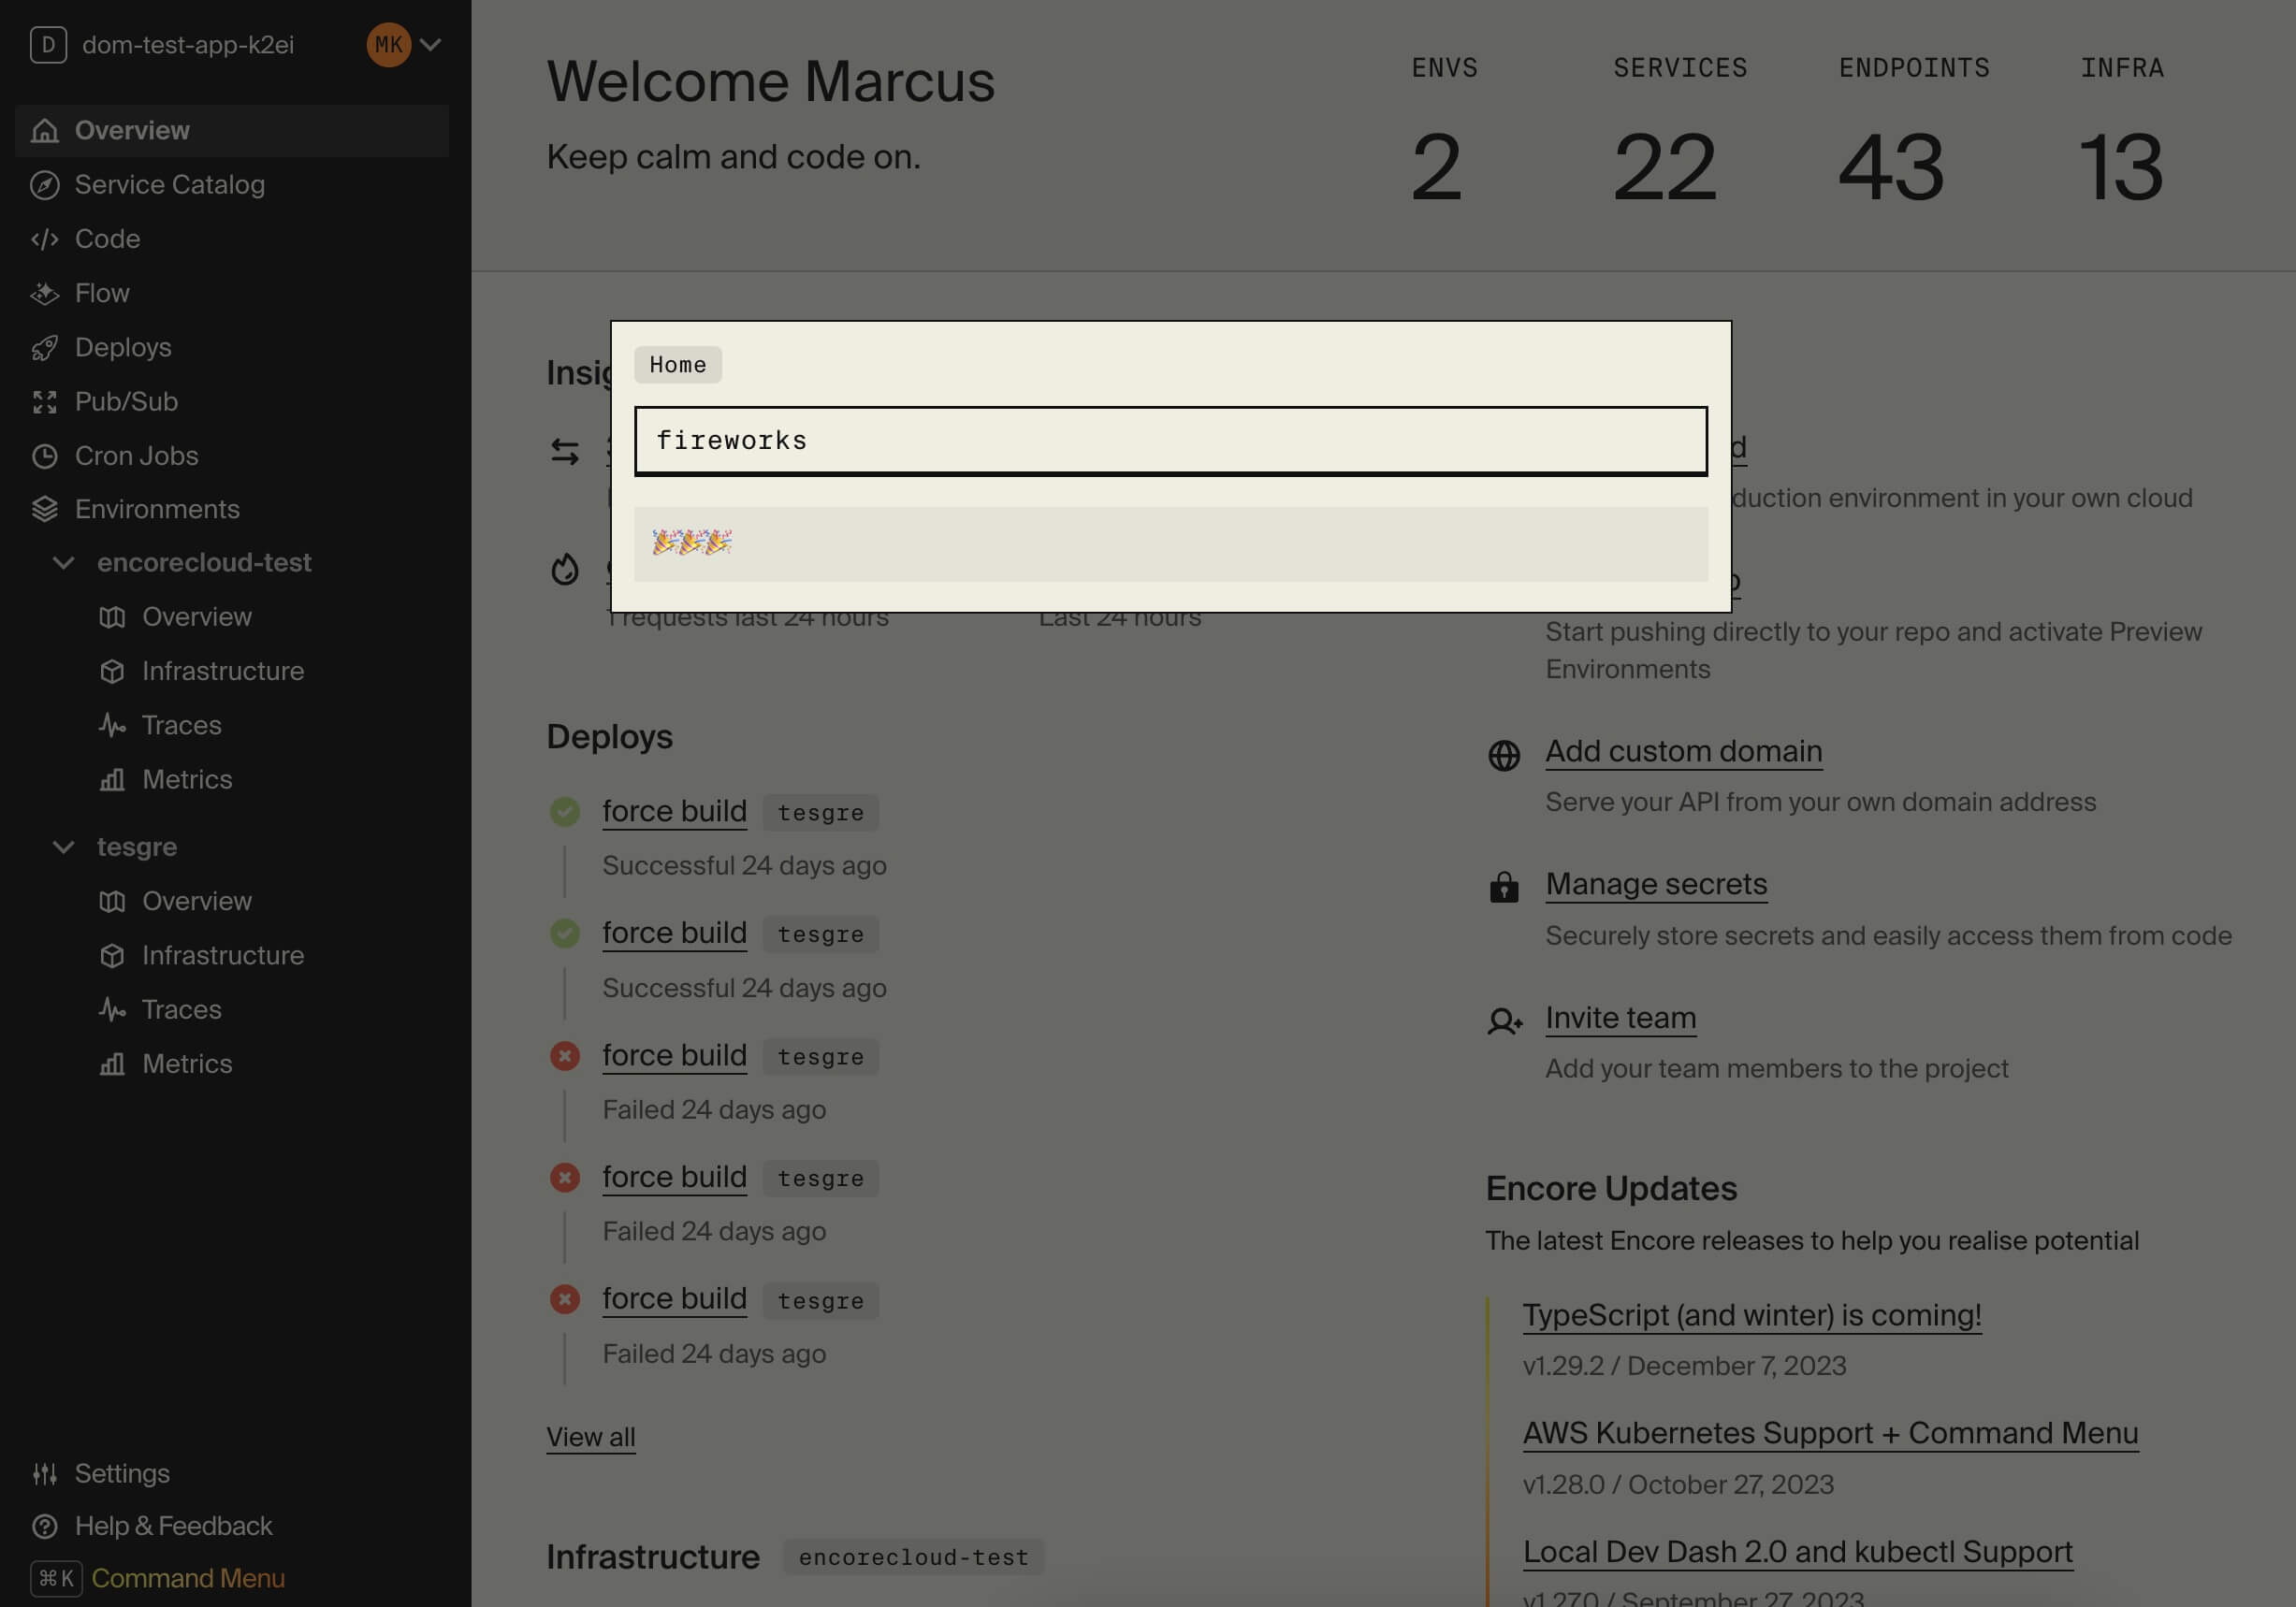
### Celebrate with fireworks
Now that your app is running in the cloud, let's celebrate with some fireworks:
🥐 In the Cloud Dashboard, open the Command Menu by pressing **Cmd + K** (Mac) or **Ctrl + K** (Windows/Linux).
_From here you can easily access all Cloud Dashboard features and for example jump straight to specific services in the Service Catalog or view Traces for specific endpoints._
🥐 Type `fireworks` in the Command Menu and press enter. Sit back and enjoy the show!